目录
- 1基本工作
- 1.1 创建场景
- 1.2 创建物理世界
- 2 骰子
- 2.1 骰子模型
- 2.2 骰子物理
- 2.3 判断骰子的顶面
- 方案一
- 方案二
- 具体实现
- 2.4 锁定骰子
- 结
1基本工作
笔者利用业余时间自学了three.js。为了更好的了解WebGL以及更熟练的使用three,想模仿原神中的小游戏“七圣召唤”中的投掷骰子效果,作为首个练习项目~~ 这是坚持写技术博客的第二周,也是首篇在掘金写的文章,人生路远,仍需远行。
1.1 创建场景
直接贴代码~
| /** | |
| * 创建场景对象Scene | |
| */ | |
| const scene = new THREE.Scene(); | |
| /** | |
| * 创建网格模型 | |
| */ | |
| const geometry = new THREE.BoxGeometry(, 300, 5); //创建一个立方体几何对象Geometry | |
| const material = new THREE.MeshPhongMaterial({ | |
| color:x845EC2, | |
| antialias: true, | |
| alpha: true | |
| }); //材质对象Material | |
| const desk = new THREE.Mesh(geometry, material); //网格模型对象Mesh | |
| desk.receiveShadow = true; | |
| desk.rotateX(Math.PI *.5) | |
| scene.add(desk); //网格模型添加到场景中 | |
| //聚光灯 | |
| const light = new THREE.SpotLight(xffffff); | |
| light.position.set(, 220, 100); //光源位置 | |
| light.castShadow = true; | |
| light.shadow.mapSize.width =; | |
| light.shadow.mapSize.height =; | |
| scene.add(light); //点光源添加到场景中 | |
| //环境光 | |
| const ambient = new THREE.AmbientLight(x666666); | |
| scene.add(ambient); | |
| // 相机设置 | |
| const width = window.innerWidth; //窗口宽度 | |
| const height = window.innerHeight; //窗口高度 | |
| const k = width / height; //窗口宽高比 | |
| const s =; //三维场景显示范围控制系数,系数越大,显示的范围越大 | |
| //创建相机对象 | |
| const camera = new THREE.OrthographicCamera(-s * k, s * k, s, -s,, 1000); | |
| camera.position.set(, 200, 450); //设置相机位置 | |
| camera.lookAt(scene.position); //设置相机方向(指向的场景对象) | |
| /** | |
| * 创建渲染器对象 | |
| */ | |
| const renderer = new THREE.WebGLRenderer({ antialias: true }); | |
| renderer.shadowMap.enabled = true; | |
| renderer.shadowMap.type = THREE.PCFSoftShadowMap; | |
| renderer.setSize(width, height);//设置渲染区域尺寸 | |
| renderer.setClearColor(xb9d3ff, 1); //设置背景颜色 | |
| document.getElementById("app").appendChild(renderer.domElement) //插入canvas对象 | |
| //执行渲染操作 指定场景、相机作为参数 | |
| function render() { | |
| renderer.render(scene, camera); | |
| } | |
| render(); |
1.2 创建物理世界
| const world = new CANNON.World(); | |
| world.gravity.set(, -9.82, 0); | |
| world.allowSleep = true; | |
| const floorBody = new CANNON.Body({ | |
| mass:, | |
| shape: new CANNON.Plane(), | |
| position: new CANNON.Vec(0, 3, 0), | |
| }) | |
| // 由于平面初始化是是竖立着的,所以需要将其旋转至跟现实中的地板一样 横着 | |
| // 在cannon.js中,我们只能使用四元数(Quaternion)来旋转,可以通过setFromAxisAngle(…)方法,第一个参数是旋转轴,第二个参数是角度 | |
| floorBody.quaternion.setFromAxisAngle(new CANNON.Vec(-1, 0, 0), Math.PI * 0.5) | |
| world.addBody(floorBody) | |
| const fixedTimeStep =.0 / 60.0; // seconds | |
| const maxSubSteps =; | |
| // loop | |
| let lastTime; | |
| (function animate(time) { | |
| requestAnimationFrame(animate); | |
| if (lastTime !== undefined) { | |
| var dt = (time - lastTime) /; | |
| world.step(fixedTimeStep, dt, maxSubSteps); | |
| } | |
| dice_manager.update_all(); | |
| render(); | |
| lastTime = time; | |
| })(); |
至此基本物理世界场景就创建完成。接下来我们需要一个生成骰子的函数。
2 骰子
2.1 骰子模型
很简单,直接使用new THREE.OctahedronGeometry(),这个构造函数会返回一个八面立方体。
并且我们需要一个八面都是不同颜色的骰子。
| const rgb_arr = [ | |
| [, 178, 74], | |
| [, 150, 75], | |
| [, 103, 208], | |
| [, 168, 79], | |
| [, 204, 238], | |
| [, 210, 192], | |
| [, 228, 241], | |
| [, 255, 255], | |
| ]; | |
| const color_arr = []; | |
| rgb_arr.map((val_arr) => { | |
| for (let i =; i < 3; i++) { | |
| val_arr.map((val) => { | |
| color_arr.push(val /); | |
| }); | |
| } | |
| }); | |
| const color = new FloatArray(color_arr); | |
| geometry.attributes.color = new THREE.BufferAttribute(color,); | |
| const material = new THREE.MeshLambertMaterial({ | |
| vertexColors: true, | |
| side: THREE.DoubleSide, | |
| }); | |
| const polyhedron_mesh = new THREE.Mesh(geometry, material); |
- THREE.BufferAttribute接收的rbg的值为0~1,所以还需要将原始的rbg值除以255。
- 将vertexColors设为true,表示以顶点数据为准。
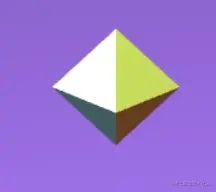

好像相差有点大。。不过我们还是得到了一个八面的骰子(没有高清的元素图标贴图,只能勉强看看~)
2.2 骰子物理
根据上面弄好的骰子模型生成一个骰子的物理模型。
| const create_dice_shape = (mesh) => { | |
| let geometry = new THREE.BufferGeometry(); | |
| geometry.setAttribute("position", mesh.geometry.getAttribute("position")); | |
| geometry = mergeVertices(geometry); | |
| const position = geometry.attributes.position.array; | |
| const index = geometry.index.array; | |
| const vertices = []; | |
| // 转换成cannon需要的顶点和面 | |
| for (let i =, len = position.length; i < len; i += 3) { | |
| vertices.push( | |
| new CANNON.Vec(position[i], position[i + 1], position[i + 2]) | |
| ); | |
| } | |
| const faces = []; | |
| for (let i =, len = index.length; i < len; i += 3) { | |
| faces.push([index[i], index[i +], index[i + 2]]); | |
| } | |
| // 生成cannon凸多面体 | |
| return new CANNON.ConvexPolyhedron({ vertices, faces }); | |
| }; |
有了ConvexPolyhedron我们就可以创建一个body物理模型了
| const body = new CANNON.Body({ | |
| mass:, | |
| shape, | |
| }); |
将渲染模型和物理模型绑定起来:
| update: () => { | |
| mesh.position.copy(body.position); | |
| mesh.quaternion.copy(body.quaternion); | |
| }, |
设置body参数的函数,来让我们可以投掷骰子:
| init_body: (position) => { | |
| body.position = position; | |
| // 设置加速度和向下的速度 | |
| body.angularVelocity.set(Math.random(), Math.random(), Math.random()); | |
| body.velocity.set(, -80, 0); | |
| body.sleepState =; //将sleepState设为0 不然重置后不会运动 | |
| }, |

fine~相当不错
2.3 判断骰子的顶面
关于如何判断骰子的顶面,翻遍了谷歌和百度,始终没有好结果。
发一下牢骚,在互联网上搜索的几乎全是不相关的内容。要么就是一众的采集站,要么一样的帖子大伙们反复转载反复写,甚至还有拿开源项目卖钱的。让我体会了什么叫“知识库污染”。
既然没有现成的方案,那就只能自己想咯。我们知道three有个Group类,他用于将多个模型组合成一个组一起运动。由此想到两个相对可行的方案:(有没有大佬分享更好的办法啊~
方案一
骰子每个面弄成多个mesh组合成一个THREE.Group(),在骰子停止时获取所有骰子的位置,THREE.Raycaster()在每个骰子的上面生成射线并朝向骰子,此时相交的第一个模型就是骰子的顶面。
缺点: 太复杂,物理模型不好弄,pass掉~
方案二
骰子还是那个骰子,但是在每个面上创建一个不可见的模型,并用THREE.Group()绑定到一块儿,随着骰子一起运动,停下时,获取每个骰子y轴最大的定位点,也就是最高的那个,便是骰子的顶面。
缺点: 没想到,但应该比方案一好。
具体实现
首先创建一个函数,它用于在骰子相应的地方创建一个不可见的模型。
| const create_basic_mesh = (position, name) => { | |
| const geometry = new THREE.BufferGeometry(); | |
| const vertices = new FloatArray([0, 0, 0]); | |
| geometry.setAttribute("position", new THREE.BufferAttribute(vertices,)); | |
| const mesh = new THREE.Mesh(geometry); | |
| [] = position; | |
| mesh.name = name; //标记面的点数 | |
| return mesh; | |
| }; |
将其包装成一个组,其中顶点位置后的参数(grass等等)用于标记点数,代表着游戏中的七大元素以及万能元素。
| // 初始化点数位置 | |
| const init_points = (mesh) => { | |
| const group = new THREE.Group(); | |
| group.add(mesh); | |
| group.name = "dice"; | |
| group.add(create_basic_mesh([, 5, 5], "grass")); | |
| group.add(create_basic_mesh([, -5, 5], "universal")); | |
| group.add(create_basic_mesh([, -5, -5], "water")); | |
| group.add(create_basic_mesh([, 5, -5], "rock")); | |
| group.add(create_basic_mesh([-, 5, 5], "fire")); | |
| group.add(create_basic_mesh([-, -5, 5], "ice")); | |
| group.add(create_basic_mesh([-, -5, -5], "wind")); | |
| group.add(create_basic_mesh([-, 5, -5], "thunder")); | |
| return group; | |
| }; |
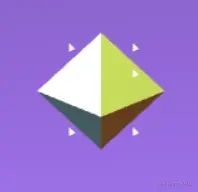
差不多就是这样,为了方便调试,我暂时把它渲染成了可见的。
判断顶面,只需要获取它们中最高的那一个即可
| get_top: () => { | |
| let top_face, | |
| max =; | |
| mesh.children.map((val, index) => { | |
| if (index ==) return; | |
| val.updateMatrixWorld(); //更新模型的世界矩阵 | |
| let worldPosition = new THREE.Vector(); | |
| val.getWorldPosition(worldPosition); //获取模型在世界中的位置 | |
| if (max < worldPosition.y) { | |
| max = worldPosition.y; | |
| top_face = val.name; | |
| } | |
| }); | |
| return top_face; | |
| }, |
2.4 锁定骰子
在七圣召唤中每一次重随都能锁定骰子,被锁定的骰子会移动到旁边并且不会参与重随。
| //鼠标选中模型 | |
| const choose = (event) => { | |
| let mouseX = event.clientX;//鼠标单击位置横坐标 | |
| let mouseY = event.clientY;//鼠标单击位置纵坐标 | |
| //屏幕坐标转标准设备坐标 | |
| const x = (mouseX / window.innerWidth) * - 1; | |
| const y = - (mouseY / window.innerHeight) * + 1; | |
| let standardVector = new THREE.Vector(x, y);//标准设备坐标 | |
| //标准设备坐标转世界坐标 | |
| let worldVector = standardVector.unproject(camera); | |
| //射线投射方向单位向量(worldVector坐标减相机位置坐标) | |
| let ray = worldVector.sub(camera.position).normalize(); | |
| //创建射线投射器对象 | |
| let raycaster = new THREE.Raycaster(camera.position, ray); | |
| raycaster.camera = camera//设置一下相机 | |
| let intersects = raycaster.intersectObjects(dice_meshs); | |
| //长度大于说明选中了骰子 | |
| if (intersects.length >) { | |
| let dice_name = intersects[]?.object.parent.name; | |
| locked_dice.push(dice_name); | |
| dice_manager.move_dice(dice_name, new CANNON.Vec(135, 10, (-100 + locked_dice.length * 20))) //移动骰子 | |
| } | |
| } | |
| addEventListener('click', choose); // 监听窗口鼠标单击事件 |
move_dice函数
| // 移动骰子到相应位置 | |
| move_dice: (name, position) => { | |
| for (let i =; i < dice_arr.length; i++) { | |
| if (name == dice_arr[i].mesh.name) { | |
| dice_arr[i].body.position = position; | |
| break; | |
| } | |
| } | |
| }, |
重随时需要判断被锁定的骰子。
| init_dice: (exclude_dices) => { | |
| for (let i =; i < dice_arr.length ; i++) { | |
| if(!exclude_dices.includes(dice_arr[i].mesh.name)){ | |
| dice_arr[i].init_body(new CANNON.Vec(-(i % 4) * 21, 100, i * 6)); | |
| } | |
| } | |
| }, |
按照惯例测试一下。
