# 关于-Windows Terminal
- Windows Terminal 是什么
- Windows Terminal 下载
- Microsoft Store [Recommended]
- Other install methods
- 基本设置
- 设置默认终端
- Windows Terminal 集成
- Git Bash
- Anaconda3
- VScode
- Zsh
- Windows Terminal 美化
- 字体缺失问题解决
- 快捷键操作
- 参考文献
# Windows Terminal 是什么
Windows Terminal 是一个全新的、流行的、功能强大的命令行终端工具,是一个面向命令行工具和 shell(如命令提示符、PowerShell 和适用于 Linux 的 Windows 子系统 (WSL))用户的新式终端应用程序。
Windows Terminal包含很多来社区呼声很高的特性,例如:多 Tab 支持、富文本、多语言支持、可配置、主题和样式,支持 emoji 和基于 GPU 运算的文本渲染等等;你还可用它来创建你自己的主题并自定义文本、颜色、背景和快捷方式。
同时该终端依然符合我们的目标和要求,以确保它保持快速、高效,并且不会消耗大量内存和电源。
可以使用历史命令(↑/↓)😊。
# Windows Terminal 下载
Note: Windows Terminal requires Windows 10 2004 (build 19041) or later
# Microsoft Store [Recommended]
Install the Windows Terminal from the Microsoft Store (opens new window). This allows you to always be on the latest version when we release new builds with automatic upgrades.
This is our preferred method.
- 通过Microsoft Store下载。
- 打开Microsoft Store,搜索Windows Terminal,下载安装
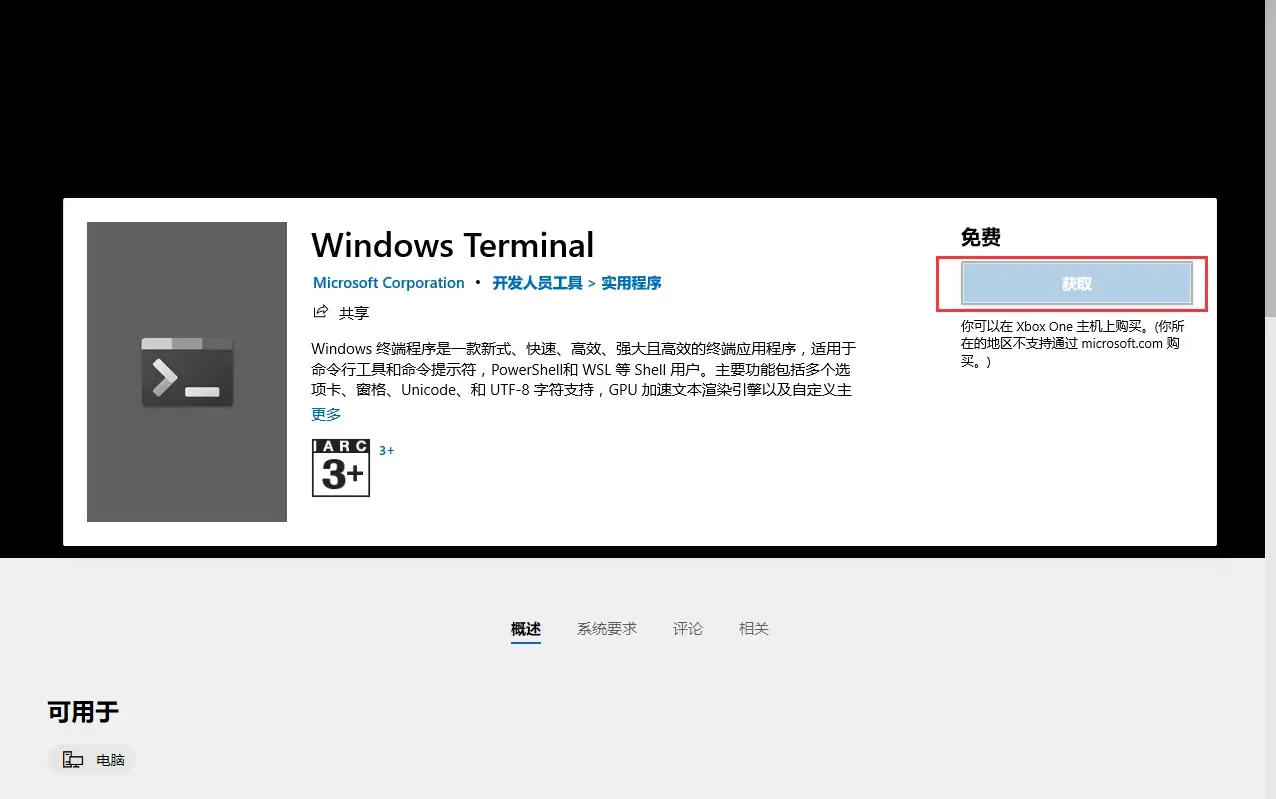
我的 Microsoft Store 打不开,没关系,我尝试下面这种方式。
# Other install methods
# Via GitHub
For users who are unable to install Windows Terminal from the Microsoft Store, released builds can be manually downloaded from this repository's Releases page (opens new window).
- 在github下载安装包 (opens new window)
- 找到下面的Assets
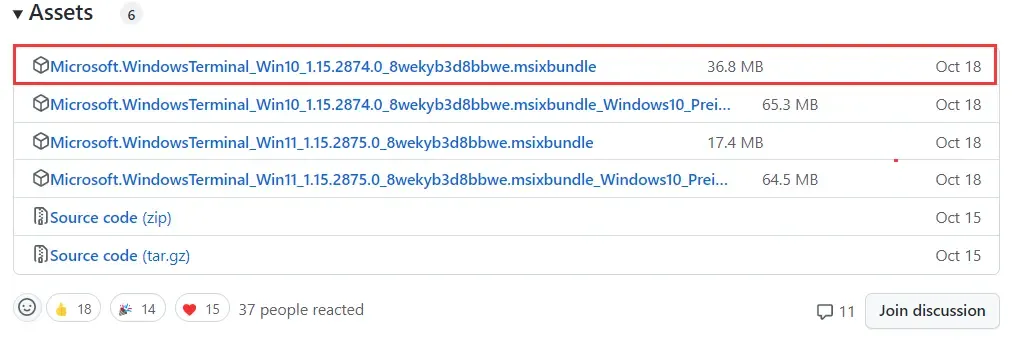
- 选择对自己系统对应的版本下载。
- 下载完成,双击安装。
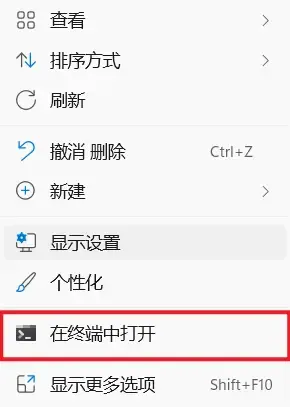
- 安装完成
# 基本设置
- 另一种打开方式:
Win+R,输入wt打开Windows Terminal。
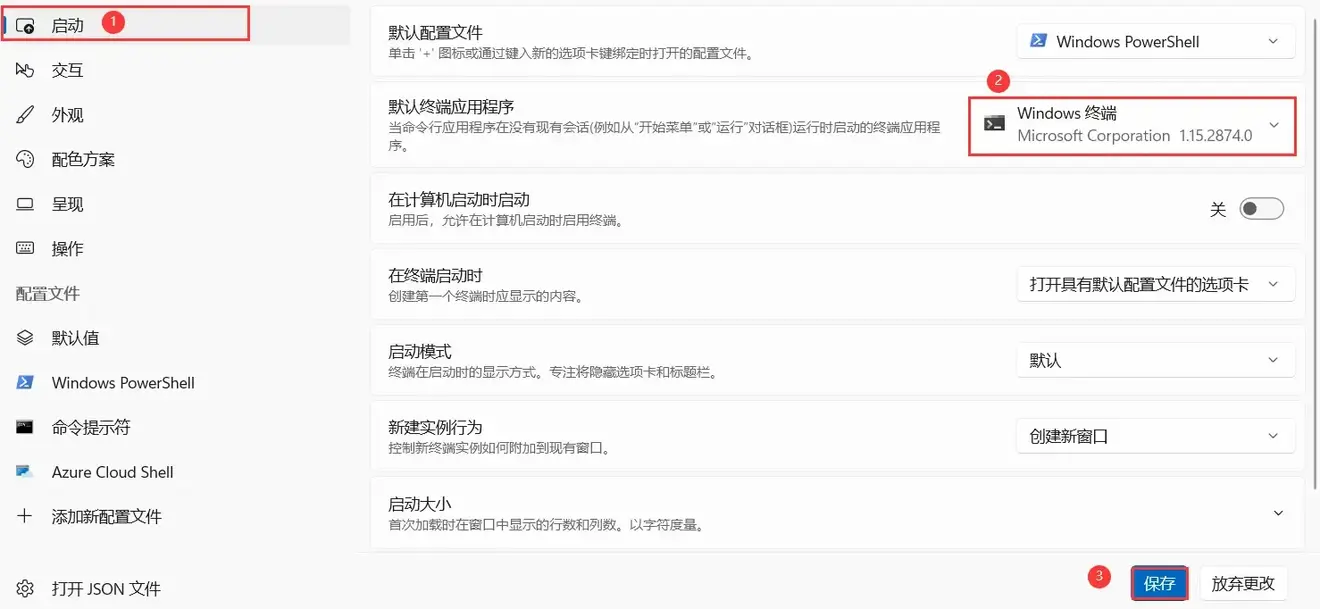
# 设置默认终端
# Windows Terminal 集成
# Git Bash
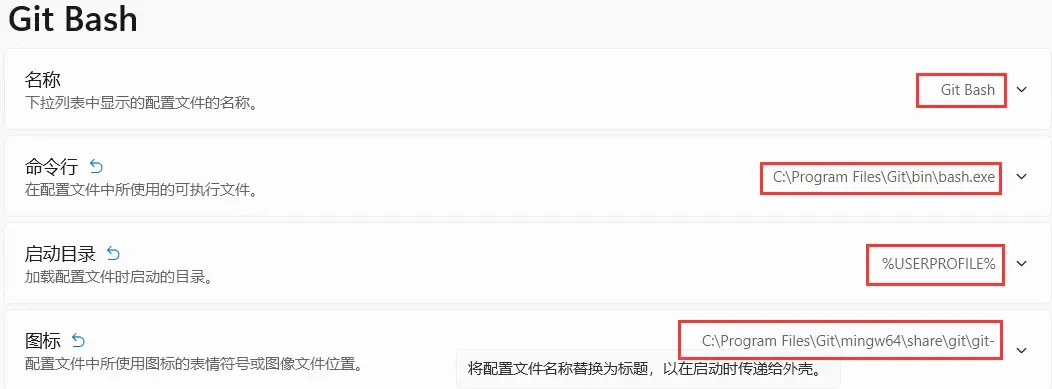
- 点击设置,添加新配置文件
- 新建空配置文件,填入名称,命令行,启动目录,图标相关信息。 名称:
Git Bash命令行:C:\Program Files\Git\bin\bash.exe启动目录:%USERPROFILE%图标:C:\Program Files\Git\mingw64\share\git\git-for-windows.ico - 填写成功,保存。
- 结果

- 使用测试

# Anaconda3
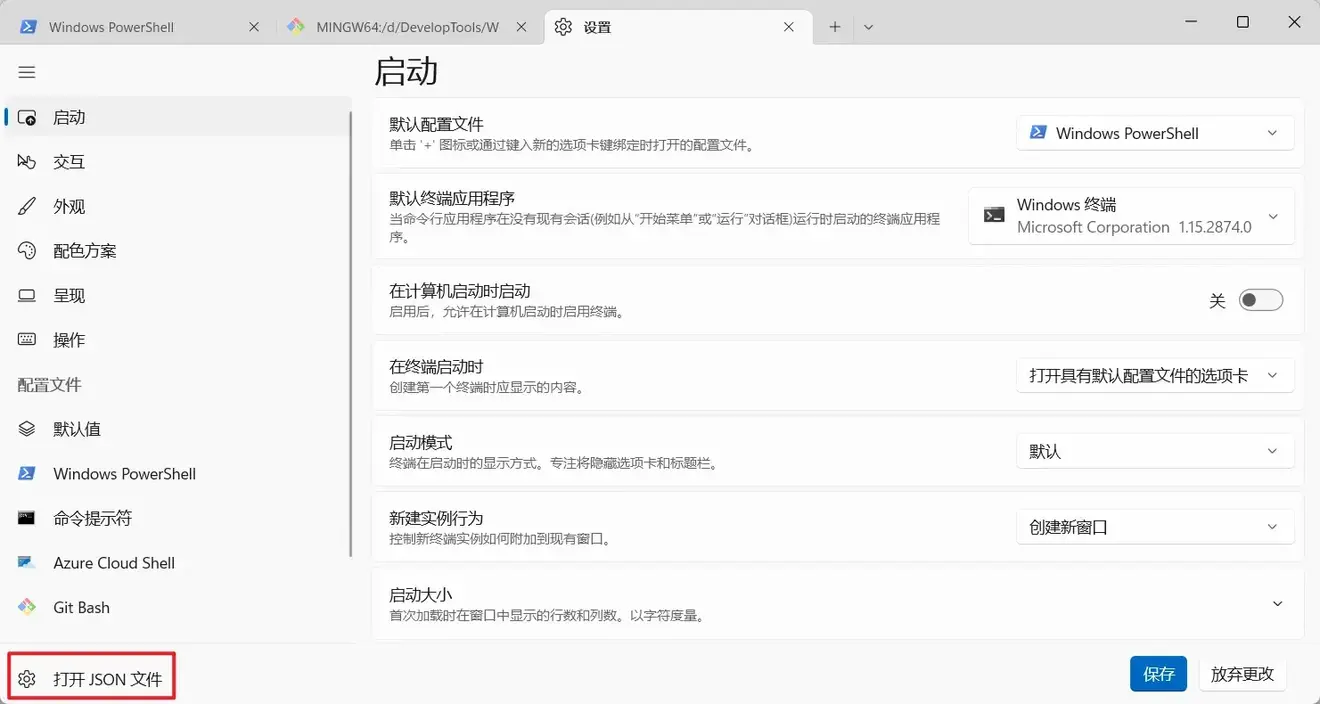
这次我们通过JSON文件配置:
| { | |
| "commandline": "D:\\DevelopTools\\Anaconda3\\python.exe", | |
| "icon": "D:\\DevelopTools\\Anaconda3\\Menu\\anaconda-navigator.ico", | |
| "name": "Anaconda3", | |
| "startingDirectory": "%USERPROFILE%" | |
| }, |
- 结果

- 使用测试

# VScode
打开VScode配置文件:C:\Users\你的用户名\AppData\Roaming\Code\User\settings.json
| "terminal.explorerKind": "external", | |
| "terminal.external.windowsExec": "C:\\Users\\你的用户名\\AppData\\Local\\Microsoft\\WindowsApps\\wt.exe" |
- 结果

- 使用测试

# Zsh
自动提示插件zsh-autosuggestions:
git clone https://gitee.com/zsh-users/zsh-autosuggestions ${ZSH_CUSTOM:-~/.oh-my-zsh/custom}/plugins/zsh-autosuggestions
语法高亮zsh-syntax-highlighting:
git clone https://gitee.com/zsh-users/zsh-syntax-highlighting.git ${ZSH_CUSTOM:-~/.oh-my-zsh/custom}/plugins/zsh-syntax-highlighting
找到plugins 在后面追加 逗号分割,逗号前后需要有间距,注意:如果没有安装CentOS子系统等,可以使用Git Bash的vim命令
vim ~/.zshrc
添加以下内容:
| plugins=( | |
| git , | |
| zsh-autosuggestions , | |
| zsh-syntax-highlighting | |
| ) |
git空格,
重新加载~/.zshrc
source ~/.zshrc
# Windows Terminal 美化
- 对PowerShell进行美化
- 打开JSON配置文件,定位到Defaults里添加:
- 使用亚克力效果,opacity值[越小越透明]
| "opacity": 2, | |
| "useAcrylic": true |
- 设置背景:
| "backgroundImage": "https://s1.ax1x.com/2022/05/20/OLpgmD.jpg", | |
| "backgroundImageOpacity": 0.1, |
- 修改字体
| "fontFace": "XXX", | |
| "fontSize": 14 |
安装oh-my-posh
如果没有winget,在微软商店搜索"应用安装程序" 更新
执行命令,如果说提示有多个oh-my-push,可以使用winget install ID值安装
winget install oh-my-posh
配置文件位置
| PS C:\Users\DELL\Desktop> $PROFILE | |
| C:\Users\DELL\Documents\WindowsPowerShell\Microsoft.PowerShell_profile.ps1 |
使用VScode打开
CODE $PROFILE
添加内容
oh-my-posh init pwsh --config $env:POSH_THEMES_PATH\montys.omp.json | Invoke-Expression
重启Terminal,发现字体缺失

# 字体缺失问题解决
安装Nerd字体
推荐:
JetBrains Mono Medium Nerd Font Complete Mono
- Mono字体下载 (opens new window)
- 下载解压后,进入fonts下面的ttf目录,右键为所有用户安装。
- 在JSON配置文件修改字体
"fontFace": "JetBrainsMono Nerd Font Mono"
- 结果

# 快捷键操作
- 字体操作
- 选项卡操作
- 窗口操作
- 焦点操作
操作 | 快捷键 |
字体变大 | ctrl++ |
字体变小 | ctrl+- |
查找 | ctrl+shift+F |
复制 | ctrl+c |
粘贴 | ctrl+v |
操作 | 快捷键 |
切换到选项卡[0-7] | ctrl+alt+[1-8] |
切换到最后一个选项卡 | ctrl+alt+9 |
上一个选项卡 | ctrl+shift+tab |
下一个选项卡 | ctrl+tab |
新建标签页[0-8] | ctrl+shift+[1-9] |
操作 | 快捷键 |
切换全屏 | alt+enter或者F11 |
关闭窗口 | alt+F4 |
新建窗口· | ctrl+shift+n |
调整窗口大小[上、下、左、右] | alt+shilt+up/down/left/right,用不了,没想好用什么替换 |
操作 | 快捷键 |
向 上、下、左、右 移动焦点 | alt+up/down/left/right,用不了,没想好用什么替换 |
向上、下翻一页 | ctrl+shift+pgup/pddn |
向上、下滚动 | ctrl+shift+up/down |
- 总结:快捷键是可以自己设置的,适合自己的,才是最好的。