今天我们来分享web前端CSS定位中的position:absolute绝对定位的应用场景案例的相关场景!

绝对定位是CSS中非常中啊哟的知识点,接下来我我们会通过7个不同的层面结合7个不同的案例来展开讲解!
绝对定位元素的特性
- 使元素完全脱离文档流,将释放自己的位置
- 元素的层级提升,会覆盖在其它元素上
- 离自己最近的定位父元素进行位置调整,如果没有定位的父元素,则相对body进行位置调整
- 元素支持宽高设置
- margin:auto;水平居中失效。可以通过left与margin-left控制元素水平居中
- 定位元素未设置宽高情况下,同时设置top和bottom会改变元素高,同时设置left和right会改变元素宽
绝对定位元素常见用法合集
- top、bottom以及left、right 优先级(案例1)
- 相对于直接父元素定位(案例2)
- 相对父元素的父元素定位(案例3)
- 相对于body定位(案例4)
- 子元素自适应父元素宽高(案例5)
- 设置元素水平垂直居中(案例6)
- 改变元素的层级关系(案例7)
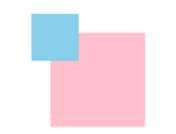
1、top、bottom以及left、right 优先级
如果元素添加宽高,同时设置top与bottom属性,会以top值为主。 如果同时设置left和right属性,以left为主。
| <style type="text/css"> | |
| html,body{margin:0;} | |
| .box{ | |
| width:100px; | |
| height:100px; | |
| margin: 50px auto; | |
| background-color: pink; | |
| position: relative;/*相对定位*/ | |
| } | |
| .box .item{ | |
| width:50px; | |
| height: 50px; | |
| position: absolute;/*绝对定位*/ | |
| left:-20px;/*与相对定位元素左边距离*/ | |
| top:-20px;/*与相对定位元素顶部距离*/ | |
| bottom:0px;/*不生效*/ | |
| right:0px;/*不生效*/ | |
| background-color:skyblue; | |
| } | |
| </style> |
2、相对于直接父元素定位
相对于直接父元素定位案例是太多太多,下图列举了几个

其中图1鼠标滑动悬浮效果 源码
| <style> | |
| body,h3{ | |
| margin:0; | |
| padding:0; | |
| } | |
| .music{ | |
| width: 150px; | |
| height: 150px; | |
| margin:100px auto; | |
| position: relative; | |
| } | |
| .music h3{ | |
| height: 35px; | |
| line-height: 35px; | |
| width: 100%; | |
| background-color: rgba(0,0,0,0.5); | |
| color:#fff; | |
| position: absolute; | |
| left:0px; | |
| bottom:0px; | |
| font-size: 14px; | |
| font-weight: 100; | |
| white-space: nowrap; | |
| overflow: hidden; | |
| text-overflow: ellipsis; | |
| } | |
| .music span.icon-hot{ | |
| padding:2px 6px 4px 5px; | |
| background-color: red; | |
| color:#fff; | |
| font-size: 14px; | |
| position: absolute; | |
| right:0px; | |
| top:0px; | |
| } | |
| </style> | |
| <body> | |
| <div class="music"> | |
| <img src="images/music.jpg" alt="" height="150"> | |
| <div class="video-mask"></div> | |
| <span class="icon-hot">最新</span> | |
| <h3 class="video-title">古风戏腔丨一声曲叹,惊艳了芳华</h3> | |
| </div> | |
| </body> |
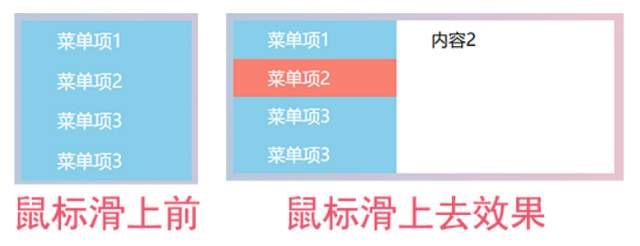
3、相对父元素的父元素定位-二级右测悬浮菜单
| <style> | |
| body,ul,li{ | |
| margin:0; | |
| padding:0; | |
| } | |
| body{ | |
| background-image: linear-gradient(to right,skyblue,pink); | |
| } | |
| ul{ | |
| list-style: none; | |
| width: 150px; | |
| margin: 100px auto; | |
| position: relative;/*相对定位,.menu-item就是相对于ul来绝对定位的*/ | |
| } | |
| ul li{ | |
| height: 35px; | |
| line-height: 35px; | |
| text-indent: 2em; | |
| background-color:skyblue; | |
| } | |
| ul li a{ | |
| text-decoration: none; | |
| color:#fff; | |
| } | |
| ul li:hover{ | |
| background-color: salmon; | |
| } | |
| ul li .menu-item{ | |
| width: 200px; | |
| height: 100%; | |
| background-color: #fff; | |
| position: absolute;/*绝对定位*/ | |
| left:150px; | |
| top:0px; | |
| display: none; | |
| } | |
| ul li:hover .menu-item{ | |
| display: block; | |
| } | |
| </style> | |
| <body> | |
| <ul class="menu"> | |
| <li> | |
| <a href="#">菜单项1</a> | |
| <div class="menu-item">内容1</div> | |
| </li> | |
| <li> | |
| <a href="#">菜单项2</a> | |
| <div class="menu-item">内容2</div> | |
| </li> | |
| <li> | |
| <a href="#">菜单项3</a> | |
| <div class="menu-item">内容3</div> | |
| </li> | |
| <li> | |
| <a href="#">菜单项3</a> | |
| <div class="menu-item">内容4</div> | |
| </li> | |
| </ul> | |
| </body> |
4、相对于body定位-右击显示桌面菜单
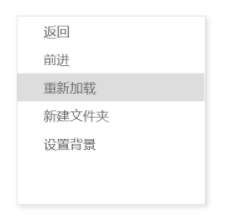
当鼠标在浏览器窗口右击时,会在右击的位置显示对应的桌面菜单。这里的菜单就是相对于body来绝对定位的。
| <style> | |
| body,ul,li{ | |
| margin: 0; | |
| padding: 0; | |
| } | |
| ul{ | |
| list-style: none; | |
| } | |
| .menu{ | |
| width:200px; | |
| height: 200px; | |
| background-color: #fff; | |
| border:1px solid #ddd; | |
| box-shadow: 2px 2px 5px #ddd; | |
| position: absolute; | |
| display: none; | |
| } | |
| .menu li{ | |
| text-indent: 2em; | |
| font-size: 14px; | |
| color:#666; | |
| line-height: 30px; | |
| } | |
| .menu li:hover{ | |
| background-color: #ddd; | |
| } | |
| </style> | |
| <body> | |
| <ul class="menu" id="menu"> | |
| <li>返回</li> | |
| <li>前进</li> | |
| <li>重新加载</li> | |
| <li>新建文件夹</li> | |
| <li>设置背景</li> | |
| </ul> | |
| <script> | |
| var tag=document.getElementById('menu'); | |
| var li=document.querySelectorAll('.menu li'); | |
| //取消系统默认的右键弹窗 | |
| document.oncontextmenu=function(){ | |
| return false; | |
| } | |
| //按下右键,并抬起时 | |
| document.onmouseup=function(e){ | |
| if(e.button==2){//判断鼠标按下的时右键 | |
| //获取鼠标按下时的坐标 | |
| var x=e.pageX; | |
| var y=e.pageY; | |
| //把鼠标按下时的坐标,分别赋值给tag元素的left和top | |
| tag.style.left=x+'px'; | |
| tag.style.top=y+'px'; | |
| /*右键后,显示右侧桌面菜单*/ | |
| tag.style.display='block'; | |
| } | |
| } | |
| document.onclick=function(){ | |
| /*在窗口任意位置点击,隐藏桌面菜单*/ | |
| tag.style.display='none'; | |
| } | |
| </script> | |
| </body> |
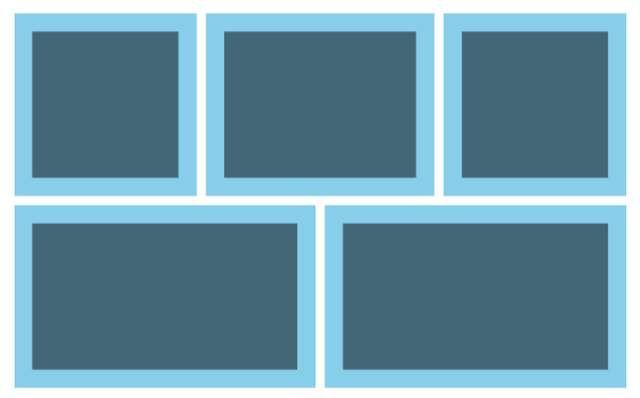
5、子元素自适应父元素宽高-黑色半透明遮罩层
黑色半透明遮罩层不用设置宽高。我们通过position的left,right、top、bottom来控制黑色半透明遮罩层宽度和高度。
| <style> | |
| body,ul,li{ | |
| margin:0; | |
| padding: 0; | |
| } | |
| ul{ | |
| list-style: none; | |
| width:690px ; | |
| } | |
| ul li{ | |
| margin:5px; | |
| float: left; | |
| background-color: skyblue; | |
| position: relative;/*相对定位*/ | |
| } | |
| ul li:nth-child(1),ul li:nth-child(3){ | |
| width: 200px; | |
| height: 200px; | |
| } | |
| ul li:nth-child(2){ | |
| width: 250px; | |
| height: 200px; | |
| } | |
| ul li:nth-child(4),ul li:nth-child(5){ | |
| width: 330px; | |
| height: 200px; | |
| } | |
| ul li::before{ | |
| display: block; | |
| content: ""; | |
| /*通过定位,来控制元素的宽高,可以自适应父元素*/ | |
| position: absolute; | |
| left:20px; | |
| right:20px; | |
| top:20px; | |
| bottom:20px; | |
| background-color: rgba(0,0,0,0.5);/*黑色半透明遮罩层*/ | |
| } | |
| </style> | |
| <body> | |
| <ul> | |
| <li></li> | |
| <li></li> | |
| <li></li> | |
| <li></li> | |
| <li></li> | |
| </ul> | |
| </body> |
6、绝对定位设置元素水平垂直居中

三角形相对父元素水平居中源码
| <style> | |
| html,body{ | |
| margin:0; | |
| width: 100%; | |
| height: 100%; | |
| } | |
| .tag{ | |
| width:100px; | |
| height:100px; | |
| padding: 10px; | |
| margin: 100px auto; | |
| background-color:orange; | |
| border-radius: 10px; | |
| position: relative;/*绝对定位*/ | |
| } | |
| .tag::after{ | |
| display:block; | |
| content: ""; | |
| /*以下三行代码,绘制三角形*/ | |
| width:0; | |
| border:10px solid transparent; | |
| border-bottom-color:orange; | |
| position: absolute; /*利用绝对定位设置三角形的位置*/ | |
| /*以下两行代码,设置三角形相对父元素水平居中*/ | |
| left:50%; | |
| margin-left:-10px; | |
| top:-20px; | |
| } | |
| </style> | |
| <body> | |
| <div class="tag"></div> | |
| </body> |
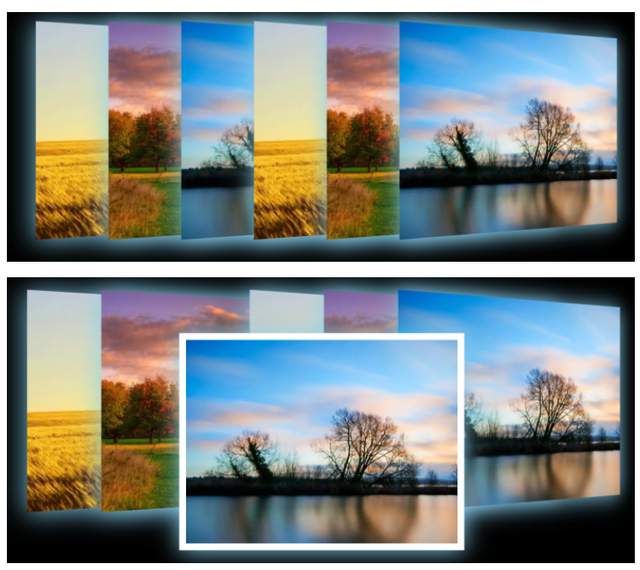
7、改变元素的层级关系-3D图片展示效果
当鼠标滑动到元素上面,通过改变z-index的值,来提升元素层级,让其在最上方展示。
| <style> | |
| body,ul,li{ | |
| margin:0; | |
| padding: 0; | |
| } | |
| body{ | |
| background-color:#000; | |
| } | |
| ul{ | |
| list-style: none; | |
| width: 800px; | |
| height: 300px; | |
| margin: 50px auto; | |
| position: relative;/*相对定位*/ | |
| perspective:800px ;/*3D场景-景深(视距)*/ | |
| } | |
| ul li{ | |
| width:400px; | |
| height:300px; | |
| position: absolute;/*绝对定位*/ | |
| left:calc(var(--i)*100px);/*通过自定义属性动态计算元素left值*/ | |
| transform: rotateY(20deg);/*Y轴旋转20deg*/ | |
| box-shadow: 0px 2px 35px skyblue; | |
| transition: all .5s;/*过渡动画*/ | |
| } | |
| ul li img{ | |
| width: 100%; | |
| height: 100%; | |
| object-fit: cover; | |
| } | |
| ul li:hover{ | |
| border:10px solid #fff; | |
| transform: rotateY(0deg);/*元素Y轴旋转到0deg*/ | |
| z-index:2;/*改变元素层级,让元素在最上面显示*/ | |
| top:50px; | |
| } | |
| </style> | |
| <body> | |
| <ul> | |
| <li style="--i:0"><img src="images/rotate1.webp" alt=""></li> | |
| <li style="--i:1"><img src="images/rotate2.webp" alt=""></li> | |
| <li style="--i:2"><img src="images/rotate3.webp" alt=""></li> | |
| <li style="--i:3"><img src="images/rotate1.webp" alt=""></li> | |
| <li style="--i:4"><img src="images/rotate2.webp" alt=""></li> | |
| <li style="--i:5"><img src="images/rotate3.webp" alt=""></li> | |
| </ul> | |
| </body> |
为帮助到一部分同学不走弯路,真正达到一线互联网大厂前端项目研发要求,首次实力宠粉,打造了《30天挑战学习计划》,内容如下:
HTML/HTML5,CSS/CSS3,JavaScript,真实企业项目开发,云服务器部署上线,从入门到精通
- PC端项目开发(1个)
- 移动WebApp开发(2个)
- 多端响应式开发(1个)
共4大完整的项目开发 !一行一行代码带领实践开发,实际企业开发怎么做我们就是怎么做。从学习一开始就进入工作状态,省得浪费时间。
从学习一开始就同步使用 Git 进行项目代码的版本的管理,Markdown 记录学习笔记,包括真实大厂项目的开发标准和设计规范,命名规范,项目代码规范,SEO优化规范
从蓝湖UI设计稿 到 PC端,移动端,多端响应式开发项目开发
- 真机调试,云服务部署上线;
- Linux环境下 的 Nginx 部署,Nginx 性能优化;
- Gzip 压缩,HTTPS 加密协议,域名服务器备案,解析;
- 企业项目域名跳转的终极解决方案,多网站、多系统部署;
- 使用 使用 Git 在线项目部署;
这些内容在《30天挑战学习计划》中每一个细节都有讲到,包含视频+图文教程+项目资料素材等。只为实力宠粉,真正一次掌握企业项目开发必备技能,不走弯路 !