最近做的项目需要用到阿里云视频点播功能,管理后台使用 Dcat admin 开发,网上关于阿里云视频点播的案例几乎都是 JAVA 或者 其他后端,没有使用前端上传的,这里记录一下。
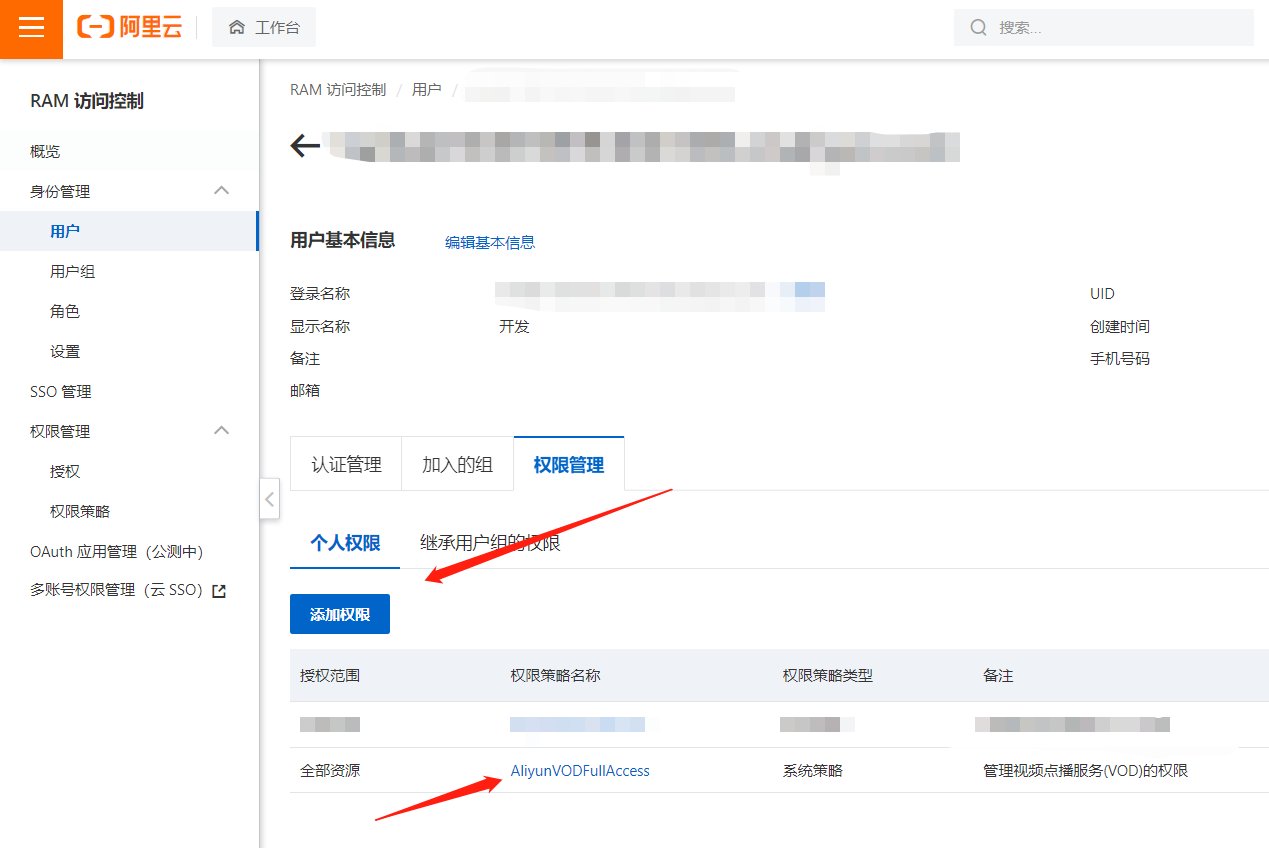
1. 首先配置好阿里云 RAM 账号,准备好 access_key 和 secret
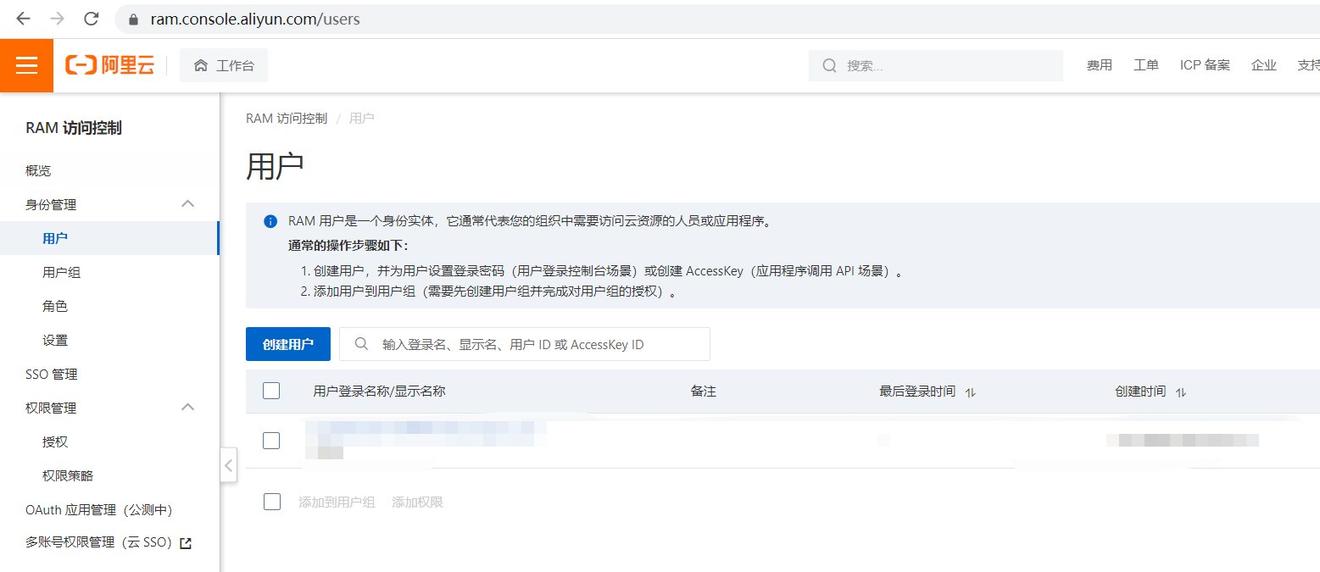
配置配置管理阿里云视频点播权限
2. 安装阿里云的SDK
composer require alibabacloud/sdk
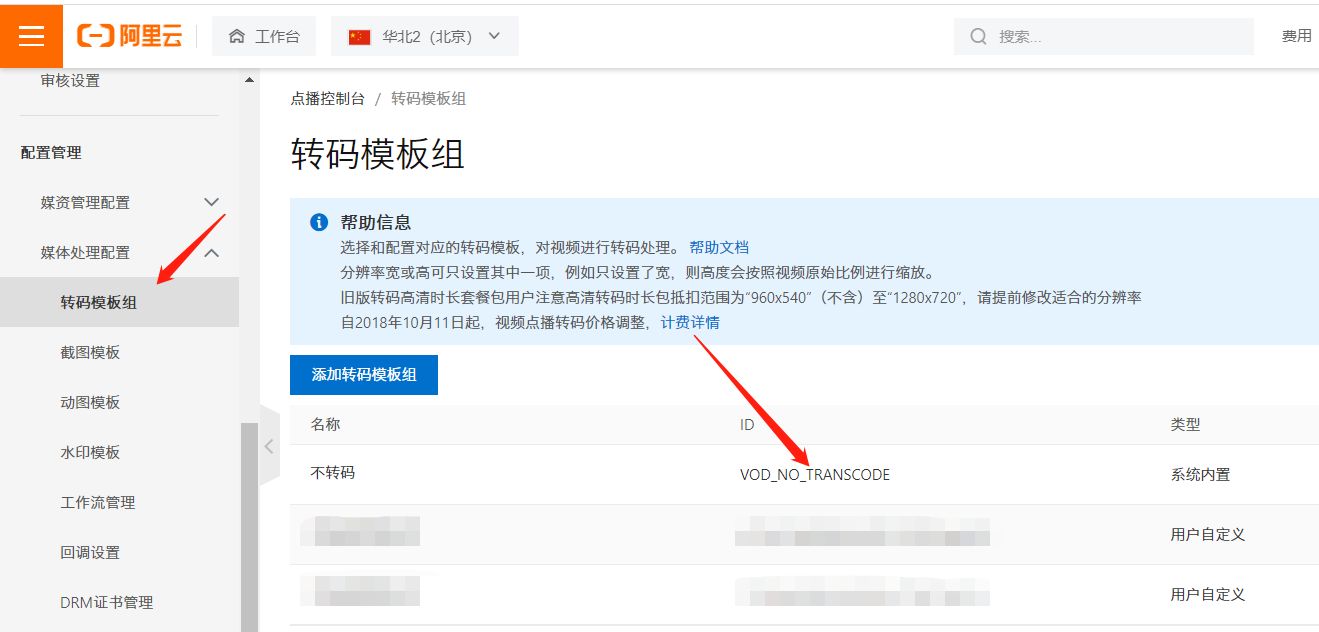
3. 创建分类与转码模板
我们要对上传的视频进行转码和压缩,这样可以节省流量,最好对视频做好分类,这样比较好管理。
转码模板
视频分类
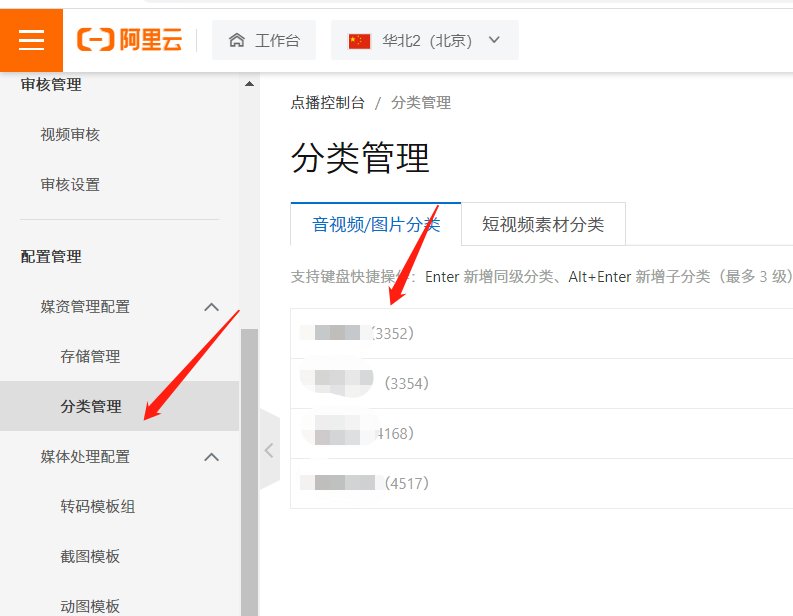
记住这两个的 ID,后面会用到
4. 编写授权接口
由于我们是前端上传,需要先请求后端接口拿到授权。
路由注册
| Route::get('/api/upload/video', [VideoHandler::class, 'createClient']) | |
| use AlibabaCloud\Client\Exception\ClientException; | |
| use AlibabaCloud\Client\Exception\ServerException; | |
| use AlibabaCloud\Vod\Vod; | |
| use Illuminate\Http\Request; | |
| class VideoHandler{ | |
| public function createClient(Request $request) | |
| { | |
| try { | |
| $user_param = json_decode($request->post('extend')); // 这里我使用了额外参数,用来定义上传文档归属的分类和转码模板 | |
| $tempGroupId = $user_param->Extend->type == 'video' ? 'XXXX' : 'XXXX'; // 这里我需要判断前端要上传的是 视频还是音频从而选择不同的转码模板 | |
| $cateId = $user_param->Extend->category; | |
| unset($user_param->Extend->type); | |
| unset($user_param->Extend->category); | |
| $videoRequest = Vod::v20170321()->createUploadVideo(); | |
| $result = $videoRequest | |
| ->withFileName($request->post('filename')) // 文件名 | |
| ->withTitle($request->post('name')) // 标题 | |
| ->withTemplateGroupId($tempGroupId) // 转码模板 | |
| ->withCateId($cateId) // 类别ID | |
| ->withUserData(json_encode($user_param)) // 用户额外参数,用作回调使用 | |
| ->request(); | |
| return $result->toArray(); | |
| } catch (ClientException $exception) { | |
| echo $exception->getMessage() . PHP_EOL; | |
| } catch (ServerException $exception) { | |
| echo $exception->getMessage() . PHP_EOL; | |
| echo $exception->getErrorCode() . PHP_EOL; | |
| echo $exception->getRequestId() . PHP_EOL; | |
| echo $exception->getErrorMessage() . PHP_EOL; | |
| } | |
| } | |
| } |
5. Dcat admin 前端发起请求
| protected function form() | |
| { | |
| return Form::make(new AudiovisualAnimation(), function (Form $form) { | |
| $form->html(view('uploads.upload-auth', | |
| [ | |
| 'type' => 'video', // 媒体文件类型 | |
| 'category' => 'xxxx', // 上面创建的视频分类ID | |
| ]), | |
| '视频文件1')->required(); | |
| $form->hidden('video1'); // 这个表单必须要有,我们要把上面的 Html 处理后的回调赋值到这个 `video1` | |
| } |
上传视图
| // uploads.upload-auth | |
| <div class="upload"> | |
| <div class="file"> | |
| <div> | |
| <input type="file" class="media-file" onchange="uploadInitial(this, '{{$type}}', '{{$category}}')"> | |
| </div> | |
| <div class="upload-type"> | |
| <label class="status"></label> | |
| <div class="upload-progress progress progress-bar-primary pull-left" style="display:none; width: 35%; margin-top: 10px;"> | |
| <div class="progress-bar progress-bar-striped active" style="line-height: 18px; width: 0;">0%</div> | |
| </div> | |
| </div> | |
| </div> | |
| </div> |
相关JS,代码都是现成的,拿过去用就好使,如果有特殊需要自己去看 API 文档
| //兼容IE11 | |
| if (!FileReader.prototype.readAsBinaryString) { | |
| FileReader.prototype.readAsBinaryString = function (fileData) { | |
| var binary = ""; | |
| var pt = this; | |
| var reader = new FileReader(); | |
| reader.onload = function (e) { | |
| var bytes = new Uint8Array(reader.result); | |
| var length = bytes.byteLength; | |
| for (var i = 0; i < length; i++) { | |
| binary += String.fromCharCode(bytes[i]); | |
| } | |
| //pt.result - readonly so assign binary | |
| pt.content = binary; | |
| pt.onload() | |
| } | |
| reader.readAsArrayBuffer(fileData); | |
| } | |
| } | |
| var uploader; | |
| /** | |
| * 创建一个上传对象 | |
| * 使用 UploadAuth 上传方式 | |
| */ | |
| function createUploader(fileEle, extend) { | |
| let status = fileEle.parent().next('.upload-type').children('.status') | |
| let progressEle = fileEle.parent().next('.upload-type').children('.progress'); | |
| let uploader = new AliyunUpload.Vod({ | |
| timeout: 60000, | |
| partSize: 1048576, | |
| parallel: 5, | |
| retryCount: 3, | |
| retryDuration: 2, | |
| userId: '1308118194043180', | |
| // 添加文件成功 | |
| addFileSuccess: function (uploadInfo) { | |
| status.text('添加文件成功, 等待上传...') | |
| progressEle.show() | |
| console.log("addFileSuccess: " + uploadInfo.file.name) | |
| }, | |
| // 开始上传 | |
| onUploadstarted: function (uploadInfo) { | |
| // 地址和凭证接口(https://help.aliyun.com/document_detail/55407.html) | |
| let createUrl = '/api/upload/video' // 授权接口地址 | |
| $.ajax({ | |
| type: 'post', | |
| url: createUrl, | |
| headers: { | |
| "Access-Control-Allow-Origin": "*" | |
| }, | |
| data: { | |
| 'filename': uploadInfo.file.name, | |
| 'name': uploadInfo.file.name, | |
| 'extend': extend, | |
| }, | |
| success: function (data) { | |
| console.log(data) | |
| let uploadAuth = data.UploadAuth | |
| let uploadAddress = data.UploadAddress | |
| let videoId = data.VideoId | |
| uploader.setUploadAuthAndAddress(uploadInfo, uploadAuth, uploadAddress, videoId) | |
| } | |
| }) | |
| status.text('上传状态: 文件开始上传...') | |
| console.log("onUploadStarted:" + uploadInfo.file.name + ", endpoint:" + uploadInfo.endpoint + ", bucket:" + uploadInfo.bucket + ", object:" + uploadInfo.object) | |
| }, | |
| // 文件上传成功 | |
| onUploadSucceed: function (uploadInfo) { | |
| console.log("onUploadSucceed: " + uploadInfo.file.name + ", endpoint:" + uploadInfo.endpoint + ", bucket:" + uploadInfo.bucket + ", object:" + uploadInfo.object) | |
| fileEle.parents('.form-group').next('input[type="hidden"]').val(uploadInfo.videoId) | |
| status.text('上传状态: 文件上传成功!') | |
| progressEle.hide(); | |
| }, | |
| // 文件上传失败 | |
| onUploadFailed: function (uploadInfo, code, message) { | |
| console.log("onUploadFailed: file:" + uploadInfo.file.name + ",code:" + code + ", message:" + message) | |
| status.text('上传状态: 文件上传失败!') | |
| }, | |
| // 文件上传进度,单位:字节, 可以在这个函数中拿到上传进度并显示在页面上 | |
| onUploadProgress: function (uploadInfo, totalSize, progress) { | |
| // console.log("onUploadProgress:file:" + uploadInfo.file.name + ", fileSize:" + totalSize + ", percent:" + Math.ceil(progress * 100) + "%") | |
| let progressPercent = Math.ceil(progress * 100) + '%'; | |
| // console.log(progressPercent) | |
| progressEle.children('.progress-bar').text(progressPercent) | |
| progressEle.children('.progress-bar').width(progressPercent) | |
| status.text('上传状态: 文件上传中...') | |
| }, | |
| // 全部文件上传结束 | |
| onUploadEnd: function (uploadInfo) { | |
| status.css('color', '#21b978').text('上传状态: 文件上传完毕!') | |
| } | |
| }) | |
| return uploader | |
| } | |
| $(document).on('pjax:end', function() { | |
| $('.upload').each(function(){ | |
| if ($(this).parents('.form-group').next("input[type='hidden']").val()) { | |
| $(this).children('.file').children('.upload-type').children('.status').css('color', '#cc0000').text('文件已上传,重新上传会替换现有文件') | |
| } | |
| }) | |
| }).trigger('pjax:end'); | |
| function uploadInitial(e, ...param) { | |
| let _this = $(e); | |
| let file = e.files[0] | |
| console.log(e) | |
| console.log(e.files) | |
| if (!file) { | |
| alert("请先选择需要上传的文件!") | |
| return | |
| } | |
| let userData = '{"Extend":{' + | |
| '"type":"' + param['0'] + | |
| '","category":"' + param['1'] + | |
| '"}}'; | |
| uploader = createUploader(_this, userData) | |
| uploader.addFile(file) | |
| uploader.startUpload() | |
| _this.next('.authUpload').attr('disabled', false) | |
| } |
一些样式
| .container { | |
| width: 1200px; | |
| margin: 0 auto; | |
| } | |
| .input-control { | |
| margin: 5px 0; | |
| } | |
| .input-control label { | |
| font-size: 14px; | |
| color: #333; | |
| width: 30%; | |
| text-align: right; | |
| display: inline-block; | |
| vertical-align: middle; | |
| margin-right: 10px; | |
| } | |
| .input-control input { | |
| width: 30%; | |
| height: 30px; | |
| padding: 0 5px; | |
| } | |
| .progress { | |
| font-size: 14px; | |
| } | |
| .progress i { | |
| font-style: normal; | |
| } | |
| .upload-type { | |
| color: #666; | |
| font-size: 12px; | |
| padding: 10px 0; | |
| } | |
| .upload{ | |
| padding-top: 5px; | |
| } | |
| .upload-type button { | |
| margin: 0 10px 0 20px; | |
| } | |
| .status { | |
| font-size: 12px; | |
| display: block; | |
| } | |
| .info { | |
| font-size: 14px; | |
| padding-left: 30px; | |
| } |
到这上传就结束了,此时 Dcat admin 表单的 video1 的值为阿里云视频点播的 RequestId 直接保存就行了,但是现在还不能播放,我们还要去处理转码后的回调。
6. 转码回调
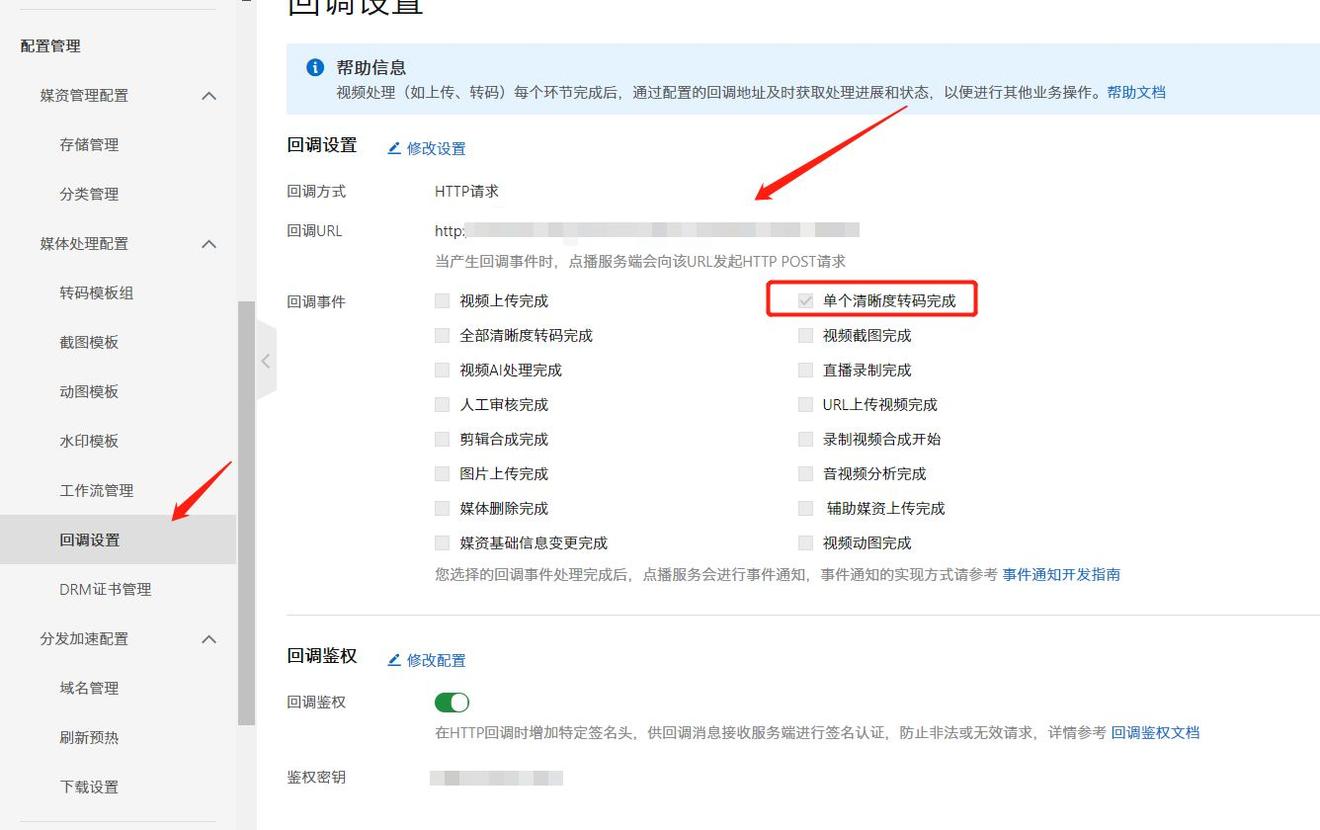
这里的连接地址必须是 http 的, https 不兼容,建议开启回调鉴权。
7. 编写回调接口
| class VideoHandler | |
| { | |
| ... | |
| /** | |
| * 视频转码完成回调 | |
| */ | |
| public function callback(Request $request) | |
| { | |
| // 回调鉴权 | |
| if(md5(config('video.callback_url') .'|'. $request->header('X-VOD-TIMESTAMP') .'|'. config('video.key')) == $request->header('X-VOD-SIGNATURE') && $request->post('Status') == 'success') | |
| { | |
| // 把回调播放地址先扔进缓存里,然后下次要播放的时候直接用记录的 RequestId 去缓存中找相对应的播放地址,然后删除缓存,替换 RequestId 为播放地址。我是这么处理的,具体看你的业务逻辑 | |
| Cache::set($request->post('VideoId'), $request->post('FileUrl')); | |
| }} | |
| ... | |
| } |
水平有限,就只能做到这种程度了,不会 VUE,JQUERY 将就看。