目录
- 前言
- 1、绘制静态的图形
- 2、让两边的限制圆动起来
- 3、动态滑动并计算当前的区间值
- 4、计算当前值与回调处理
- 5、实时文本显示与后续的扩展
- 后记
前言
之前我们的复习中,我们已经对原生 Canvas 的绘制有了详细的了解,我们对事件的处理也有了简单的了解,这一期我们就对绘制与事件的处理做更进一步的实现。
如图,我们需要做这么一个区间的选择控件,此控件也是我们常用的控件,在一些筛选页面,根据价格,数值进行一些筛选的时候,我们需要设置一个最小值和一个最大值。然后取一段中间的区间值。
而这个控件的实现就是典型的自定义绘制与自定义事件处理的标志性实现。我愿称之为自定义View的筑基练习,如果大家能从头到尾实现一遍,那么对自定义流程基本上已经驾轻就熟了。
惯例我们分析一下实现步骤:
- 左边右边的控制圆分别实现,虽然一般情况下它们的属性都是相同的,但是为了防止左右不同的圆,我们做好兼容处理。
- 中间的圆角矩形进度条,我们也分为默认的底色和选中的颜色。
- 对事件的处理,左右的圆形控件的移动处理。
- 其他的文本显示。
- 自定义属性的抽取与回调处理。
思路我们已经有了,下面一步一步的来实现吧! Let's go
1、绘制静态的图形
关于静态的效果绘制,我们已经驾轻就熟了。 测量,画笔,矩阵的初始化,绘制,一套流程下来,都已经是固定的模板了。
进度矩形条,左右圆形的一些资源,我们就能实现一个静态的绘制。
需要定义的变量如下:
| private int mRangLineHeight = getResources().getDimensionPixelSize(R.dimen.d_4dp); //圆角矩形线的高度 | |
| private int mRangLineCornerRadius; //圆角矩形线的圆角半径 | |
| private int mRangLineDefaultColor = Color.parseColor("#CDCDCD"); //默认颜色 | |
| private int mRangLineCheckedColor = Color.parseColor("#0689FD"); //选中颜色 | |
| private int mCircleRadius = getResources().getDimensionPixelSize(R.dimen.d_14dp); //圆半径 | |
| private int mCircleStrokeWidth = getResources().getDimensionPixelSize(R.dimen.d_1d5dp); //圆边框的大小 | |
| private int mLeftCircleBGColor = Color.parseColor("#0689FD"); //左边实心圆颜色 | |
| private int mLeftCircleStrokeColor = Color.parseColor("#FFFFFF"); //左边圆边框的颜色 | |
| private int mRightCircleBGColor = Color.parseColor("#0689FD"); //右边实心圆颜色 | |
| private int mRightCircleStrokeColor = Color.parseColor("#FFFFFF"); //右边圆边框的颜色 | |
| private float mLeftCircleCenterX; //左右两个圆心位置 | |
| private float mLeftCircleCenterY; | |
| private float mRightCircleCenterX; | |
| private float mRightCircleCenterY; | |
| private RectF mDefaultCornerLineRect; //默认颜色的圆角矩形 | |
| private RectF mSelectedCornerLineRect; //选中颜色的圆角矩形 | |
| private Paint mLeftCirclePaint; //各种画笔 | |
| private Paint mLeftCircleStrokePaint; | |
| private Paint mRightCirclePaint; | |
| private Paint mRightCircleStrokePaint; | |
| private Paint mDefaultLinePaint; | |
| private Paint mSelectedLinePaint; |
画笔与Rect的初始化:
| private void initPaint() { | |
| //初始化左边实心圆 | |
| mLeftCirclePaint = new Paint(); | |
| mLeftCirclePaint.setAntiAlias(true); | |
| mLeftCirclePaint.setDither(true); | |
| mLeftCirclePaint.setStyle(Paint.Style.FILL); | |
| mLeftCirclePaint.setColor(mLeftCircleBGColor); | |
| //初始化左边圆的边框 | |
| mLeftCircleStrokePaint = new Paint(); | |
| mLeftCircleStrokePaint.setAntiAlias(true); | |
| mLeftCircleStrokePaint.setDither(true); | |
| mLeftCircleStrokePaint.setStyle(Paint.Style.STROKE); | |
| mLeftCircleStrokePaint.setColor(mLeftCircleStrokeColor); | |
| mLeftCircleStrokePaint.setStrokeWidth(mCircleStrokeWidth); | |
| //初始化右边实心圆 | |
| mRightCirclePaint = new Paint(); | |
| mRightCirclePaint.setAntiAlias(true); | |
| mRightCirclePaint.setDither(true); | |
| mRightCirclePaint.setStyle(Paint.Style.FILL); | |
| mRightCirclePaint.setColor(mRightCircleBGColor); | |
| //初始化右边圆的边框 | |
| mRightCircleStrokePaint = new Paint(); | |
| mRightCircleStrokePaint.setAntiAlias(true); | |
| mRightCircleStrokePaint.setDither(true); | |
| mRightCircleStrokePaint.setStyle(Paint.Style.STROKE); | |
| mRightCircleStrokePaint.setColor(mRightCircleStrokeColor); | |
| mRightCircleStrokePaint.setStrokeWidth(mCircleStrokeWidth); | |
| //默认颜色的圆角矩形线 | |
| mDefaultCornerLineRect = new RectF(); | |
| //中间选中颜色的圆角矩形 | |
| mSelectedCornerLineRect = new RectF(); | |
| mDefaultLinePaint = new Paint(); | |
| mDefaultLinePaint.setAntiAlias(true); | |
| mDefaultLinePaint.setDither(true); | |
| mSelectedLinePaint = new Paint(); | |
| mSelectedLinePaint.setAntiAlias(true); | |
| mSelectedLinePaint.setDither(true); | |
| } |
关于测量还是按我们前面文字介绍说的来,我们先确定测量的模式与宽高,再计算一个最小的宽高,然后根据xml里面定义的测量模式来确定测量的宽高。
具体实现如下:
| protected void onMeasure(int widthMeasureSpec, int heightMeasureSpec) { | |
| int widthMode = MeasureSpec.getMode(widthMeasureSpec); | |
| int widthSize = MeasureSpec.getSize(widthMeasureSpec); | |
| int heightMode = MeasureSpec.getMode(heightMeasureSpec); | |
| int heightSize = MeasureSpec.getSize(heightMeasureSpec); | |
| int finalWidth, finalHeight; | |
| //计算的宽度与高度 | |
| int calWidthSize = getPaddingLeft() + mCircleRadius * 2 + getPaddingRight() + mCircleStrokeWidth * 2; | |
| int calHeightSize = getPaddingTop() + mCircleRadius * 2 + mCircleStrokeWidth * 2 + getPaddingBottom(); | |
| if (widthMode == MeasureSpec.EXACTLY) { | |
| //如果是精确模式使用测量的宽度 | |
| finalWidth = widthSize; | |
| } else if (widthMode == MeasureSpec.AT_MOST) { | |
| //如果是WrapContent使用计算的宽度 | |
| finalWidth = Math.min(widthSize, calWidthSize); | |
| } else { | |
| //其他模式使用计算的宽度 | |
| finalWidth = calWidthSize; | |
| } | |
| if (heightMode == MeasureSpec.EXACTLY) { | |
| //如果是精确模式使用测量的高度 | |
| finalHeight = heightSize; | |
| } else if (heightMode == MeasureSpec.AT_MOST) { | |
| //如果是WrapContent使用计算的高度 | |
| finalHeight = Math.min(heightSize, calHeightSize); | |
| } else { | |
| //其他模式使用计算的高度 | |
| finalHeight = calHeightSize; | |
| } | |
| //确定测量宽高 | |
| setMeasuredDimension(finalWidth, finalHeight); | |
| } |
内部有详细的注释,推荐大家宽度使用固定的数组,高度wrap_content。
测量完成之后当显示出来了,我们就可以对圆形和矩阵进行一些赋值操作。
| protected void onSizeChanged(int w, int h, int oldw, int oldh) { | |
| super.onSizeChanged(w, h, oldw, oldh); | |
| //左边圆的圆心坐标 | |
| mLeftCircleCenterX = getPaddingLeft() + strokeRadius; | |
| mLeftCircleCenterY = getPaddingTop() /*+ rectDialogHeightAndSpace */ + strokeRadius; | |
| //右边圆的圆心坐标 | |
| mRightCircleCenterX = w - getPaddingRight() - strokeRadius; | |
| mRightCircleCenterY = getPaddingTop() /*+ rectDialogHeightAndSpace */ + strokeRadius; | |
| //默认圆角矩形进度条 | |
| mRangLineCornerRadius = mRangLineHeight / 2;//圆角半径 | |
| mDefaultCornerLineRect.left = getPaddingLeft() + strokeRadius; | |
| mDefaultCornerLineRect.top = getPaddingTop() /*+ rectDialogHeightAndSpace */ + strokeRadius - mRangLineCornerRadius; | |
| mDefaultCornerLineRect.right = w - getPaddingRight() - strokeRadius; | |
| mDefaultCornerLineRect.bottom = getPaddingTop() /*+ rectDialogHeightAndSpace */ + strokeRadius + mRangLineCornerRadius; | |
| //选中状态圆角矩形进度条 | |
| mSelectedCornerLineRect.left = mLeftCircleCenterX; | |
| mSelectedCornerLineRect.top = getPaddingTop() /*+ rectDialogHeightAndSpace */ + strokeRadius - mRangLineCornerRadius; | |
| mSelectedCornerLineRect.right = mRightCircleCenterX; | |
| mSelectedCornerLineRect.bottom = getPaddingTop() /*+ rectDialogHeightAndSpace */ + strokeRadius + mRangLineCornerRadius; | |
| } |
我们确定了圆角进度矩形线条的rect,和左右限制圆的圆心和大小,我们就可以使用对的画笔进行绘制出静态的数据来。
| //左侧的控制圆与边框 | |
| private void drawLeftCircle(Canvas canvas) { | |
| //实心圆 | |
| canvas.drawCircle(mLeftCircleCenterX, mLeftCircleCenterY, mCircleRadius, mLeftCirclePaint); | |
| //空心圆 | |
| canvas.drawCircle(mLeftCircleCenterX, mLeftCircleCenterY, mCircleRadius, mLeftCircleStrokePaint); | |
| } | |
| //右侧的控制圆与边框 | |
| private void drawRightCircle(Canvas canvas) { | |
| //实心圆 | |
| canvas.drawCircle(mRightCircleCenterX, mRightCircleCenterY, mCircleRadius, mRightCirclePaint); | |
| //空心圆 | |
| canvas.drawCircle(mRightCircleCenterX, mRightCircleCenterY, mCircleRadius, mRightCircleStrokePaint); | |
| } | |
| //中心的圆角矩形进度条-默认的底色 | |
| private void drawDefaultCornerRectLine(Canvas canvas) { | |
| mDefaultLinePaint.setColor(mRangLineDefaultColor); | |
| canvas.drawRoundRect(mDefaultCornerLineRect, mRangLineCornerRadius, mRangLineCornerRadius, mDefaultLinePaint); | |
| } | |
| //中心的圆角矩形进度条-已经选中的颜色 | |
| private void drawSelectedRectLine(Canvas canvas) { | |
| mSelectedLinePaint.setColor(mRangLineCheckedColor); | |
| canvas.drawRoundRect(mSelectedCornerLineRect, mRangLineCornerRadius, mRangLineCornerRadius, mSelectedLinePaint); | |
| } |
这几个东西绘制出来,我们的效果就如下所示:
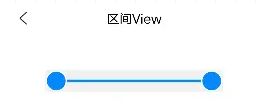
为了方便显示大小,我在控件里加一个灰色的背景为了方便观看整个控件的大小。
静态的实现之后我们就要开始让两边的限制圆形动起来。
2、让两边的限制圆动起来
我们在 onDraw 的方法中可以得知,动态的成员变量就是两个圆的X轴坐标即为 mLeftCircleCenterX 和 mRightCircleCenterX ,那么中间的进度线条的绘制则是根据 mSelectedCornerLineRect 的矩阵来绘制的。矩阵的left 和 right 也是根据 mLeftCircleCenterX 和 mRightCircleCenterX 来计算的。
所以我们的最终目的就是动态的记录当前事件中的 mLeftCircleCenterX 和 mRightCircleCenterX 值,但是有左右两个控制圆,我们怎么判断移动的是哪一个圆呢?
先上一个判断方法。
| /** | |
| * 判断当前移动的是左侧限制圆,还是右侧限制圆 | |
| * | |
| * @param downX 按下的坐标点 | |
| * @return true表示按下的左侧,false表示按下的右侧 | |
| */ | |
| private boolean checkTouchCircleLeftOrRight(float downX) { | |
| //用一个取巧的方法,如果当前按下的为X坐标,那么左侧圆心X的坐标减去按下的X坐标,如果大于右侧的圆心X减去X坐标,那么就说明在左侧,否则就在右侧 | |
| return !(Math.abs(mLeftCircleCenterX - downX) - Math.abs(mRightCircleCenterX - downX) > 0); | |
| } |
当我们移动的时候我们怎么计算呢?通常常用的方法是把进度线条分为几份,计算每一份的长度。我们把这些变量提取出来:
| private int mStrokeRadius; //半径+边框的总值 | |
| private int slice = 5; //代表整体进度分为多少份 | |
| private float perSlice; //每一份所占的长度 | |
| private int maxValue = 100; //最大值,默认为100 | |
| private int minValue = 0; //最小值,默认为0 | |
| private float downX; | |
| private boolean touchLeftCircle; |
通过入口方法对其赋值,并且显示出来后对每一份长度进行计算:
| /** | |
| * 设置数据与回调处理 | |
| */ | |
| public void setupData(int minValue, int maxValue, int sliceValue) { | |
| this.minValue = minValue; | |
| this.maxValue = maxValue; | |
| int num = (maxValue - minValue) / sliceValue; | |
| slice = (maxValue - minValue) % sliceValue == 0 ? num : num + 1; | |
| invalidate(); | |
| } | |
| protected void onSizeChanged(int w, int h, int oldw, int oldh) { | |
| super.onSizeChanged(w, h, oldw, oldh); | |
| int realWidth = w - getPaddingLeft() - getPaddingRight(); | |
| mStrokeRadius = mCircleRadius + mCircleStrokeWidth; | |
| //计算每一份对应的距离 | |
| perSlice = (realWidth - mStrokeRadius * 2) * 1f / slice; | |
| } |
到处我们就能写OnTouch方法了,这是核心方法,我们慢一点来。
我们先只对按下的事件做处理:
| @Override | |
| public boolean onTouchEvent(MotionEvent event) { | |
| if (event.getAction() == MotionEvent.ACTION_DOWN) { | |
| //按下的时候记录当前操作的是左侧限制圆还是右侧的限制圆 | |
| downX = event.getX(); | |
| touchLeftCircle = checkTouchCircleLeftOrRight(downX); | |
| if (touchLeftCircle) { | |
| //如果是左侧 | |
| //如果超过右侧最大值则不处理 | |
| if (downX + perSlice > mRightCircleCenterX) { | |
| return false; | |
| } | |
| mLeftCircleCenterX = downX; | |
| } else { | |
| //如果是右侧 | |
| //如果超过左侧最小值则不处理 | |
| if (downX - perSlice < mLeftCircleCenterX) { | |
| return false; | |
| } | |
| mRightCircleCenterX = downX; | |
| } | |
| } | |
| //中间的进度矩形是根据两边圆心点动态计算的 | |
| mSelectedCornerLineRect.left = mLeftCircleCenterX; | |
| mSelectedCornerLineRect.right = mRightCircleCenterX; | |
| //全部的事件处理完毕,变量赋值完成之后,开始重绘 | |
| invalidate(); | |
| return true; | |
| } |
按下的过程中对,最大最小值做判断,并且赋值进度矩阵的 left 和 right ,那么我们就能实现指定的点击效果,如下图所示:
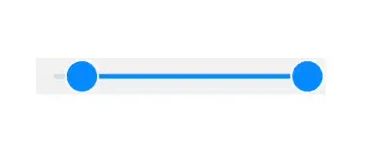
这只是点击呢,效果太挫了,我们想要按着滑动怎么办?那我们就需要重写Move事件。
3、动态滑动并计算当前的区间值
滑动相对来说是比较难得,我们要处理两个限制圆的滚动,并且当它们两个圆碰撞在一起的时候,我们要处理交换的逻辑,并且还需要注意滑动边界的处理。
| @Override | |
| public boolean onTouchEvent(MotionEvent event) { | |
| if (event.getAction() == MotionEvent.ACTION_DOWN) { | |
| //按下的时候记录当前操作的是左侧限制圆还是右侧的限制圆 | |
| downX = event.getX(); | |
| touchLeftCircle = checkTouchCircleLeftOrRight(downX); | |
| if (touchLeftCircle) { | |
| //如果是左侧 | |
| //如果超过右侧最大值则不处理 | |
| if (downX + perSlice > mRightCircleCenterX) { | |
| return false; | |
| } | |
| mLeftCircleCenterX = (int) downX; | |
| } else { | |
| //如果是右侧 | |
| //如果超过左侧最小值则不处理 | |
| if (downX - perSlice < mLeftCircleCenterX) { | |
| return false; | |
| } | |
| mRightCircleCenterX = downX; | |
| } | |
| } else if (event.getAction() == MotionEvent.ACTION_MOVE) { | |
| float moveX = event.getX(); | |
| if (mLeftCircleCenterX + perSlice > mRightCircleCenterX) { | |
| //两圆重合的情况下的处理 | |
| if (touchLeftCircle) { | |
| // 左侧到最右边 | |
| if (mLeftCircleCenterX == getWidth() - getPaddingRight() - mStrokeRadius) { | |
| touchLeftCircle = true; | |
| mLeftCircleCenterX = getWidth() - getPaddingRight() - mStrokeRadius; | |
| } else { | |
| //交换右侧滑动 | |
| touchLeftCircle = false; | |
| mRightCircleCenterX = (int) moveX; | |
| } | |
| } else { | |
| //右侧到最左边 | |
| if (mRightCircleCenterX == getPaddingLeft() + mStrokeRadius) { | |
| touchLeftCircle = false; | |
| mRightCircleCenterX = getPaddingLeft() + mStrokeRadius; | |
| } else { | |
| //交换左侧滑动 | |
| touchLeftCircle = true; | |
| mLeftCircleCenterX = (int) moveX; | |
| } | |
| } | |
| } else { | |
| //如果是正常的移动 | |
| if (touchLeftCircle) { | |
| //滑动左边限制圆,如果左边圆超过右边圆,那么把右边圆赋值给左边圆,如果没超过就赋值当前的moveX | |
| mLeftCircleCenterX = mLeftCircleCenterX - mRightCircleCenterX >= 0 ? mRightCircleCenterX : moveX; | |
| } else { | |
| //滑动右边限制圆,如果右边圆超过左边圆,那么把左边圆赋值给右边圆,如果没超过就赋值当前的moveX | |
| mRightCircleCenterX = mRightCircleCenterX - mLeftCircleCenterX <= 0 ? mLeftCircleCenterX : moveX; | |
| } | |
| } | |
| } | |
| //对所有的手势效果进行过滤操作,不能超过最大最小值 | |
| limitMinAndMax(); | |
| //中间的进度矩形是根据两边圆心点动态计算的 | |
| mSelectedCornerLineRect.left = mLeftCircleCenterX; | |
| mSelectedCornerLineRect.right = mRightCircleCenterX; | |
| //全部的事件处理完毕,变量赋值完成之后,开始重绘 | |
| invalidate(); | |
| return true; | |
| } |
主要需要处理的是交换身位的方法,当两个圆相撞的时候,需要赋值处理,交换X的赋值,然后切换 touchLeftCircle 的值,然后对另一个圆进行移动。
需要注意的是我们一定要在赋值之前对最大值与最小值进行校验,以免滑到天边去了。
| private void limitMinAndMax() { | |
| //如果是操作的左侧限制圆,超过最小值了 | |
| if (mLeftCircleCenterX < getPaddingLeft() + mStrokeRadius) { | |
| mLeftCircleCenterX = getPaddingLeft() + mStrokeRadius; | |
| } | |
| //如果是操作的左侧限制圆,超过最大值了 | |
| if (mLeftCircleCenterX > getWidth() - getPaddingRight() - mStrokeRadius) { | |
| mLeftCircleCenterX = getWidth() - getPaddingRight() - mStrokeRadius; | |
| } | |
| //如果是操作的右侧限制圆,超过最大值了 | |
| if (mRightCircleCenterX > getWidth() - getPaddingRight() - mStrokeRadius) { | |
| mRightCircleCenterX = getWidth() - getPaddingRight() - mStrokeRadius; | |
| } | |
| //如果是操作的右侧限制圆,超过最小值了 | |
| if (mRightCircleCenterX < getPaddingLeft() + mStrokeRadius) { | |
| mRightCircleCenterX = getPaddingLeft() + mStrokeRadius; | |
| } | |
| } |
此时大致的效果已经出来了,效果如图:

4、计算当前值与回调处理
我们一直都是计算的是两个圆的中心点X轴的计算,那么我们真正选中的值是多少呢?总不能把X轴坐标给调用者吧。所以我们需要通过滑动的百分比动态的计算具体的值。
| //根据移动的距离计算当前的值 | |
| private int getPercentMax(float distance) { | |
| //计算此时的位置坐标对应的距离能分多少份 | |
| int lineLength = getWidth() - getPaddingLeft() - getPaddingRight() - mStrokeRadius * 2; | |
| distance = distance <= 0 ? 0 : (distance >= lineLength ? lineLength : distance); | |
| //计算滑动的百分比 | |
| float percentage = distance / lineLength; | |
| return (int) (percentage * maxValue); | |
| } |
那我们需要在Move事件中一直回调吗?没必要,我们在取消的时候,或者说事件完毕的时候,当用户选好了区间之后,我们回调一次即可。
| if (event.getAction() == MotionEvent.ACTION_UP || event.getAction() == MotionEvent.ACTION_CANCEL) { | |
| //计算当前的左侧右侧真正的限制值 | |
| int moveLeftData = getPercentMax(mLeftCircleCenterX - getPaddingLeft() - mStrokeRadius); | |
| int moveRightData = getPercentMax(mRightCircleCenterX - getPaddingLeft() - mStrokeRadius); | |
| //顺便赋值当前的真正值,便于后面的回调 | |
| int leftValue = Math.min(moveLeftData, maxValue); | |
| int rightValue = Math.min(moveRightData, maxValue); | |
| if (mListener != null) mListener.onMoveValue(leftValue, rightValue); | |
| } | |
| //回调区间值的监听 | |
| private OnRangeValueListener mListener; | |
| public interface OnRangeValueListener { | |
| void onMoveValue(int leftValue, int rightValue); | |
| } |
我们在Activity中通过setup方法就可以设置值并监听到最后的区间事件
| override fun init() { | |
| findViewById<RangeView>(R.id.range_view).setupData(0, 100, 1) { leftValue, rightValue -> | |
| toast("leftValue:$leftValue rightValue:$rightValue") | |
| } | |
| } |
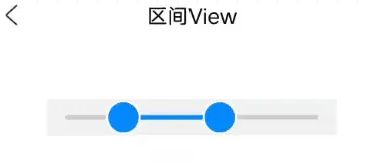
效果:
5、实时文本显示与后续的扩展
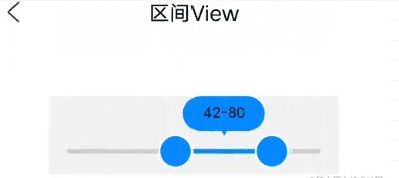
这么看起来倒是似模似样了,我们的需求是在拖动的时候实时在顶部展示一个弹窗,展示当前的值,这怎么搞?
其实就是在顶部绘制一个圆角矩形,在矩形内部绘制文本,然后我们通过左右限制圆的位置计算出中间 的位置,让顶部的圆角矩形在中间位置显示不就行了嘛。开干
先定义需要用到的成员变量:
| private int mTopDialogTextSize = getResources().getDimensionPixelSize(R.dimen.d_12dp); //顶部文字的大小 | |
| private int mTopDialogTextColor = Color.parseColor("#000000"); //顶部文字的颜色 | |
| private int mTopDialogWidth = getResources().getDimensionPixelSize(R.dimen.d_70dp); //顶部描述信息弹窗的宽度 | |
| private int mTopDialogCornerRadius = getResources().getDimensionPixelSize(R.dimen.d_15dp); //顶部描述信息弹窗圆角半径 | |
| private int mTopDialogBGColor = Color.parseColor("#0689FD"); //顶部框的颜色 | |
| private int mTopDialogSpaceToProgress = getResources().getDimensionPixelSize(R.dimen.d_2dp); //顶部描述信息弹窗距离进度条的间距(配置) | |
| private int mRealDialogDistanceSpace; //顶部弹窗与进度条的间距(顶部弹窗与进度的真正距离)计算得出 | |
| private Path mTrianglePath; //画小三角形路径 | |
| private int mTriangleLength = 15; //等边三角形边长 | |
| private int mTriangleHeight; //等边三角形的高 | |
| private Paint textPaint; |
然后我们在初始化画笔与资源的时候,初始化文本的画笔和顶部弹窗的矩阵:
| private void initPaint() { | |
| //顶部圆角矩形 | |
| mTopDialogRect = new RectF(); | |
| //画小三角形指针 | |
| mTrianglePath = new Path(); | |
| //小三角形的高 | |
| mTriangleHeight = (int) Math.sqrt(mTriangleLength * mTriangleLength - mTriangleLength / 2 * (mTriangleLength / 2)); | |
| textPaint = new Paint(); | |
| textPaint.setAntiAlias(true); | |
| textPaint.setDither(true); | |
| textPaint.setTextSize(mTopDialogTextSize); | |
| textPaint.setColor(mTopDialogTextColor); | |
| } |
由于我们加了顶部的高度,那么我们就需要在测量的时候也要把高度加上去
| protected void onMeasure(int widthMeasureSpec, int heightMeasureSpec) { | |
| ... | |
| //计算的宽度与高度 | |
| int calWidthSize = getPaddingLeft() + mCircleRadius * 2 + getPaddingRight() + mCircleStrokeWidth * 2; | |
| int calHeightSize = getPaddingTop() + mTopDialogCornerRadius * 2 + mTriangleHeight + mTopDialogSpaceToProgress | |
| + mCircleRadius * 2 + mCircleStrokeWidth * 2 + getPaddingBottom(); | |
| ... | |
| } |
显示的时候我们计算真正的高度,我们比设置的再高出一点点方便展示。并且对顶部弹窗的矩阵赋值
| protected void onSizeChanged(int w, int h, int oldw, int oldh) { | |
| super.onSizeChanged(w, h, oldw, oldh); | |
| ... | |
| mRealDialogDistanceSpace = mTopDialogCornerRadius * 2 + mTopDialogSpaceToProgress; | |
| //数值描述圆角矩形 | |
| mTopDialogRect.left = w / 2 - mTopDialogWidth / 2; | |
| mTopDialogRect.top = getPaddingTop(); | |
| mTopDialogRect.right = w / 2 + mTopDialogWidth / 2; | |
| mTopDialogRect.bottom = getPaddingTop() + mTopDialogCornerRadius * 2; | |
| ... | |
| } |
然后我们就能绘制顶部的弹窗背景与内部的文本,再绘制弹窗下面的小三角指针
| //顶部的文字框 | |
| private void drawTopTextRectDialog(Canvas canvas) { | |
| if (leftValue == minValue && (rightValue == maxValue || rightValue < maxValue)) { | |
| textDesc = "低于 " + rightValue; | |
| } else if (leftValue > minValue && rightValue == maxValue) { | |
| textDesc = "高于 " + leftValue; | |
| } else if (leftValue > minValue && rightValue < maxValue) { | |
| if (leftValue == rightValue) { | |
| textDesc = "低于 " + rightValue; | |
| } else | |
| textDesc = leftValue + "-" + rightValue; | |
| } | |
| if (isShowRectDialog) { | |
| //绘制圆角矩形框 | |
| mSelectedLinePaint.setShader(null); | |
| mSelectedLinePaint.setColor(mTopDialogBGColor); | |
| canvas.drawRoundRect(mTopDialogRect, mTopDialogCornerRadius, mTopDialogCornerRadius, mSelectedLinePaint); | |
| //绘制文本 | |
| textPaint.setColor(mTopDialogTextColor); | |
| textPaint.setTextSize(mTopDialogTextSize); | |
| float textWidth = textPaint.measureText(textDesc); | |
| float textLeft = mTopDialogRect.left + mTopDialogWidth / 2 - textWidth / 2; | |
| canvas.drawText(textDesc, textLeft, getPaddingTop() + mTopDialogCornerRadius + mTopDialogTextSize / 4, textPaint); | |
| } | |
| } | |
| //顶部文字框下面的三角箭头 | |
| private void drawSmallTriangle(Canvas canvas) { | |
| if (isShowRectDialog) { | |
| mTrianglePath.reset(); | |
| mTrianglePath.moveTo(mTopDialogRect.left + mTopDialogWidth / 2 - mTriangleLength / 2, getPaddingTop() + mTopDialogCornerRadius * 2); | |
| mTrianglePath.lineTo(mTopDialogRect.left + mTopDialogWidth / 2 + mTriangleLength / 2, getPaddingTop() + mTopDialogCornerRadius * 2); | |
| mTrianglePath.lineTo(mTopDialogRect.left + mTopDialogWidth / 2, getPaddingTop() + mTopDialogCornerRadius * 2 + mTriangleHeight); | |
| mTrianglePath.close(); | |
| canvas.drawPath(mTrianglePath, mSelectedLinePaint); | |
| } | |
| } |
由于要绘制的参数是顶部的矩阵,所以我们在onTouch中,还需要对顶部的矩阵进行重新动态赋值,才能让他动起来:
| @Override | |
| public boolean onTouchEvent(MotionEvent event) { | |
| ... | |
| } else if (event.getAction() == MotionEvent.ACTION_MOVE) { | |
| //计算当前的左侧右侧真正的限制值 | |
| int moveLeftData = getPercentMax(mLeftCircleCenterX - getPaddingLeft() - mStrokeRadius); | |
| int moveRightData = getPercentMax(mRightCircleCenterX - getPaddingLeft() - mStrokeRadius); | |
| //顺便赋值当前的真正值,可以让顶部文字显示 | |
| leftValue = Math.min(moveLeftData, maxValue); | |
| rightValue = Math.min(moveRightData, maxValue); | |
| } else if (event.getAction() == MotionEvent.ACTION_UP || event.getAction() == MotionEvent.ACTION_CANCEL) { | |
| //计算当前的左侧右侧真正的限制值 | |
| int moveLeftData = getPercentMax(mLeftCircleCenterX - getPaddingLeft() - mStrokeRadius); | |
| int moveRightData = getPercentMax(mRightCircleCenterX - getPaddingLeft() - mStrokeRadius); | |
| //赋值方便回调 | |
| leftValue = Math.min(moveLeftData, maxValue); | |
| rightValue = Math.min(moveRightData, maxValue); | |
| if (mListener != null) mListener.onMoveValue(leftValue, rightValue); | |
| //移除消息,并重新开始延时关闭顶部弹窗 | |
| removeCallbacks(dismissRunnable); | |
| postDelayed(dismissRunnable, 1000); | |
| } | |
| ... | |
| //顶部的文本框矩阵也要居中布局 | |
| mTopDialogRect.left = (mRightCircleCenterX + mLeftCircleCenterX) / 2 - mTopDialogWidth / 2; | |
| mTopDialogRect.right = (mRightCircleCenterX + mLeftCircleCenterX) / 2 + mTopDialogWidth / 2; | |
| //全部的事件处理完毕,变量赋值完成之后,开始重绘 | |
| invalidate(); | |
| return true; | |
| } | |
| //顶部弹窗的显示 | |
| Runnable dismissRunnable = new Runnable() { | |
| @Override | |
| public void run() { | |
| if (!isRectDialogShowing) { | |
| isShowRectDialog = false; | |
| } | |
| postInvalidate(); | |
| } | |
| }; |
总体来说绘制和动态赋值矩阵的left right并不算太难,相比两个圆的触摸事件要相对简单一点。
实现的效果就是如下:
后记
当然后面如果我们有更对的需求还能继续绘制一些东西,例如:
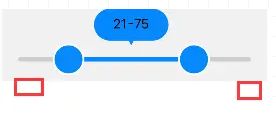
如果我们想在图片红框处添加固定的最小值和最大值,也简单,我们直接drawText到指定的位置即可,我们不是已经有进度条Rect的 left 和 right 了吗?就可以很方便的添加文本。
由于是我自用的一个控件,目前需求并没有更多的要求就并没有进行更多的扩展,轮子已经在这里了,如果大家有兴趣也可以很方便的修改的。大家跟着一起复习一遍,是不是感觉自定义的绘制和自定义的事件已经入门了呢 - -!