前言
在Web应用开发中,经常需要实现PDF文件的加载和显示功能。本文小编将为您介绍如何在ASP.NET Core中实现这一功能,以便用户可以在Web应用中查看和浏览PDF文件。
实现步骤
1)在服务器端创建PDF
- 打开 Visual Studio 并创建新的 ASP. NET Core Web 应用程序,小编这里项目名称为CreatePDF。
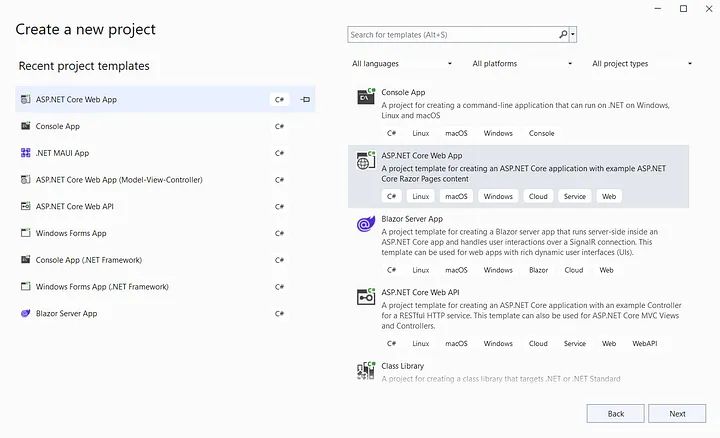
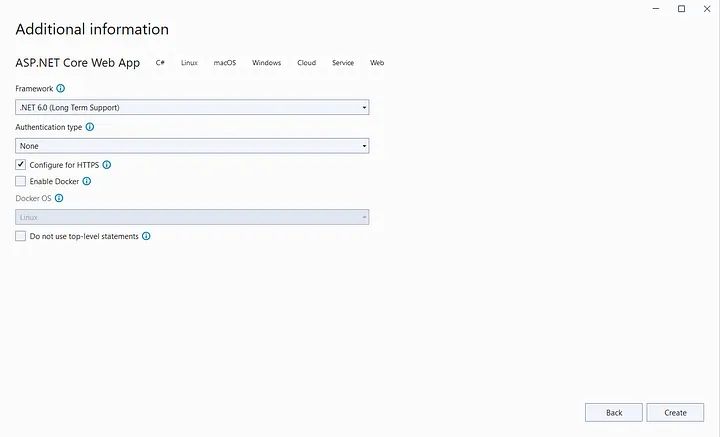
- 选择 .NET Core 6.0 作为项目的目标框架。
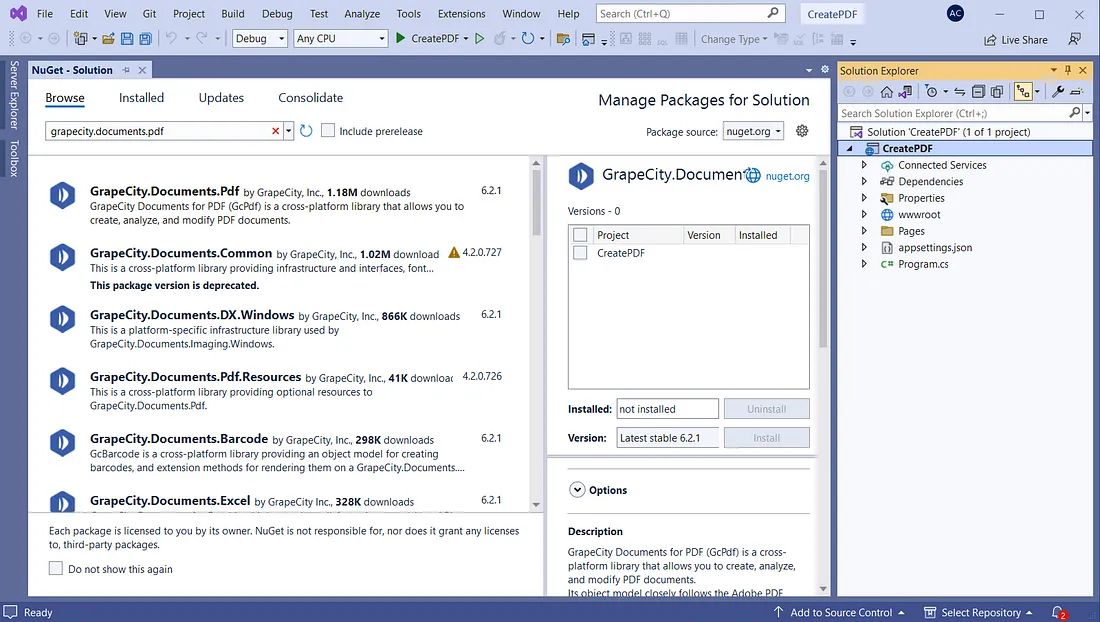
- 安装依赖包:在“Solution Explorer中右键单击该项目,然后选择“Manage NuGet Packages”。在右上角的“Package source”中,进行选择。单击左上角的“Browse ”选项卡并搜索“GrapeCity.Documents”,从左侧面板中选择 GrapeCity.Documents.Pdf,最后通过单击右侧面板中的“install”按钮进行安装。
- 打开项目文件夹中“Pages”文件夹下的“ Index.cshtml.cs ”页面。并在此文件中定义服务器端代码以生成 PDF 文件,代码如下所示:
| //Define Environment variable to access web root folder | |
| private IWebHostEnvironment Environment; | |
| public IndexModel(ILogger<IndexModel> logger, IWebHostEnvironment _environment) | |
| { | |
| _logger = logger; | |
| Environment = _environment; | |
| CreatePDF(); | |
| } |
- 接下来,对第4步的 CreatePDF()方法进行详细地编写:
| public void CreatePDF() | |
| { | |
| const int FontSize = 12; | |
| //Define an instance of GcPdfDocument | |
| var doc = new GcPdfDocument(); | |
| //Add a new page | |
| var page = doc.Pages.Add(); | |
| var g = page.Graphics; | |
| //Initialize TextLayout to render text | |
| var tl = g.CreateTextLayout(); | |
| //Add an image to PDF document | |
| var img = Image.FromFile(Path.Combine("Resources", "ImagesBis", "2020-website-gcdocs-headers_tall.png")); | |
| var rc = page.Bounds; | |
| rc.Height *= 0.65f; | |
| g.DrawImage(img, rc, null, ImageAlign.StretchImage); | |
| //Define text format settings | |
| var ip = new PointF(48, 72); | |
| var font = Font.FromFile(Path.Combine("Resources", "Fonts", "OpenSans-Regular.ttf")); | |
| var tfCap = new TextFormat() { Font = font, FontSize = FontSize * 1.6f, ForeColor = Color.White }; | |
| var tf = new TextFormat() { Font = font, FontSize = FontSize, ForeColor = Color.White }; | |
| tl.MaxWidth = 72 * 5; | |
| // Add Header: | |
| tl.AppendLine("Fast, Efficient Document APIs for .NET 5 and Java Applications", tfCap); | |
| tl.AppendLine(tfCap); | |
| tl.AppendLine("Take total control of your documents with ultra-fast, low-footprint APIs for enterprise apps.", tf); | |
| tl.AppendLine(tf); | |
| g.DrawTextLayout(tl, ip); | |
| // Add Bullet list: | |
| ip.Y += tl.ContentHeight; | |
| tl.Clear(); | |
| const string bullet = "\x2022\x2003"; | |
| tl.FirstLineIndent = -g.MeasureString(bullet, tf).Width; | |
| tl.ParagraphSpacing += 4; | |
| tl.Append(bullet, tf); | |
| tl.AppendLine("Generate, load, edit, save XLSX spreadsheets, PDF, Images, and DOCX files using C# .NET, VB.NET, or Java", tf); | |
| tl.Append(bullet, tf); | |
| tl.AppendLine("View, edit, print, fill and submit documents in JavaScript PDF Viewer and PDF Editor.", tf); | |
| tl.Append(bullet, tf); | |
| tl.AppendLine("Compatible on Windows, macOS, and Linux", tf); | |
| tl.Append(bullet, tf); | |
| tl.AppendLine("No dependencies on Excel, Word, or Acrobat", tf); | |
| tl.Append(bullet, tf); | |
| tl.AppendLine("Deploy to a variety of cloud-based services, including Azure, AWS, and AWS Lambda", tf); | |
| tl.Append(bullet, tf); | |
| tl.AppendLine("Product available individually or as a bundle", tf); | |
| //Render text | |
| g.DrawTextLayout(tl, ip); | |
| //Save the document to web root folder | |
| doc.Save(Path.Combine(Environment.WebRootPath, "sample.pdf")); | |
| } |
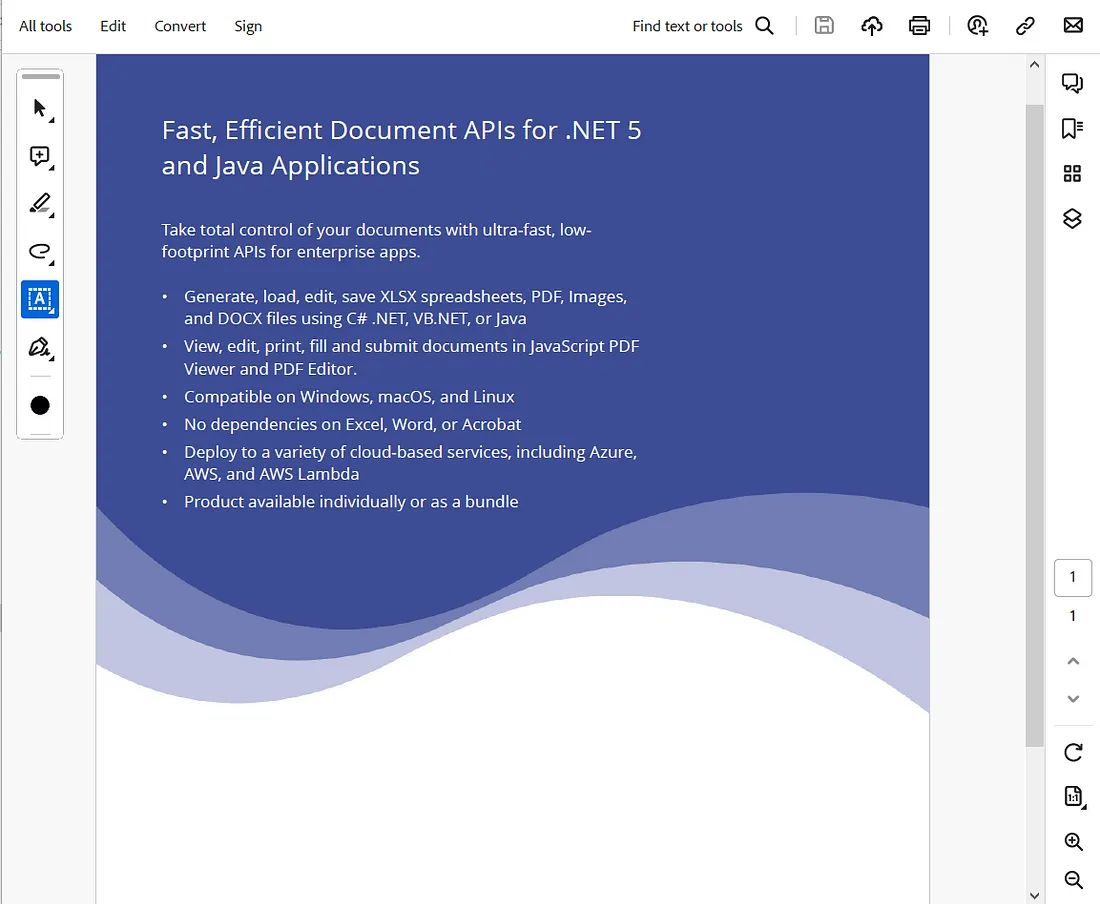
实现效果如下所示(用Adobe打开):
2)加载和查看PDF
在实现步骤1)中,小编实现了如何新建一个PDF的过程,但是新建的PDF需要在Adobe中打开,那么有没有一种可以直接在浏览器中编辑和修改PDF的编辑器呢?答案是肯定的。接下来小编就将继续为大家介绍一下如何使用JavaScript实现一个加载和修改PDF的编辑器的步骤:
- 打开 Visual Studio 的“Package Manager Console”,选择“Tools”→“NuGet Package Manager”→“Package Manager Console”,然后输入以下指令:
npm install @grapecity/gcpdfviewer
- 在Index.cshtml 文件中添加以下代码:
| <div id="root" style="height:600px;"></div> | |
| <script src="~/node_modules/@@grapecity/gcpdfviewer/gcpdfviewer.js"></script> | |
| <script> | |
| window.onload = function () { | |
| var viewer = new GcPdfViewer("#root", { /* Specify options here */ } | |
| ); | |
| viewer.addDefaultPanels(); | |
| viewer.open("sample.pdf"); | |
| } | |
| </script> |
- 实现效果:

- 使用注释编辑器添加注释
在第3步实现的PDF编辑器中提供了一个注释编辑器功能,用于在文档中添加或删除不同类型的注释,例如文本注释,圆圈注释,图章注释,编辑注释等。下面的GIF就是一个圆圈注释的例子:

总结
上文小编总结了如何在服务器端创建 PDF 文件并在客户端加载和编辑它。如果您想了解更多的资料,欢迎参考这篇技术文档。