目录
- 前言
- Demo
- 需要实现的功能
- 初始化数据和页面渲染
- touchstart 手指开始触摸事件
- touchmove 监听手指滑动事件
- touchend 监听手指触摸结束事件
- 页面滚动处理
- 连接的两颗星星之间有其他星星时
前言
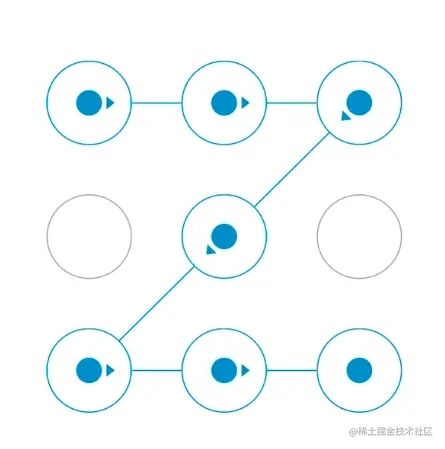
之前在公司开发活动项目的时候,遇到一个项目需求要让用户使用手势画星位图来解锁星座运势,一看设计稿,这不就是我们平时的手机屏幕解锁吗?于是上网搜了一些关于手势解锁的文章,没找到可以直接复用的,于是只能自己打开canvas教程,边学习边设计实现了这个功能,同时兼容了移动端和PC端,在这里把代码分享出来,感兴趣的可以看看。

Demo

需要实现的功能
- 在canvas画布上展示指定行 * 列星星,并可设置随机显示位置
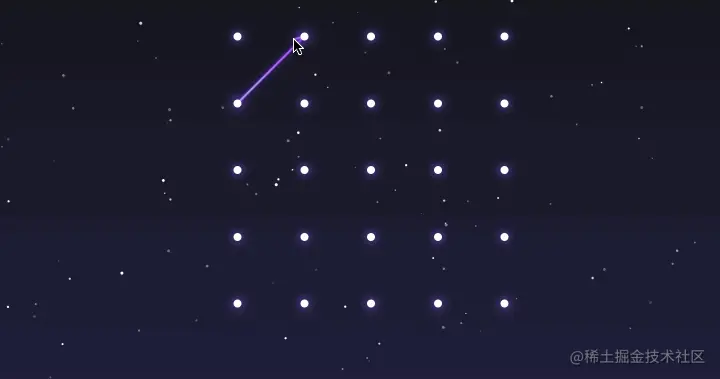
- 手指滑动可连接画布上任意亮点的星星
- 当画布上已经有连接的星星时,可以从已有星星的首部或者尾部开始继续连接
- 同一颗星星不可重复连接,且需要限制连接星星数量的最大最小值
- 其他:兼容PC端、连接星星过程中禁止滚动等
初始化数据和页面渲染

- 定义好连接星星的行列数目(starXNum 和 starYNum),和canvas画布的宽高
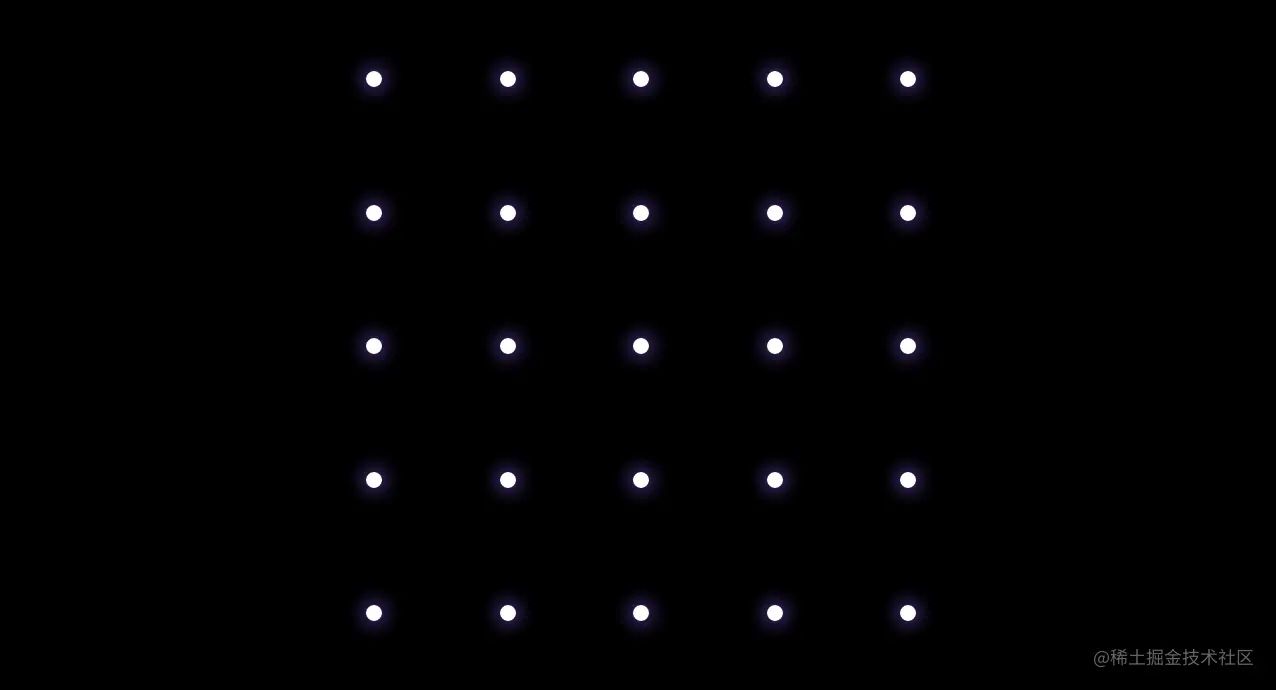
- 根据定义好的行列和canvas画布大小,计算好每颗星星的大小(starX)和横竖间距(spaceX、spaceY),初始化星星, 这里一开始想通过canvas渲染星星到画布上,但是由于呈现出的小圆点呈锯齿状,视觉体验不好,因此改成用常规div+css画出所有的星星然后通过计算距离渲染(如上图)
| <div class="starMap" ref="starMap"> | |
| <canvas | |
| id="starMap" | |
| ref="canvas" | |
| class="canvasBox" | |
| :width="width" | |
| :height="height" | |
| :style="{ width, height }" | |
| @touchstart="touchStart" | |
| @touchmove="touchMove" | |
| @touchend="touchEnd" | |
| @mousedown="touchStart" | |
| @mousemove="touchMove" | |
| @mouseup="touchEnd" | |
| @mouseout="touchEnd" | |
| @mouseenter="touchStart" | |
| ></canvas> | |
| <div class="starsList"> | |
| <div v-for="n in starXNum" :key="n" class="starColBox" :style="{ marginBottom: `${spaceY}px` }"> | |
| <div v-for="j in starYNum" :key="j" class="starRow" :style="{ marginRight: `${spaceX}px` }"> | |
| <div :class="['starIcon', showStar(n, j) && 'show']" :style="{ width: `${starX}px`, height: `${starX}px` }"> | |
| <div :class="['starCenter', isSelectedStar(n, j) && `animate-${getRandom(0, 2, 0)}`]"></div> | |
| </div> | |
| </div> | |
| </div> | |
| </div> | |
| <canvas id="judgeCanvas" :width="width" :height="height" class="judgeCanvas" :style="{ width, height }"></canvas> | |
| </div> | |
| /* | |
| * this.width=画布宽 | |
| * this.height=画布高 | |
| * this.starX=星星的大小,宽高相等不做区分 | |
| */ | |
| spaceX () { // 星星横向间距 | |
| return (this.width - this.starX * this.starXNum) / 4 | |
| } | |
| spaceY () { // 星星纵向间距 | |
| return (this.height - this.starX * this.starYNum) / 4 | |
| } |
初始化canvas画布和基础数据
- 通过 canvas.getContext('2d') ➚ 获取绘图区域
- 定义一个数组pointIndexArr来存储最原始画布上所有可能的星星,再定义数组 pointPos 存储初当前展示的所有星星的坐标(以当前canvas画布左上角的坐标为圆点),用于手指滑动过程中判断是否经过某个点
- 定义数组 points 存放画布上已经连接的星星
- 设置canvas绘图的样式,如连接线的宽度 lineWidth,模糊度 lineBlurWidth,设置canvas连接线色值 strokeStyle = '#c9b8ff',连接线结束时为圆形的线帽 lineCap = 'round' 。
| function setData () { // 初始化canvas数据 | |
| this.initStarPos() | |
| this.lineWidth = 2 // 连接线宽度 | |
| this.lineBlurWidth = 6 // 连接线shadow宽 | |
| this.canvas = document.getElementById('starMap') | |
| if (!this.canvas) return console.error('starMap: this.canvas is null') | |
| this.ctx = this.canvas.getContext('2d') | |
| this.ctx.strokeStyle = '#c9b8ff' | |
| this.ctx.lineCap = 'round' | |
| this.ctx.lineJoin = 'bevel' | |
| const judgeCanvas = document.getElementById('judgeCanvas') | |
| this.judgeCtx = judgeCanvas.getContext('2d') | |
| } | |
| function initStarPos () { // 初始化星星位置 | |
| const arr = this.pointIndexArr = this.initPointShowArr() | |
| const pointPos = [] | |
| /** | |
| * spaceX=横向间距;spaceY:纵向间距 | |
| * 星星中点x位置: 星星/2 + (星星的尺寸 + 横向间距)* 前面的星星数量 | |
| * 星星中点y位置: 星星/2 + (星星的尺寸 + 竖向间距)* 前面的星星数量 | |
| * pointPos=所有页面渲染的星星(x, y)坐标 | |
| */ | |
| arr.forEach(item => { | |
| let x = 0 | |
| let y = 0 | |
| x = this.starX / 2 + (this.starX + this.spaceX) * (item % this.starXNum) | |
| y = this.starX / 2 + (this.starX + this.spaceY) * Math.floor(item / this.starXNum) | |
| pointPos.push({ x, y, index: item }) | |
| }) | |
| this.pointPos = [...pointPos] | |
| } | |
| function initPointShowArr () { | |
| const result = [] | |
| const originArr = [] | |
| const arrLen = getRandom(25, this.starXNum * this.starYNum, 0) // 可选择随机选择需要显示星星的数量 getRandom(21, 25, 0) | |
| const starOriginLen = this.starXNum * this.starYNum | |
| for (let i = 0; i < starOriginLen; i++) { | |
| originArr.push(i) | |
| } | |
| // 获取星星展示随机数组后进行排序重组 | |
| for (let i = 0; i < arrLen; i++) { | |
| const random = Math.floor(Math.random() * originArr.length) | |
| if (result.includes(originArr[random])) { | |
| continue | |
| } | |
| result.push(originArr[random]) | |
| originArr.splice(random, 1) | |
| } | |
| result.sort((a, b) => a - b) | |
| return result | |
| } |
touchstart 手指开始触摸事件
监听手指开始触摸事件:
- 判断手指开始触摸的位置是否正好是某颗星星坐标位置。这里首先需要通过 getBoundingClientRect ➚ 方法获取canvas画布相对于整个视口的圆点 (x, y) ,然后将当前触摸点减去圆点位置,即可得当前手指所在点的坐标;
- 通过 indexOfPoint 方法将当前坐标与 pointPos 数组中的星星坐标进行匹配,判断是否要进行canvas画线,当匹配成功,则添加到已连接星星数组中;
- 我们限制了每次连接星星的最大数量,因此每次开始连接点时需要 checkLimit() 校验是否超出最大限制。
- 变量 reconnectStart 来记录是否是在画布上已有星星的基础上连接的星星
| function touchStart (e) { | |
| if (this.checkLimit()) return | |
| this.lockScroll() | |
| const rect = this.$refs.canvas.getBoundingClientRect() // 此处获取canvas位置,防止页面滚动时位置发生变化 | |
| this.canvasRect = { x: rect.left, y: rect.top, left: rect.left, right: rect.right, bottom: rect.bottom, top: rect.top } | |
| const [x, y] = this.getEventPos(e) | |
| const index = this.indexOfPoint(x, y) | |
| if (this.pointsLen) { | |
| this.reconnectStart = true | |
| } else { | |
| this.pushToPoints(index) | |
| } | |
| } | |
| function getEventPos (event) { // 当前触摸坐标点相对canvas画布的位置 | |
| const x = event.clientX || event.touches[0].clientX | |
| const y = event.clientY || event.touches[0].clientY | |
| return [x - this.canvasRect.x, y - this.canvasRect.y] | |
| } | |
| function indexOfPoint (x, y) { | |
| if (this.pointPos.length === 0) throw new Error('未找到星星坐标') | |
| // 为了减少计算量,将星星当初正方形计算 | |
| for (let i = 0; i < this.pointPos.length; i++) { | |
| if ((Math.abs(x - this.pointPos[i].x) < this.starX / 1.5) && (Math.abs(y - this.pointPos[i].y) < this.starX / 1.5)) { | |
| return i | |
| } | |
| } | |
| return -1 | |
| } | |
| function pushToPoints (index) { | |
| if (index === -1 || this.points.includes(index)) return false | |
| this.points.push(index) | |
| return true | |
| } | |
| function checkBeyondCanvas (e) { // 校验手指是否超出canvas区域 | |
| const x = e.clientX || e.touches[0].clientX | |
| const y = e.clientY || e.touches[0].clientY | |
| const { left, top, right, bottom } = this.canvasRect | |
| const outDistance = 40 // 放宽边界的判断 | |
| if (x < left - outDistance || x > right + outDistance || y < top - outDistance || y > bottom + outDistance) { | |
| this.connectEnd() | |
| return true | |
| } | |
| return false | |
| } |
touchmove 监听手指滑动事件
监听手指滑动事件:
- 在手指滑动过程中,获取每个点的坐标(x, y), 判断该点是否正好为某颗星星的坐标位置,再调用 draw() 方法画线。
- a. 如果没有移动到星星的位置,则在画布上画出上一个连接星星到当前点的对应的轨迹
- b. 如果移动到了某颗星星的坐标范围,则在上一颗星星和当前星星之间画一条直线,并将该点添加到 points 数组中
- draw 方法中,每次画线前,需要调用canvas的API canvas.clearRect ➚ 清空画布,抹除上一次的状态,重新调用 drawLine 方法按照 points 数组中的点顺序绘制新的星星连线轨迹。
drawLine中涉及到一些canvas的基本方法和属性:
| canvas.beginPath() // 表示开始画线或重置当前路径 | |
| canvas.moveTo(x, y) // 指定目标路径的开始位置,不创建线条 | |
| canvas.lineTo(x, y) // 添加一个新点,创建从该点到画布中最后指定点的线条,不创建线条 | |
| canvas.closePath() // 结束路径,应与开始路径呼应 | |
| canvas.stroke() // 实际地绘制出通过 moveTo() 和 lineTo() 方法定义的路径,默认为黑色 | |
| const grd = canvas.createLinearGradient(x1, y1, x2, y2) // 创建线性渐变的起止坐标 | |
| grd.addColorStop(0, '#c9b8ff') // 定义从 0 到 1 的颜色渐变 | |
| grd.addColorStop(1, '#aa4fff') | |
| canvas.strokeStyle = grd | |
| function touchMove (e) { | |
| console.log('touchMove', e) | |
| if (this.checkBeyondCanvas(e)) return // 防止touchmove移出canvas区域后不松手,滚动后页面位置改变在canvas外其他位置触发连接 | |
| if (this.checkLimit()) return | |
| this.lockScroll() // 手指活动过程中禁止页面滚动 | |
| const [x, y] = this.getEventPos(e) | |
| const idx = this.indexOfPoint(x, y) | |
| if (this.reconnectStart && (idx === this.points[this.pointsLen - 1] || idx !== this.points[0])) { | |
| this.reconnectStart = false | |
| idx === this.points[0] && this.points.reverse() | |
| } | |
| this.pushToPoints(idx) | |
| this.draw(x, y) | |
| } | |
| function draw (x, y) { | |
| if (!this.canvas) return | |
| this.ctx.clearRect(0, 0, this.canvas.width, this.canvas.height) | |
| if (this.pointsLen === 0) return | |
| this.rearrangePoints(x, y) | |
| this.drawLine(x, y) | |
| } | |
| function drawLine (x, y) { | |
| this.ctx.lineWidth = this.lineWidth | |
| const startPos = this.getPointPos(0) | |
| const endPos = this.getPointPos(this.pointsLen - 1) | |
| for (let i = 1; i < this.pointsLen; i++) { | |
| const movePos = i === 1 ? startPos : this.getPointPos(i - 1) | |
| this.drawradientLine(movePos.x, movePos.y, this.getPointPos(i).x, this.getPointPos(i).y, true) | |
| } | |
| if (x !== undefined && y !== undefined) { | |
| this.drawradientLine(endPos.x, endPos.y, x, y, false) | |
| } else { | |
| this.ctx.stroke() | |
| } | |
| } | |
| drawradientLine (x1, y1, x2, y2, closePath) { // 渐变线条 | |
| if (!this.ctx) return | |
| this.ctx.beginPath() | |
| this.ctx.moveTo(x1, y1) // 开始位置 | |
| this.ctx.lineTo(x2, y2) // 画到此处 | |
| const grd = this.ctx.createLinearGradient(x1, y1, x2, y2) // 线性渐变的起止坐标 | |
| grd.addColorStop(0, '#c9b8ff') | |
| grd.addColorStop(1, '#aa4fff') | |
| this.ctx.strokeStyle = grd | |
| this.ctx.shadowBlur = this.lineBlurWidth | |
| this.ctx.shadowColor = '#5a00ff' | |
| closePath && this.ctx.closePath() | |
| this.ctx.stroke() | |
| } |
touchend 监听手指触摸结束事件
手指离开屏幕时, 当前连接星星如果少于两颗(至少连接两个点),则清空数组,否则按照当前已连接的点重新绘制线条,当已连接的点小于最小限制时,给用户toast提示。
至此,连接星星的基本功能就完成了,还需要进行一些细节的处理。
| function touchEnd (e) { | |
| this.connectEnd(true) | |
| } | |
| connectEnd () { | |
| this.unlockScroll() | |
| if (this.pointsLen === 1) { | |
| this.points = [] | |
| } | |
| this.draw() | |
| if (this.pointsLen > 1 && this.pointsLen < this.minLength && !this.reconnectStart) { | |
| this.showToast(`至少连接${this.minLength}颗星星哦~`) | |
| } | |
| } |
页面滚动处理
当页面有滚动条是,连线过程中容易连带着页面滚动,导致触摸点错位,并且用户体验不好。解决方案是:每当手指触摸画布区域开始连接时,先禁止页面的滚动,当手指放开后或离开画布后再恢复页面滚动。
具体代码如下:
| function lockScroll () { | |
| if (this.unlock) return | |
| this.unlock = lockScrollFunc() | |
| } | |
| function unlockScroll () { | |
| if (this.unlock) { | |
| this.unlock() | |
| this.unlock = null | |
| } | |
| } | |
| function unLockScrollFunc () { | |
| const str = document.body.getAttribute(INTERNAL_LOCK_KEY) | |
| if (!str) return | |
| try { | |
| const { height, pos, top, left, right, scrollY } = JSON.parse(str) | |
| document.documentElement.style.height = height | |
| const bodyStyle = document.body.style | |
| bodyStyle.position = pos | |
| bodyStyle.top = top | |
| bodyStyle.left = left | |
| bodyStyle.right = right | |
| window.scrollTo(0, scrollY) | |
| setTimeout(() => { | |
| document.body.removeAttribute(LOCK_BODY_KEY) | |
| document.body.removeAttribute(INTERNAL_LOCK_KEY) | |
| }, 30) | |
| } catch (e) {} | |
| } | |
| function lockScrollFunc () { | |
| if (isLocked) return unLockScrollFunc | |
| const htmlStyle = document.documentElement.style | |
| const bodyStyle = document.body.style | |
| const scrollY = window.scrollY | |
| const height = htmlStyle.height | |
| const pos = bodyStyle.position | |
| const top = bodyStyle.top | |
| const left = bodyStyle.left | |
| const right = bodyStyle.right | |
| bodyStyle.position = 'fixed' | |
| bodyStyle.top = -scrollY + 'px' | |
| bodyStyle.left = '0' | |
| bodyStyle.right = '0' | |
| htmlStyle.height = '100%' | |
| document.body.setAttribute(LOCK_BODY_KEY, scrollY + '') | |
| document.body.setAttribute(INTERNAL_LOCK_KEY, JSON.stringify({ | |
| height, pos, top, left, right, scrollY | |
| })) | |
| return unLockScrollFunc | |
| } |
连接的两颗星星之间有其他星星时

如上所示,当连接的两颗星星路径上有其他的星星时,视觉上四连接了4颗星星,实际上中间两颗手指未触摸过的星星并未加入到当前绘制星星的数组中,这时候如果想要做最大最小星星数量的限制就会失误,因此这里通过判断方向,将中间两颗星星也接入到已连接星星数组中,每次 draw() 时判断一下。
如下列出了连接所有可能的8种情况和处理步骤:
判断是否有多余的点
判断方向 a.竖线: x1 = x2
- 从上到下: y1 < y2
- 从下到上: y1 > y2 b.横线:y1 = y2
- 从左到右:x1 < x2
- 从右到左:x1 > x2 c.斜线()
- 从上到下:x1 < x2 y1 < y2
- 从下到上:x1 > x2 y1 > y2 d.斜线(/)
- 从上到下:x1 > x2 y1 < y2
- 从下到上:x1 < x2 y1 > y2
给点数组重新排序
与points合并
长度超出最大限制个则从末尾抛出
开始画线
| canvas.isPointInPath(x, y) // 判断点 (x, y)是否在canvas路径的区域内 | |
| function rearrangePoints () { // 根据最后两个点之间连线,如果有多出的点进行重排,否则不处理 | |
| if (this.pointsLen === 1) return | |
| const endPrevPos = this.getPointPos(this.pointsLen - 2) | |
| const endPos = this.getPointPos(this.pointsLen - 1) | |
| const x1 = endPrevPos.x | |
| const y1 = endPrevPos.y | |
| const x2 = endPos.x | |
| const y2 = endPos.y | |
| this.judgeCtx.beginPath() | |
| this.judgeCtx.moveTo(x1, y1) // 开始位置 | |
| this.judgeCtx.lineTo(x2, y2) // 画到此处 | |
| const extraArr = [] | |
| const realArr = [] | |
| this.pointPos.forEach((item, i) => { | |
| if (this.judgeCtx.isPointInStroke(item.x, item.y)) realArr.push(i) | |
| if (this.judgeCtx.isPointInStroke(item.x, item.y) && !this.points.includes(i)) { | |
| extraArr.push(i) | |
| } | |
| }) | |
| if (!extraArr.length) return | |
| const extraPosArr = extraArr.map(item => { | |
| return { ...this.pointPos[item], i: item } | |
| }) | |
| const getExtraSortMap = new Map([ | |
| [[0, -1], (a, b) => a.y - b.y], | |
| [[0, 1], (a, b) => b.y - a.y], | |
| [[-1, 0], (a, b) => a.x - b.x], | |
| [[1, 0], (a, b) => b.x - a.x], | |
| [[-1, -1], (a, b) => (a.x - b.x) && (a.y - b.y)], | |
| [[1, 1], (a, b) => (b.x - a.x) && (b.y - a.y)], | |
| [[1, -1], (a, b) => (b.x - a.x) && (a.y - b.y)], | |
| [[-1, 1], (a, b) => (a.x - b.x) && (b.y - a.y)] | |
| ]) | |
| const extraSortArr = extraPosArr.sort(getExtraSortMap.get([this.getEqualVal(x1, x2), this.getEqualVal(y1, y2)])) | |
| this.points.splice(this.pointsLen - 1, 0, ...(extraSortArr.map(item => item.i))) | |
| this.pointsLen > this.maxLength && this.points.splice(this.maxLength, this.pointsLen - this.maxLength) | |
| } | |
| function getEqualVal (a, b) { | |
| return a - b === 0 ? 0 : a - b > 0 ? 1 : -1 | |
| } |
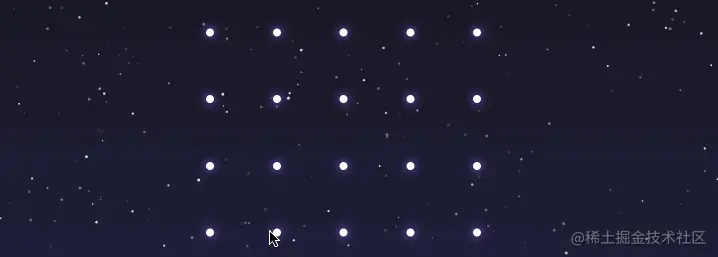
最后找了个星空背景的demo贴到代码中,功能就完成了,关于星空背景的实现感兴趣的可以自己研究一下。