小程序消息推送种类
- 订阅消息
- 模板消息
- 统一服务消息
- 客服消息
由于模板消息「已经下线」,这里的示例消息是订阅消息
实现订阅消息我们开始需要知道几个小程序的参数值
- 小程序appid
- 小程序密钥
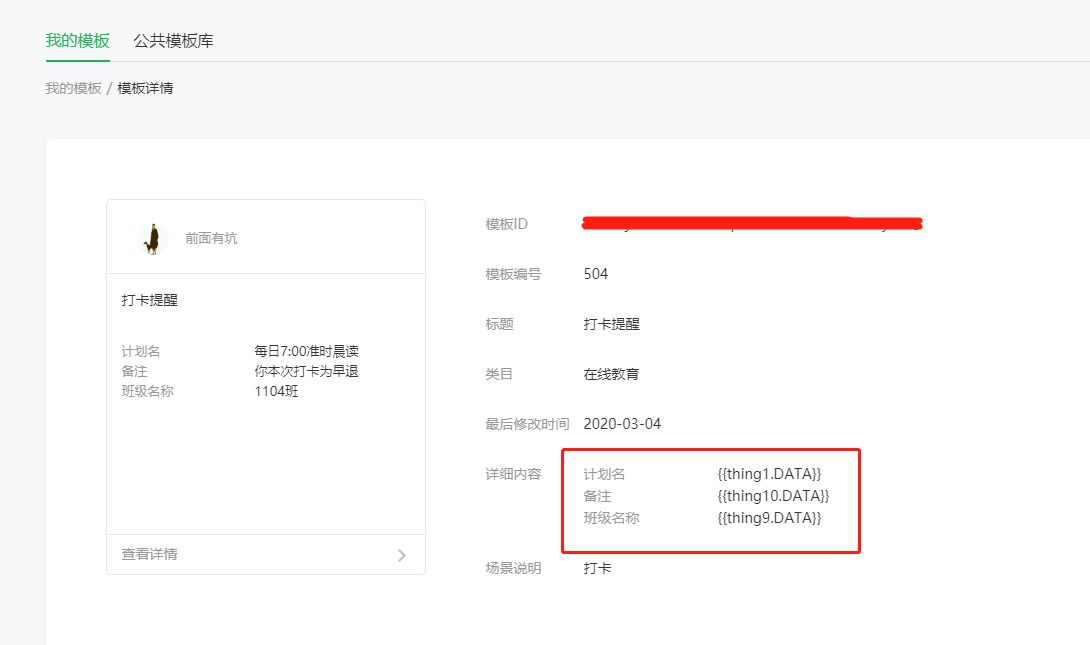
- 小程序订阅模板 id (template_id)
以上参数都可以在小程序管理后台上找到
小程序端
- 开发前需要获取小程序设置模板 ID,没有设置模板消息时可以添加新的模板 https://mp.weixin.qq.com
- 拥有模板 ID 后,需要获取到下发消息权限
用户下发推送消息权限
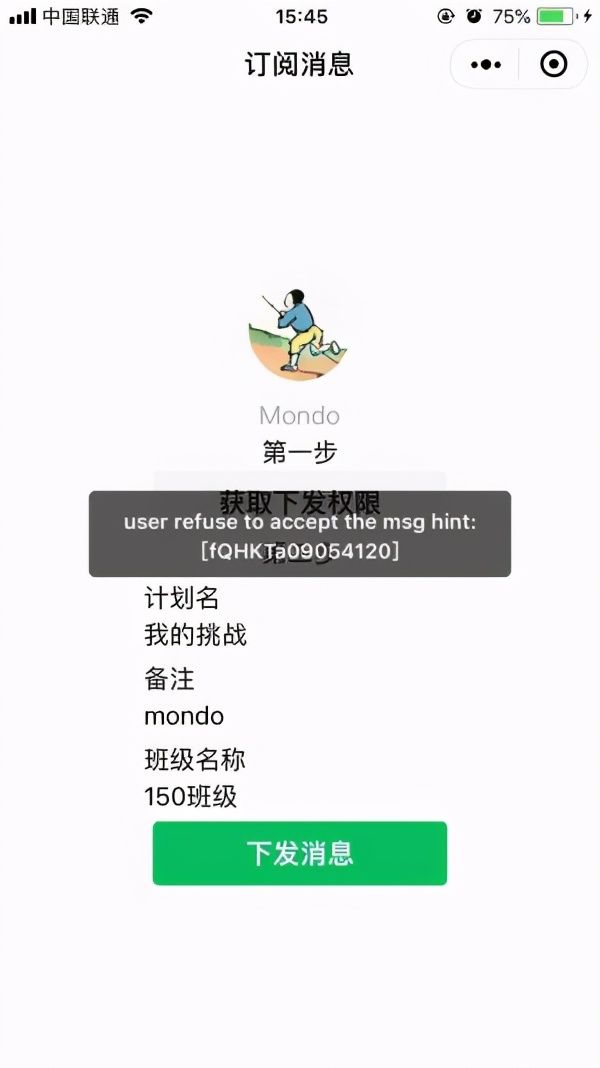
在订单或者其它操作完成时,调起客户端小程序订阅消息界面,获取到用户操作结果
| // index.wxml | |
| <button bindtap="bindSubscribeMessage"> 获取下发权限 </button> | |
| // index.js | |
| bindSubscribeMessage() { | |
| wx.requestSubscribeMessage({ | |
| tmplIds: ['tmplIds'], | |
| success (res) { | |
| console.log(res) | |
| } | |
| }) | |
| } |
传送用户 code
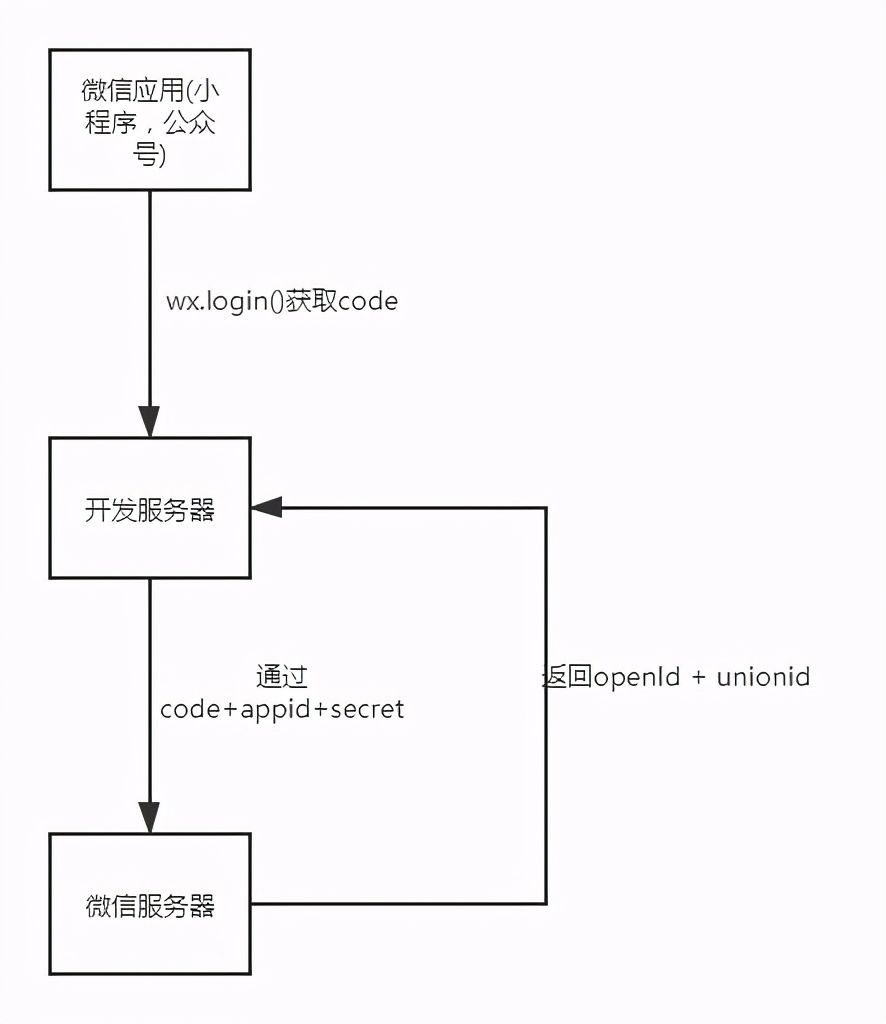
由于消息推送服务端需要小程序 openid 所以我们需要将通过 wx.login 登录小程序将 code 发送给服务端
| bindLogin() { | |
| /* 1. 获取code 请求开发服务器 | |
| * 2. 开发服务器通过 code + appid + secret 请求微信服务器获取 openid | |
| */ | |
| wx.login({ | |
| success: res => { | |
| if (res.code) { | |
| const { task } = this.data; | |
| this.request(Object.assign(task, { code: res.code })); | |
| } | |
| } | |
| }); | |
| } |
服务端
这里由于是自己模拟服务端,使用的 Koa 来实现基本流程,其他后端实现流程应该是一样的
由于推送消息需要小程序 access_token 和 openid,所以我们先要获取这两个参数
获取流程

获取小程序客服端传参 code
通过客户端发送接口 app/send 拿到参数 code
| function getBodyMessage(ctx) { | |
| const { body } = ctx.request; | |
| return body; | |
| } |
获取 openid
通过 code + secret(小程序密钥) + appid 获取 openid
| function getOpenId(js_code) { | |
| return new Promise(resolve => { | |
| http( | |
| { | |
| url: `https://api.weixin.qq.com/sns/jscode2session`, | |
| method: 'get', | |
| qs: { | |
| grant_type: 'authorization_code', | |
| js_code, | |
| appid: APP.appid, | |
| secret: APP.secret | |
| }, | |
| json: true //设置返回的数据为json | |
| }, | |
| (error, response, body) => { | |
| if (!error && response.statusCode == 200) { | |
| resolve(body); | |
| } | |
| } | |
| ); | |
| }); | |
| } |
获取 access_token
| function getAccessToken() { | |
| return new Promise(resolve => { | |
| http( | |
| { | |
| url: `${WX_API}/token`, | |
| method: 'get', | |
| qs: { | |
| grant_type: 'client_credential', // 注意 type 类型 | |
| appid: APP.appid, | |
| secret: APP.secret | |
| }, | |
| json: true //设置返回的数据为json | |
| }, | |
| (error, response, body) => { | |
| if (!error && response.statusCode == 200) { | |
| const { access_token } = body; | |
| resolve(access_token); | |
| } | |
| } | |
| ); | |
| }); | |
| } |
推送消息
我们获取到 openid 和 access_token 后就可以推送消息给用户了
| function sendMessage({ access_token, openid, msg }) { | |
| const requestData = { | |
| touser: openid, | |
| template_id: APP.template_id, | |
| // 模板消息属性和属性值需要注意内容限制 | |
| data: { | |
| thing1: { | |
| value: msg.taskName | |
| }, | |
| thing10: { | |
| value: msg.remarks | |
| }, | |
| thing9: { | |
| value: msg.className | |
| } | |
| } | |
| }; | |
| console.log(requestData); | |
| return new Promise((resolve, reject) => { | |
| http( | |
| { | |
| // 注意 access_token 需要在接口形式传送 | |
| url: `${WX_API}/message/subscribe/send?access_token=${access_token}`, | |
| headers: { | |
| 'content-type': 'application/json' | |
| }, | |
| method: 'post', | |
| body: requestData, // 需要注意是放在 body 上,而不是 form 上 | |
| json: true // 设置返回的数据为json | |
| }, | |
| (error, response, body) => { | |
| if (!error && response.statusCode == 200) { | |
| resolve(body); | |
| } else { | |
| reject(); | |
| } | |
| } | |
| ); | |
| }); | |
| } |
这里我们需要「注意」:
- 下发的消息模板需要注意订阅消息参数值内容限制,需要参考
- 下发模板消息属性需要注意

- 开发模式下,授权一次下发一次消息

- 后端启动 npm run dev
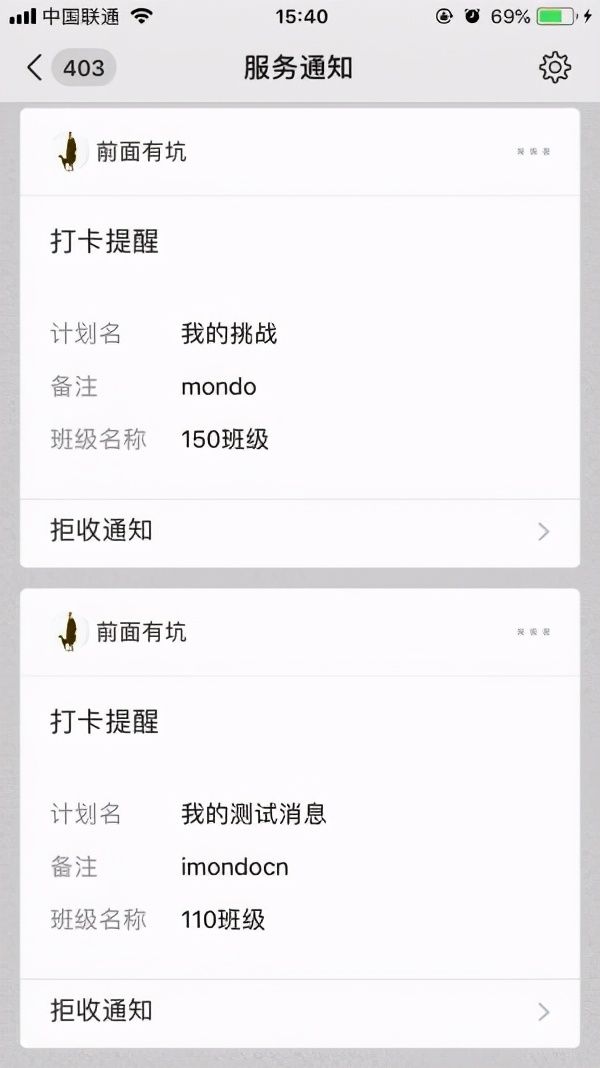
实现效果

2020-03-05更新
小程序模板消息中有两种模板
- 一次性订阅
- 长期订阅
这两个模板根据小程序的服务类型来区分,只有部分服务类型:医疗、民生、交通、教育之类的线下服务开放长期订阅模板库选择。
社区有篇帖子详细的说明了一些区别
