
作者:semlinker 全栈修仙之路
转发链接:
https://mp.weixin.qq.com/s/0c7XmwHDycdfQHKScSfFeQ
前言
想学习 TypeScript 的小伙伴看过来,上一篇 了不起的 TypeScript 入门教程「基础篇」我们讲了7点关于TypeScript 方面的知识点,本文将继续带你一步步学习 TypeScript 入门相关的十四个知识点。内容大纲请看下图:

八、TypeScript 数组
8.1 数组结构
| let x: number, let y: number ,let z: number; | |
| let five_array = [0,1,2,3,4]; | |
| [x,y,z] = five_array; |
8.2 数组展开运算符
| let two_array = [0, 1]; | |
| let five_array = [...two_array, 2, 3, 4]; |
8.3 数组遍历
| let colors: string[] = ["red", "green", "blue"]; | |
| for (let i of colors) { | |
| console.log(i); | |
| } |
九、TypeScript 对象
9.1 对象解构
| let person = { | |
| name: "Semlinker", | |
| gender: "Male", | |
| }; | |
| let { name, gender } = person; |
9.2 对象展开运算符
| let person = { | |
| name: "Semlinker", | |
| gender: "Male", | |
| address: "Xiamen", | |
| }; | |
| // 组装对象 | |
| let personWithAge = { ...person, age: 33 }; | |
| // 获取除了某些项外的其它项 | |
| let { name, ...rest } = person; |
十、TypeScript 接口
在面向对象语言中,接口是一个很重要的概念,它是对行为的抽象,而具体如何行动需要由类去实现。
TypeScript 中的接口是一个非常灵活的概念,除了可用于对类的一部分行为进行抽象以外,也常用于对「对象的形状(Shape)」进行描述。
10.1 对象的形状
| interface Person { | |
| name: string; | |
| age: number; | |
| } | |
| let Semlinker: Person = { | |
| name: "Semlinker", | |
| age: 33, | |
| }; |
10.2 可选 | 只读属性
| interface Person { | |
| readonly name: string; | |
| age?: number; | |
| } |
只读属性用于限制只能在对象刚刚创建的时候修改其值。此外 TypeScript 还提供了 ReadonlyArray<T> 类型,它与 Array<T> 相似,只是把所有可变方法去掉了,因此可以确保数组创建后再也不能被修改。
| let a: number[] = [1, 2, 3, 4]; | |
| let ro: ReadonlyArray<number> = a; | |
| ro[0] = 12; // error! | |
| ro.push(5); // error! | |
| ro.length = 100; // error! | |
| a = ro; // error! |
十一、TypeScript 类
11.1 类的属性与方法
在面向对象语言中,类是一种面向对象计算机编程语言的构造,是创建对象的蓝图,描述了所创建的对象共同的属性和方法。
在 TypeScript 中,我们可以通过 Class 关键字来定义一个类:
| class Greeter { | |
| // 静态属性 | |
| static cname: string = "Greeter"; | |
| // 成员属性 | |
| greeting: string; | |
| // 构造函数 - 执行初始化操作 | |
| constructor(message: string) { | |
| this.greeting = message; | |
| } | |
| // 静态方法 | |
| static getClassName() { | |
| return "Class name is Greeter"; | |
| } | |
| // 成员方法 | |
| greet() { | |
| return "Hello, " + this.greeting; | |
| } | |
| } | |
| let greeter = new Greeter("world"); |
那么成员属性与静态属性,成员方法与静态方法有什么区别呢?这里无需过多解释,我们直接看一下以下编译生成的 ES5 代码:
| "use strict"; | |
| var Greeter = /** @class */ (function () { | |
| // 构造函数 - 执行初始化操作 | |
| function Greeter(message) { | |
| this.greeting = message; | |
| } | |
| // 静态方法 | |
| Greeter.getClassName = function () { | |
| return "Class name is Greeter"; | |
| }; | |
| // 成员方法 | |
| Greeter.prototype.greet = function () { | |
| return "Hello, " + this.greeting; | |
| }; | |
| // 静态属性 | |
| Greeter.cname = "Greeter"; | |
| return Greeter; | |
| }()); | |
| var greeter = new Greeter("world"); |
11.2 访问器
在 TypeScript 中,我们可以通过 getter 和 setter 方法来实现数据的封装和有效性校验,防止出现异常数据。
| let passcode = "Hello TypeScript"; | |
| class Employee { | |
| private _fullName: string; | |
| get fullName(): string { | |
| return this._fullName; | |
| } | |
| set fullName(newName: string) { | |
| if (passcode && passcode == "Hello TypeScript") { | |
| this._fullName = newName; | |
| } else { | |
| console.log("Error: Unauthorized update of employee!"); | |
| } | |
| } | |
| } | |
| let employee = new Employee(); | |
| employee.fullName = "Semlinker"; | |
| if (employee.fullName) { | |
| console.log(employee.fullName); | |
| } |
11.3 类的继承
继承 (Inheritance) 是一种联结类与类的层次模型。指的是一个类(称为子类、子接口)继承另外的一个类(称为父类、父接口)的功能,并可以增加它自己的新功能的能力,继承是类与类或者接口与接口之间最常见的关系。
继承是一种 is-a 关系:
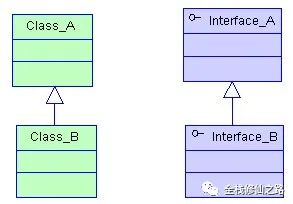
在 TypeScript 中,我们可以通过 extends 关键字来实现继承:
| class Animal { | |
| name: string; | |
| constructor(theName: string) { | |
| this.name = theName; | |
| } | |
| move(distanceInMeters: number = 0) { | |
| console.log(`${this.name} moved ${distanceInMeters}m.`); | |
| } | |
| } | |
| class Snake extends Animal { | |
| constructor(name: string) { | |
| super(name); | |
| } | |
| move(distanceInMeters = 5) { | |
| console.log("Slithering..."); | |
| super.move(distanceInMeters); | |
| } | |
| } | |
| let sam = new Snake("Sammy the Python"); | |
| sam.move(); |
11.4 ECMAScript 私有字段
在 TypeScript 3.8 版本就开始支持ECMAScript 私有字段,使用方式如下:
| class Person { | |
| #name: string; | |
| constructor(name: string) { | |
| this.#name = name; | |
| } | |
| greet() { | |
| console.log(`Hello, my name is ${this.#name}!`); | |
| } | |
| } | |
| let semlinker = new Person("Semlinker"); | |
| semlinker.#name; | |
| // ~~~~~ | |
| // Property '#name' is not accessible outside class 'Person' | |
| // because it has a private identifier. |
与常规属性(甚至使用 private 修饰符声明的属性)不同,私有字段要牢记以下规则:
- 私有字段以 # 字符开头,有时我们称之为私有名称;
- 每个私有字段名称都唯一地限定于其包含的类;
- 不能在私有字段上使用 TypeScript 可访问性修饰符(如 public 或 private);
- 私有字段不能在包含的类之外访问,甚至不能被检测到。
十二、TypeScript 泛型
软件工程中,我们不仅要创建一致的定义良好的 API,同时也要考虑可重用性。 组件不仅能够支持当前的数据类型,同时也能支持未来的数据类型,这在创建大型系统时为你提供了十分灵活的功能。
在像 C# 和 Java 这样的语言中,可以使用泛型来创建可重用的组件,一个组件可以支持多种类型的数据。 这样用户就可以以自己的数据类型来使用组件。
设计泛型的关键目的是在成员之间提供有意义的约束,这些成员可以是:类的实例成员、类的方法、函数参数和函数返回值。
泛型(Generics)是允许同一个函数接受不同类型参数的一种模板。相比于使用 any 类型,使用泛型来创建可复用的组件要更好,因为泛型会保留参数类型。
12.1 泛型接口
| interface GenericIdentityFn<T> { | |
| (arg: T): T; | |
| } |
12.2 泛型类
| class GenericNumber<T> { | |
| zeroValue: T; | |
| add: (x: T, y: T) => T; | |
| } | |
| let myGenericNumber = new GenericNumber<number>(); | |
| myGenericNumber.zeroValue = 0; | |
| myGenericNumber.add = function (x, y) { | |
| return x + y; | |
| }; |
12.3 泛型变量
对刚接触 TypeScript 泛型的小伙伴来说,看到 T 和 E,还有 K 和 V 这些泛型变量时,估计会一脸懵逼。其实这些大写字母并没有什么本质的区别,只不过是一个约定好的规范而已。也就是说使用大写字母 A-Z 定义的类型变量都属于泛型,把 T 换成 A,也是一样的。下面我们介绍一下一些常见泛型变量代表的意思:
- T(Type):表示一个 TypeScript 类型
- K(Key):表示对象中的键类型
- V(Value):表示对象中的值类型
- E(Element):表示元素类型
12.4 泛型工具类型
为了方便开发者 TypeScript 内置了一些常用的工具类型,比如 Partial、Required、Readonly、Record 和 ReturnType 等。出于篇幅考虑,这里我们只简单介绍 Partial 工具类型。不过在具体介绍之前,我们得先介绍一些相关的基础知识,方便读者自行学习其它的工具类型。
1.typeof
在 TypeScript 中,typeof 操作符可以用来获取一个变量声明或对象的类型。
| interface Person { | |
| name: string; | |
| age: number; | |
| } | |
| const sem: Person = { name: 'semlinker', age: 30 }; | |
| type Sem= typeof sem; // -> Person | |
| function toArray(x: number): Array<number> { | |
| return [x]; | |
| } | |
| type Func = typeof toArray; // -> (x: number) => number[] |
2.keyof
keyof 操作符可以用来一个对象中的所有 key 值:
| interface Person { | |
| name: string; | |
| age: number; | |
| } | |
| type K1 = keyof Person; // "name" | "age" | |
| type K2 = keyof Person[]; // "length" | "toString" | "pop" | "push" | "concat" | "join" | |
| type K3 = keyof { [x: string]: Person }; // string | number |
3.in
in 用来遍历枚举类型:
| type Keys = "a" | "b" | "c" | |
| type Obj = { | |
| [p in Keys]: any | |
| } // -> { a: any, b: any, c: any } |
4.infer
在条件类型语句中,可以用 infer 声明一个类型变量并且对它进行使用。
| type ReturnType<T> = T extends ( | |
| ...args: any[] | |
| ) => infer R ? R : any; |
以上代码中 infer R 就是声明一个变量来承载传入函数签名的返回值类型,简单说就是用它取到函数返回值的类型方便之后使用。
5.extends
有时候我们定义的泛型不想过于灵活或者说想继承某些类等,可以通过 extends 关键字添加泛型约束。
| interface ILengthwise { | |
| length: number; | |
| } | |
| function loggingIdentity<T extends ILengthwise>(arg: T): T { | |
| console.log(arg.length); | |
| return arg; | |
| } |
现在这个泛型函数被定义了约束,因此它不再是适用于任意类型:
loggingIdentity(3); // Error, number doesn't have a .length property
这时我们需要传入符合约束类型的值,必须包含必须的属性:
loggingIdentity({length: 10, value: 3});
6.Partial
Partial<T> 的作用就是将某个类型里的属性全部变为可选项 ?。
定义:
| /** | |
| * node_modules/typescript/lib/lib.es5.d.ts | |
| * Make all properties in T optional | |
| */ | |
| type Partial<T> = { | |
| [P in keyof T]?: T[P]; | |
| }; |
在以上代码中,首先通过 keyof T 拿到 T 的所有属性名,然后使用 in进行遍历,将值赋给 P,最后通过 T[P] 取得相应的属性值。中间的 ?号,用于将所有属性变为可选。
示例:
| interface Todo { | |
| title: string; | |
| description: string; | |
| } | |
| function updateTodo(todo: Todo, fieldsToUpdate: Partial<Todo>) { | |
| return { ...todo, ...fieldsToUpdate }; | |
| } | |
| const todo1 = { | |
| title: "organize desk", | |
| description: "clear clutter", | |
| }; | |
| const todo2 = updateTodo(todo1, { | |
| description: "throw out trash", | |
| }); |
在上面的 updateTodo 方法中,我们利用 Partial<T> 工具类型,定义fieldsToUpdate 的类型为 Partial<Todo>,即:
| { | |
| title?: string | undefined; | |
| description?: string | undefined; | |
| } |
十三、TypeScript 装饰器
13.1 装饰器是什么
- 它是一个表达式
- 该表达式被执行后,返回一个函数
- 函数的入参分别为 target、name 和 descriptor
- 执行该函数后,可能返回 descriptor 对象,用于配置 target 对象
13.2 装饰器的分类
- 类装饰器(Class decorators)
- 属性装饰器(Property decorators)
- 方法装饰器(Method decorators)
- 参数装饰器(Parameter decorators)
13.3 类装饰器
类装饰器声明:
| declare type ClassDecorator = <TFunction extends Function>( | |
| target: TFunction | |
| ) => TFunction | void; |
类装饰器顾名思义,就是用来装饰类的。它接收一个参数:
- target: TFunction - 被装饰的类
看完第一眼后,是不是感觉都不好了。没事,我们马上来个例子:
| function Greeter(target: Function): void { | |
| target.prototype.greet = function (): void { | |
| console.log("Hello Semlinker!"); | |
| }; | |
| } | |
| @Greeter | |
| class Greeting { | |
| constructor() { | |
| // 内部实现 | |
| } | |
| } | |
| let myGreeting = new Greeting(); | |
| myGreeting.greet(); // console output: 'Hello Semlinker!'; |
上面的例子中,我们定义了 Greeter 类装饰器,同时我们使用了 @Greeter 语法糖,来使用装饰器。
友情提示:读者可以直接复制上面的代码,在 TypeScript Playground 中运行查看结果。
有的读者可能想问,例子中总是输出 Hello Semlinker! ,能自定义输出的问候语么 ?这个问题很好,答案是可以的。
具体实现如下:
| function Greeter(greeting: string) { | |
| return function (target: Function) { | |
| target.prototype.greet = function (): void { | |
| console.log(greeting); | |
| }; | |
| }; | |
| } | |
| @Greeter("Hello TS!") | |
| class Greeting { | |
| constructor() { | |
| // 内部实现 | |
| } | |
| } | |
| let myGreeting = new Greeting(); | |
| myGreeting.greet(); // console output: 'Hello TS!'; |
13.4 属性装饰器
属性装饰器声明:
| declare type PropertyDecorator = (target:Object, | |
| propertyKey: string | symbol ) => void; |
属性装饰器顾名思义,用来装饰类的属性。它接收两个参数:
- target: Object - 被装饰的类
- propertyKey: string | symbol - 被装饰类的属性名
趁热打铁,马上来个例子热热身:
| function logProperty(target: any, key: string) { | |
| delete target[key]; | |
| const backingField = "_" + key; | |
| Object.defineProperty(target, backingField, { | |
| writable: true, | |
| enumerable: true, | |
| configurable: true | |
| }); | |
| // property getter | |
| const getter = function (this: any) { | |
| const currVal = this[backingField]; | |
| console.log(`Get: ${key} => ${currVal}`); | |
| return currVal; | |
| }; | |
| // property setter | |
| const setter = function (this: any, newVal: any) { | |
| console.log(`Set: ${key} => ${newVal}`); | |
| this[backingField] = newVal; | |
| }; | |
| // Create new property with getter and setter | |
| Object.defineProperty(target, key, { | |
| get: getter, | |
| set: setter, | |
| enumerable: true, | |
| configurable: true | |
| }); | |
| } | |
| class Person { | |
| public name: string; | |
| constructor(name : string) { | |
| this.name = name; | |
| } | |
| } | |
| const p1 = new Person("semlinker"); | |
| p1.name = "kakuqo"; |
以上代码我们定义了一个 logProperty 函数,来跟踪用户对属性的操作,当代码成功运行后,在控制台会输出以下结果:
| Set: name => semlinker | |
| Set: name => kakuqo |
13.5 方法装饰器
方法装饰器声明:
| declare type MethodDecorator = <T>(target:Object, propertyKey: string | symbol, | |
| descriptor: TypePropertyDescript<T>) => TypedPropertyDescriptor<T> | void; |
方法装饰器顾名思义,用来装饰类的方法。它接收三个参数:
- target: Object - 被装饰的类
- propertyKey: string | symbol - 方法名
- descriptor: TypePropertyDescript - 属性描述符
废话不多说,直接上例子:
| function LogOutput(tarage: Function, key: string, descriptor: any) { | |
| let originalMethod = descriptor.value; | |
| let newMethod = function(...args: any[]): any { | |
| let result: any = originalMethod.apply(this, args); | |
| if(!this.loggedOutput) { | |
| this.loggedOutput = new Array<any>(); | |
| } | |
| this.loggedOutput.push({ | |
| method: key, | |
| parameters: args, | |
| output: result, | |
| timestamp: new Date() | |
| }); | |
| return result; | |
| }; | |
| descriptor.value = newMethod; | |
| } | |
| class Calculator { | |
| double (num: number): number { | |
| return num * 2; | |
| } | |
| } | |
| let calc = new Calculator(); | |
| calc.double(11); | |
| // console ouput: [{method: "double", output: 22, ...}] | |
| console.log(calc.loggedOutput); |
下面我们来介绍一下参数装饰器。
13.6 参数装饰器
参数装饰器声明:
| declare type ParameterDecorator = (target: Object, propertyKey: string | symbol, | |
| parameterIndex: number ) => void |
参数装饰器顾名思义,是用来装饰函数参数,它接收三个参数:
- target: Object - 被装饰的类
- propertyKey: string | symbol - 方法名
- parameterIndex: number - 方法中参数的索引值
| function Log(target: Function, key: string, parameterIndex: number) { | |
| let functionLogged = key || target.prototype.constructor.name; | |
| console.log(`The parameter in position ${parameterIndex} at ${functionLogged} has | |
| been decorated`); | |
| } | |
| class Greeter { | |
| greeting: string; | |
| constructor( phrase: string) { | |
| this.greeting = phrase; | |
| } | |
| } | |
| // console output: The parameter in position 0 | |
| // at Greeter has been decorated |
介绍完 TypeScript 入门相关的基础知识,猜测很多刚入门的小伙伴已有“从入门到放弃” 的想法,最后我们来简单介绍一下编译上下文。
十四、编译上下文
14.1 tsconfig.json 的作用
- 用于标识 TypeScript 项目的根路径;
- 用于配置 TypeScript 编译器;
- 用于指定编译的文件。
14.2 tsconfig.json 重要字段
- files - 设置要编译的文件的名称;
- include - 设置需要进行编译的文件,支持路径模式匹配;
- exclude - 设置无需进行编译的文件,支持路径模式匹配;
- compilerOptions - 设置与编译流程相关的选项。
14.3 compilerOptions 选项
compilerOptions 支持很多选项,常见的有 baseUrl、 target、baseUrl、 moduleResolution 和 lib 等。
compilerOptions 每个选项的详细说明如下:
| { | |
| "compilerOptions": { | |
| /* 基本选项 */ | |
| "target": "es5", // 指定 ECMAScript 目标版本: 'ES3' (default), 'ES5', 'ES6'/'ES2015', 'ES2016', 'ES2017', or 'ESNEXT' | |
| "module": "commonjs", // 指定使用模块: 'commonjs', 'amd', 'system', 'umd' or 'es2015' | |
| "lib": [], // 指定要包含在编译中的库文件 | |
| "allowJs": true, // 允许编译 javascript 文件 | |
| "checkJs": true, // 报告 javascript 文件中的错误 | |
| "jsx": "preserve", // 指定 jsx 代码的生成: 'preserve', 'react-native', or 'react' | |
| "declaration": true, // 生成相应的 '.d.ts' 文件 | |
| "sourceMap": true, // 生成相应的 '.map' 文件 | |
| "outFile": "./", // 将输出文件合并为一个文件 | |
| "outDir": "./", // 指定输出目录 | |
| "rootDir": "./", // 用来控制输出目录结构 --outDir. | |
| "removeComments": true, // 删除编译后的所有的注释 | |
| "noEmit": true, // 不生成输出文件 | |
| "importHelpers": true, // 从 tslib 导入辅助工具函数 | |
| "isolatedModules": true, // 将每个文件做为单独的模块 (与 'ts.transpileModule' 类似). | |
| /* 严格的类型检查选项 */ | |
| "strict": true, // 启用所有严格类型检查选项 | |
| "noImplicitAny": true, // 在表达式和声明上有隐含的 any类型时报错 | |
| "strictNullChecks": true, // 启用严格的 null 检查 | |
| "noImplicitThis": true, // 当 this 表达式值为 any 类型的时候,生成一个错误 | |
| "alwaysStrict": true, // 以严格模式检查每个模块,并在每个文件里加入 'use strict' | |
| /* 额外的检查 */ | |
| "noUnusedLocals": true, // 有未使用的变量时,抛出错误 | |
| "noUnusedParameters": true, // 有未使用的参数时,抛出错误 | |
| "noImplicitReturns": true, // 并不是所有函数里的代码都有返回值时,抛出错误 | |
| "noFallthroughCasesInSwitch": true, // 报告 switch 语句的 fallthrough 错误。(即,不允许 switch 的 case 语句贯穿) | |
| /* 模块解析选项 */ | |
| "moduleResolution": "node", // 选择模块解析策略: 'node' (Node.js) or 'classic' (TypeScript pre-1.6) | |
| "baseUrl": "./", // 用于解析非相对模块名称的基目录 | |
| "paths": {}, // 模块名到基于 baseUrl 的路径映射的列表 | |
| "rootDirs": [], // 根文件夹列表,其组合内容表示项目运行时的结构内容 | |
| "typeRoots": [], // 包含类型声明的文件列表 | |
| "types": [], // 需要包含的类型声明文件名列表 | |
| "allowSyntheticDefaultImports": true, // 允许从没有设置默认导出的模块中默认导入。 | |
| /* Source Map Options */ | |
| "sourceRoot": "./", // 指定调试器应该找到 TypeScript 文件而不是源文件的位置 | |
| "mapRoot": "./", // 指定调试器应该找到映射文件而不是生成文件的位置 | |
| "inlineSourceMap": true, // 生成单个 soucemaps 文件,而不是将 sourcemaps 生成不同的文件 | |
| "inlineSources": true, // 将代码与 sourcemaps 生成到一个文件中,要求同时设置了 --inlineSourceMap 或 --sourceMap 属性 | |
| /* 其他选项 */ | |
| "experimentalDecorators": true, // 启用装饰器 | |
| "emitDecoratorMetadata": true // 为装饰器提供元数据的支持 | |
| } | |
| } |
看到这里的读者都是“真爱”,如果你还意犹未尽,那就来看看本人整理的 Github 上 1.5K+ 的开源项目:awesome-typescript。
https://github.com/semlinker/awesome-typescript
作者:semlinker 全栈修仙之路
转发链接:
https://mp.weixin.qq.com/s/0c7XmwHDycdfQHKScSfFeQ