在网页中观看和分享视频内容是一个很常见的功能,多年来,视频嵌入网页的方式发生了变化。现在,我们在现代浏览器中使用 <video> 标签就可以添加视频文件到网页上,该标签支持多个视频格式。

当使用 <video> 标签时的主要警告是渲染的视频播放器会因浏览器而异,如果你想提供一致的用户体验,使用原生操作并不理想。这就是为什么构建自定义控件而不是使用浏览器默认界面很有用的原因。
在这个教程中,我将会带你使用 JavaScript 构建一个自定义的视频播放器。目标是如何利用浏览器 HTML5 Media API 来提升默认设置的体验。
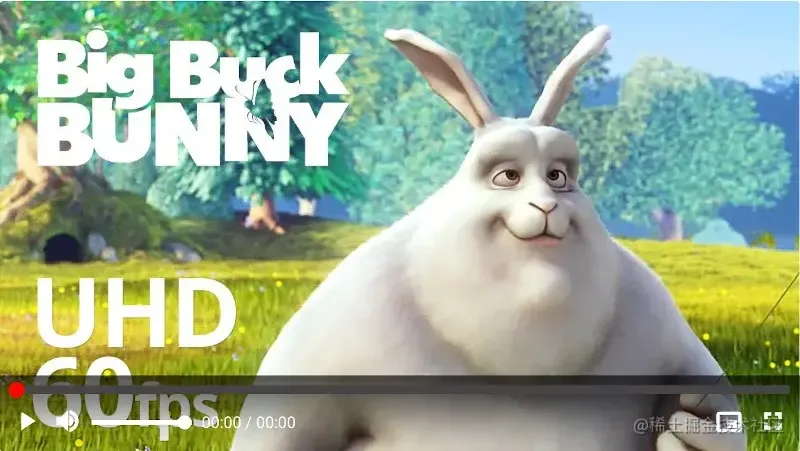
我们将在本教程中构建一个看起来像 YouTube 视频播放器,因为我认为复制大多数人已经熟悉的一些功能是个好主意。
当然,我们并不会实现 YouTube 播放器上的所有功能,因为这会让教程更长、更复杂。然而,一旦你完成了本教程,我相信你能够很轻松地加入新的功能。
你可以查看我们将构建的线上案例,或者在 GitHub 上查看源码。
准备条件
你需要对 JavaScript 和 DOM 有基本的了解,才能继续学习本教程。我推荐你使用最新版本的谷歌浏览器,因为在本文编写时,我们将添加的一些功能(比如画中画功能)仅适用于谷歌(Webkit 内核)浏览器。
开始
我在 GitHub 中为本教程准备了开始文件。有需要的话,你可以克隆到自己的机器上,并在编辑器中打开。你将分别在 index.html 和 style.css 中找到播放器的标记文档文件及其样式,以及我们用来测试播放器的视频文件。index.js 将是我们添加播放器工作所需的所有 JavaScript 代码的地方。
在终端中运行 npm install 来安装 browser-sync 作为启动 Web 服务器的开发依赖项,其在任何文件更改时自动刷新页面。然后 npm start 启动项目,监听浏览器 http://localhost:3000。
目前都做了些什么
现在,视频播放器保留本机浏览器控件,正如你所期待那样工作。自定义控件已经被定义在 #video-controls 元素,但是它们被隐藏了。
| <!-- index.html --> | |
| . . . | |
| <div class="video-controls hidden" id="video-controls"> | |
| <!-- Custom controls are defined here --> | |
| </div> | |
| . . . |
即使我们要为控件实现自定义界面,保留 <video> 元素上的 controls 属性是个很好的主意,这样用户不管出于什么原因禁用 JavaScript,浏览器本机的控件依旧可使用。对于其他人,本机空间可以轻松隐藏并替换成自定义控件,这稍后进行演示。
海报图像已经添加到视频中,设置 preload属性值为 metadata,这指示浏览器仅获取视频元数据(比如 duration)。为了让事情简单点,我们只添加 MP4 类型的视频源文件,因为该类型的视频被所有主流浏览器兼容,是一个非常安全的默认值。有关视频格式和浏览器兼容性的更多信息,可参考该文档。
| <!-- index.html --> | |
| . . . | |
| <video controls class="video" id="video" preload="metadata" poster="poster.jpg"> | |
| <source src="video.mp4" type="video/mp4"></source> | |
| </video> | |
| . . . |
隐藏自带控件
我们首先需要做的事情是在确认浏览器支持 HTML5 视频后,隐藏默认视频控件并提供我们自己的界面。在你的 index.js 文件中输入下面代码片段来实现上面的功能:
| // index.js | |
| // Select elements here | |
| const video = document.getElementById('video'); | |
| const videoControls = document.getElementById('video-controls'); | |
| const videoWorks = !!document.createElement('video').canPlayType; | |
| if (videoWorks) { | |
| video.controls = false; | |
| videoControls.classList.remove('hidden'); | |
| } |
canPlayType 属性是我们检查浏览器对视频格式支持的方式。要使用它,我们需要创建 <video> 元素的实例并将检查是否支持 canPlayType。如果支持,则可以安全地假设其支持 HTML 视频,然后禁用默认控件,启用我们自定义的控件。
默认控件已经被替换成自定义控件
切换播放状态
让我们从基础开始。我们需要通过点击播放按钮来播放或者暂停视频,并且更改应该匹配视频状态的图标。我们从获取视频和播放按钮开始,代码在 index.js 顶部,如下:
| // index.js | |
| const playButton = document.getElementById('play'); |
然后,我们创建一个函数来切换视频播放状态:
| // index.js | |
| // Add functions here | |
| // togglePlay toggles the playback state of the video. | |
| // If the video playback is paused or ended, the video is played | |
| // 如果视频播放是暂停或者视频结尾状态,视频播放 | |
| // otherwise, the video is paused | |
| // 否则,视频暂停 | |
| function togglePlay() { | |
| if (video.paused || video.ended) { | |
| video.play(); | |
| } else { | |
| video.pause(); | |
| } | |
| } |
最后,我们创建一个时间监听器,当 playButton 按钮被点击后执行 togglePlay 方法。
| // index.js | |
| // Add eventlisteners here | |
| playButton.addEventListener('click', togglePlay); |
够简单吧?通过点击浏览器中的播放按钮对其测试。它应该正确地播放和暂停视频。

这实际上为本教程的其他部分定下了基调。我们通常会选择一个视频控件,创建一个实现特定功能的函数,通过事件监听器将其连接起来。
我们继续,根据视频状态更新播放按钮。下面是 playButton 的 HTML 文件:
| <!-- index.html --> | |
| . . . | |
| <button data-title="Play (k)" id="play"> | |
| <svg class="playback-icons"> | |
| <use href="#play-icon"></use> | |
| <use class="hidden" href="#pause"></use> | |
| </svg> | |
| </button> | |
| . . . |
在 <svg> 元素中,我们有播放和暂停按钮,但是一次我们只能展示其中一个,另一个则隐藏。现在我们要做的就是切换每个图标的 hidden 类,以便根据视频的状态展示正确的图标。
首先,在 index.js 文件顶部选择图标:
| // index.js | |
| const playbackIcons = document.querySelectorAll('.playback-icons use'); |
接着,在 togglePlay 函数下创建一个函数,用来更新播放按钮:
| // index.js | |
| // updatePlayButton updates the playback icon and tooltip | |
| // depending on the playback state | |
| // 根据播放状态,updatePlayButton 函数更新播放图标和提示 | |
| function updatePlayButton() { | |
| playbackIcons.forEach(icon => icon.classList.toggle('hidden')); | |
| } |
最后,在文件底部添加如下事件监听器:
| // index.js | |
| video.addEventListener('play', updatePlayButton); | |
| video.addEventListener('pause', updatePlayButton); |
当视频播放或者暂停时,updatePlayButton 函数都会被执行,切换每个按钮中的 hidden 类。因为暂停按钮元素默认值是 hidden 类,一旦视频被播放,这个暂停图标出现,播放图标将会隐藏。如果视频被暂停,则会发生相反的情况。你可以在自己浏览器上测试。
额外要做的事情是,当鼠标移动到播放按钮上,需要更新展示的提示文本。默认提示是 play(k),但是当视频正在播放,需要更新提示信息为 pause(k)。k 是我们将在本教程后面添加播放或者暂停视频的键盘快捷键。
如下,更新 updatePlayButton 函数:
| // index.js | |
| function updatePlayButton() { | |
| playbackIcons.forEach(icon => icon.classList.toggle('hidden')); | |
| if (video.paused) { | |
| playButton.setAttribute('data-title', 'Play (k)') | |
| } else { | |
| playButton.setAttribute('data-title', 'Pause (k)') | |
| } | |
| } |
当视频正在播放或者暂停时,鼠标移动到按钮上,应该设置正确的提示文本。
如果你想知道提示信息是怎么展示的,可以看下相关的 CSS:
| // style.css | |
| . . . | |
| button::before { | |
| content: attr(data-title); | |
| position: absolute; | |
| display: none; | |
| right: 0; | |
| top: -50px; | |
| background-color: rgba(0, 0, 0, 0.6); | |
| color: #fff; | |
| font-weight: bold; | |
| padding: 4px 6px; | |
| word-break: keep-all; | |
| white-space: pre; | |
| } | |
| button:hover::before { | |
| display: inline-block; | |
| } | |
| . . . |

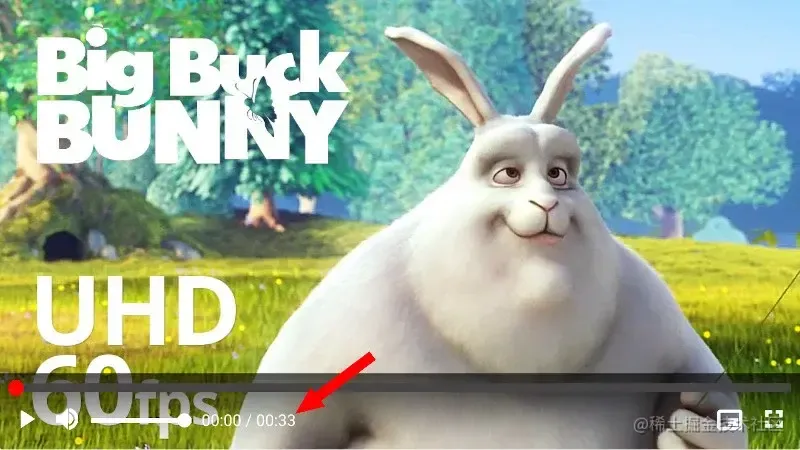
展示视频持续时间和经过时间
展示视频时长很必要,因为这是用户首先想看到的,所以我们接下来将讲解。
下面是持续时长和经过时间的元素标记:
| <!-- index.html --> | |
| <div class="time"> | |
| <time id="time-elapsed">00:00</time> | |
| <span> / </span> | |
| <time id="duration">00:00</time> | |
| </div> |
通过 index.js 选择这两个控件(元素),如下:
| // index.js | |
| const timeElapsed = document.getElementById('time-elapsed'); | |
| const duration = document.getElementById('duration'); |
一旦页面加载完成后,我们将使用 duration 属性展示视频的总时长。这个属性表示的是视频的总秒数,所以在展示之前,我们需要将其转换成分秒。我们创建一个 formatTime 函数,将时间转换成分秒:
| // index.js | |
| // formatTime takes a time length in seconds and returns the time in | |
| // minutes and seconds | |
| function formatTime(timeInSeconds) { | |
| const result = new Date(timeInSeconds * 1000).toISOString().substr(11, 8); | |
| return { | |
| minutes: result.substr(3, 2), | |
| seconds: result.substr(6, 2), | |
| }; | |
| }; |
接着,我们在 formatTime 函数下创建 initializeVideo 函数:
| // index.js | |
| // initializeVideo sets the video duration, and maximum value of the | |
| // progressBar | |
| function initializeVideo() { | |
| const videoDuration = Math.round(video.duration); | |
| const time = formatTime(videoDuration); | |
| duration.innerText = `${time.minutes}:${time.seconds}`; | |
| duration.setAttribute('datetime', `${time.minutes}m ${time.seconds}s`) | |
| } |
如上所示,视频持续时长被四舍五入,格式化为分秒,然后在屏幕上更新。datetime 同步更新为时间字符串,表示视频持续时长。
接着,如下所示,让我们将 initializeVideo 函数连接到 loadedmetadata 监听器上。当元数据被加载之后,将会更新视频的持续时长。
| // index.js | |
| video.addEventListener('loadedmetadata', initializeVideo); |
同理,当视频播放过程中,我们更新播放经过的时间。下面的函数能帮我们实现这个功能:
| // index.js | |
| // updateTimeElapsed indicates how far through the video | |
| // the current playback is | |
| function updateTimeElapsed() { | |
| const time = formatTime(Math.round(video.currentTime)); | |
| timeElapsed.innerText = `${time.minutes}:${time.seconds}`; | |
| timeElapsed.setAttribute('datetime', `${time.minutes}m ${time.seconds}s`) | |
| } |
我们需要 timeupdate 事件监听视频。无论什么时候,视频的 currentTime 属性值更新了,事件就会触发。
| // index.js | |
| video.addEventListener('timeupdate', updateTimeElapsed); |
上面的代码确保视频的 currentTime 更新,经过时间也会适当更新。

更新进度条
接下来我们要做的事情是当视频播放,更新进度条。下面是进度条的元素标志:
| <!-- index.html --> | |
| . . . | |
| <div class="video-progress"> | |
| <progress id="progress-bar" value="0" min="0"></progress> | |
| <input class="seek" id="seek" value="0" min="0" type="range" step="1"> | |
| <div class="seek-tooltip" id="seek-tooltip">00:00</div> | |
| </div> | |
| . . . |
上面,我们有 progress 元素,用于显示任务的进度条,而 range 类型的 input 允许我们快速无缝浏览视频。两个元素我都用同个样式修饰,所以它们有一样的宽高,但是 input 是透明色(除了与进度条内相同的颜色的指示点)。
如果你很好奇,你可以仔细看 CSS 的内容,看看我是怎么做的。让进度条看起来像一个单一的元素是一种 hack,但是我觉得对我们的用例来说很合理。
两者的 min 属性被设置为 0,两者的 value 属性指向当前时间值。它们还需要一个 max 属性,该属性将设置为视频的持续时间(以秒为单位),该属性值来自 video.duration,如上所示。我们可以在 initializeVideo 函数中实现,但是我们得先选择元素:
| // index.js | |
| const progressBar = document.getElementById('progress-bar'); | |
| const seek = document.getElementById('seek'); |
然后如下更新 initializeVideo 函数:
| // index.js | |
| function initializeVideo() { | |
| const videoDuration = Math.round(video.duration); | |
| seek.setAttribute('max', videoDuration); | |
| progressBar.setAttribute('max', videoDuration); | |
| const time = formatTime(videoDuration); | |
| duration.innerText = `${time.minutes}:${time.seconds}`; | |
| duration.setAttribute('datetime', `${time.minutes}m ${time.seconds}s`) | |
| } |
现在,进度条元素的范围输入在 0 和以秒为单位的视频持续时长之间,如属性 min 和 max 属性。正如你将看到的,这使得我们能够在任何时间点轻松地将进度条和时间范围同步。
继续,当视频被播放我们就更新上述元素的值,以便进度条发挥作用。如下,创建 updateProgress 函数:
| // index.js | |
| // updateProgress indicates how far through the video | |
| // the current playback is by updating the progress bar | |
| function updateProgress() { | |
| seek.value = Math.floor(video.currentTime); | |
| progressBar.value = Math.floor(video.currentTime); | |
| } |
然后,在第一个事件监听器下,为 video 添加一个新的名为 timeupdate 事件监听器:
| // index.js | |
| video.addEventListener('timeupdate', updateProgress); |
刷新你的浏览器,然后尝试。当视频被播放,你应该看到进度条更新。

预先跳转
大多数的播放器都允许你点击进度条跳转到视频指定的点,我们的视频播放器也将一样。首先,我们需要选择提示信息元素:
| // index.js | |
| const seekTooltip = document.getElementById('seek-tooltip'); |
然后,添加一个函数,用来当光标移动到进度条上在信息元素里展示时间戳:
| // index.js | |
| // updateSeekTooltip uses the position of the mouse on the progress bar to | |
| // roughly work out what point in the video the user will skip to if | |
| // the progress bar is clicked at that point | |
| function updateSeekTooltip(event) { | |
| const skipTo = Math.round((event.offsetX / event.target.clientWidth) * parseInt(event.target.getAttribute('max'), 10)); | |
| seek.setAttribute('data-seek', skipTo) | |
| const t = formatTime(skipTo); | |
| seekTooltip.textContent = `${t.minutes}:${t.seconds}`; | |
| const rect = video.getBoundingClientRect(); | |
| seekTooltip.style.left = `${event.pageX - rect.left}px`; | |
| } |
此函数在 seek 元素中,使用光标位置粗略计算用户悬停范围输入框的地方,然后将位置信息存放在 data-seek 属性中,同时更新提示信息以反映该位置的时间戳。
在 seek 控制器中关联 updateSeekTooltip 函数和 mousemove 来查看效果:
| // index.js | |
| seek.addEventListener('mousemove', updateSeekTooltip); |

不管是点击或者拖拽指示点,一旦 seek 元素值发生更改,我们希望跳转到 data-seek 属性设置的时间点。
在 updateSeekTooltip 函数下,创建一个新的名为 skipAhead 的函数:
| // index.js | |
| // skipAhead jumps to a different point in the video when | |
| // the progress bar is clicked | |
| function skipAhead(event) { | |
| const skipTo = event.target.dataset.seek ? event.target.dataset.seek : event.target.value; | |
| video.currentTime = skipTo; | |
| progressBar.value = skipTo; | |
| seek.value = skipTo; | |
| } |
使用 input 事件监控 seek 元素发生更改时,将执行此函数。然后,我们获取 data-seek 的值并检查其是否有效。如果有效,我们获取该值并更新视频播放过的时间和进度条的位置。如果 data-seek 属性不存在(比如在手机端),改为使用 seek 元素的值。
这产生跳转到视频指定位置的效果。
| // index.js | |
| seek.addEventListener('input', skipAhead); |

音频控制
| <!-- index.html --> | |
| . . . | |
| <div class="volume-controls"> | |
| <button data-title="Mute (m)" class="volume-button" id="volume-button"> | |
| <svg> | |
| <use class="hidden" href="#volume-mute"></use> | |
| <use class="hidden" href="#volume-low"></use> | |
| <use href="#volume-high"></use> | |
| </svg> | |
| </button> | |
| <input class="volume" id="volume" value="1" type="range" max="1" min="0" step="0.01"> | |
| </div> | |
| . . . |
在上面代码片段中,你可以找到所有相关音频控件的标记。我们有一个按钮,根据视频音频的状态展示,和一个控制音频范围的 input 元素。
首先,当 #volume 元素的值发生更改,我们要做的就是更改视频的音频大小。我们也要更新视频当前的图标。
正如你所见,音频的输入范围是 0 到 1,并以 0.01 的值递增。以这种方式设置它是为了使其与视频的音量属性值保持一致,该属性值的范围也是从 0 到 1,其中 0 是最低音量,1 是最高音量。
继续,我们选择按钮,图标和输入框,如下 index.js 所示:
| // index.js | |
| const volumeButton = document.getElementById('volume-button'); | |
| const volumeIcons = document.querySelectorAll('.volume-button use'); | |
| const volumeMute = document.querySelector('use[href="#volume-mute"]'); | |
| const volumeLow = document.querySelector('use[href="#volume-low"]'); | |
| const volumeHigh = document.querySelector('use[href="#volume-high"]'); | |
| const volume = document.getElementById('volume'); |
接着,创建一个新的名为 updateVolume 函数,当音频输入框值发生更改,该函数更新视频音频值:
| // index.js | |
| // updateVolume updates the video's volume | |
| // and disables the muted state if active | |
| function updateVolume() { | |
| if (video.muted) { | |
| video.muted = false; | |
| } | |
| video.volume = volume.value; | |
| } |
然后,将其和 volume 元素关联起来,如下:
| // index.js | |
| volume.addEventListener('input', updateVolume); |
到这里,你将意识到当你左滑输入框时,音量减少,反之音量增加。我们需要添加另一个函数来在音量变化时更新图标:
| // index.js | |
| // updateVolumeIcon updates the volume icon so that it correctly reflects | |
| // the volume of the video | |
| function updateVolumeIcon() { | |
| volumeIcons.forEach(icon => { | |
| icon.classList.add('hidden'); | |
| }); | |
| volumeButton.setAttribute('data-title', 'Mute (m)') | |
| if (video.muted || video.volume === 0) { | |
| volumeMute.classList.remove('hidden'); | |
| volumeButton.setAttribute('data-title', 'Unmute (m)') | |
| } else if (video.volume > 0 && video.volume <= 0.5) { | |
| volumeLow.classList.remove('hidden'); | |
| } else { | |
| volumeHigh.classList.remove('hidden'); | |
| } | |
| } |
当这函数执行,所有的图标都会隐藏,然后会根据条件显示其中一个图标。
我们可以通过监听视频 volumechange 事件,在每次音量发生变化时运行 updateVolumeIcon 函数,如下:
| // index.js | |
| video.addEventListener('volumechange', updateVolumeIcon); |
添加上面的更改后,在你浏览上你可以看到下面的效果:

我们需要添加的另一个事件是能够通过单击音量图标使得视频静音和取消静音。我们将创建一个名为 toggleMute 函数:
| // index.js | |
| // toggleMute mutes or unmutes the video when executed | |
| // When the video is unmuted, the volume is returned to the value | |
| // it was set to before the video was muted | |
| function toggleMute() { | |
| video.muted = !video.muted; | |
| if (video.muted) { | |
| volume.setAttribute('data-volume', volume.value); | |
| volume.value = 0; | |
| } else { | |
| volume.value = volume.dataset.volume; | |
| } | |
| } |
当 volumeButton 被点击后运行该函数:
| // index.js | |
| volumeButton.addEventListener('click', toggleMute); |
该函数切换视频 muted 属性的状态为真或者假。当视频被静音,音频值就会存放在 volume 元素 data-volume 属性上,以便当视频取消静音时,我们可以恢复音频状态之前的值。
这里是实操效果:

点击视频播放或者暂停
在很多视频播放器应用中,点击视频本身能够快速进行播放或者暂停,所以,在我们的播放器中也实现它。
我们要做的就是监听 video 上的 click 事件,当事件触发就运行 togglePlay 函数:
| // index.js | |
| video.addEventListener('click', togglePlay); |
虽然这可行,但是让我们通过在播放或者暂停视频时添加一些反馈让这更有趣,就像 YouTube 或者 Netflix 上一样。
这是我们动画的 HTML:
| <!-- index.html --> | |
| . . . | |
| <div class="playback-animation" id="playback-animation"> | |
| <svg class="playback-icons"> | |
| <use class="hidden" href="#play-icon"></use> | |
| <use href="#pause"></use> | |
| </svg> | |
| </div> | |
| . . . |
下面是相关的 CSS:
| // style.css | |
| .playback-animation { | |
| pointer-events: none; | |
| position: absolute; | |
| top: 50%; | |
| left: 50%; | |
| margin-left: -40px; | |
| margin-top: -40px; | |
| width: 80px; | |
| height: 80px; | |
| border-radius: 80px; | |
| background-color: rgba(0, 0, 0, 0.6); | |
| display: flex; | |
| justify-content: center; | |
| align-items: center; | |
| opacity: 0; | |
| } |
.playback-animation 元素通过 opacity 属性,设置默认值是透明色。为了复制 YouTube 中的动效,我们将会使用 Web Animations API 来实现该元素透明度和缩放效果。
在 index.js 文件顶部先选中该元素:
| // index.js | |
| const playbackAnimation = document.getElementById('playback-animation'); |
然后在其他函数下创建下面的函数:
| // index.js | |
| // animatePlayback displays an animation when | |
| // the video is played or paused | |
| function animatePlayback() { | |
| playbackAnimation.animate([ | |
| { | |
| opacity: 1, | |
| transform: "scale(1)", | |
| }, | |
| { | |
| opacity: 0, | |
| transform: "scale(1.3)", | |
| }], { | |
| duration: 500, | |
| }); | |
| } |
animate 函数接受一个关键帧对象数组和一个控制动画时间等的可选对象。
现在,为 video 元素添加第二个 click 事件:
| // index.js | |
| video.addEventListener('click', animatePlayback); |
现在当你点击播放或者暂停视频,可以看到简短的动画效果。

视频全屏
接下来,我们实现全屏功能按钮。为了让视频全屏(包括控制器),我们需要选择 .video-container 元素,然后询问浏览器去全屏放置它(及其子元素)。
在 index.js 文件中选择按钮和视频容器:
| // index.js | |
| const fullscreenButton = document.getElementById('fullscreen-button'); | |
| const videoContainer = document.getElementById('video-container'); |
然后创建一个新的名为 toggleFullScreen 函数:
| // index.js | |
| // toggleFullScreen toggles the full screen state of the video | |
| // If the browser is currently in fullscreen mode, | |
| // then it should exit and vice versa. | |
| function toggleFullScreen() { | |
| if (document.fullscreenElement) { | |
| document.exitFullscreen(); | |
| } else if (document.webkitFullscreenElement) { | |
| // Need this to support Safari | |
| document.webkitExitFullscreen(); | |
| } else if (videoContainer.webkitRequestFullscreen) { | |
| // Need this to support Safari | |
| videoContainer.webkitRequestFullscreen(); | |
| } else { | |
| videoContainer.requestFullscreen(); | |
| } | |
| } |
然后,为 fullScreenButton 元素添加一个 click 事件,如下:
| // index.js | |
| fullscreenButton.onclick = toggleFullScreen; |
toggleFullScreen 函数会先检查 document 是否是全屏模式,如果是则退出到浏览器模式。否则,则将 videoContainer 元素放置在全屏。
在该章节,我们还要做的是当鼠标悬停在按钮上更新全屏图片和提示文本。首先,选择图标:
| // index.js | |
| const fullscreenIcons = fullscreenButton.querySelectorAll('use'); |
然后创建一个函数,当 videoContainer 进行全屏或者退出全屏模式时候更新按钮:
| // index.js | |
| // updateFullscreenButton changes the icon of the full screen button | |
| // and tooltip to reflect the current full screen state of the video | |
| function updateFullscreenButton() { | |
| fullscreenIcons.forEach(icon => icon.classList.toggle('hidden')); | |
| if (document.fullscreenElement) { | |
| fullscreenButton.setAttribute('data-title', 'Exit full screen (f)') | |
| } else { | |
| fullscreenButton.setAttribute('data-title', 'Full screen (f)') | |
| } | |
| } |
最后,为 videoContainer 元素分配 updateFullscreenButton 函数到 onfullscreenchange 事件处理器:
| // index.js | |
| videoContainer.addEventListener('fullscreenchange', updateFullscreenButton); |
嗯,它按预期工作!你可以在自己浏览器上测试或者看下面的 GIF 图。

添加画中画支持
Picture-in-Picture(PiP) API 允许用户在浮动窗口(其中位于其他窗口之上) 中观看视频,这样他们就可以在观看视频的同时将注意力放在其他站点或者应用上。
到目前为止,这个 API 只被少数浏览器支持,所以我们需要对不支持的浏览器隐藏该 PiP 按钮,以便他们看不到使用不了的功能。
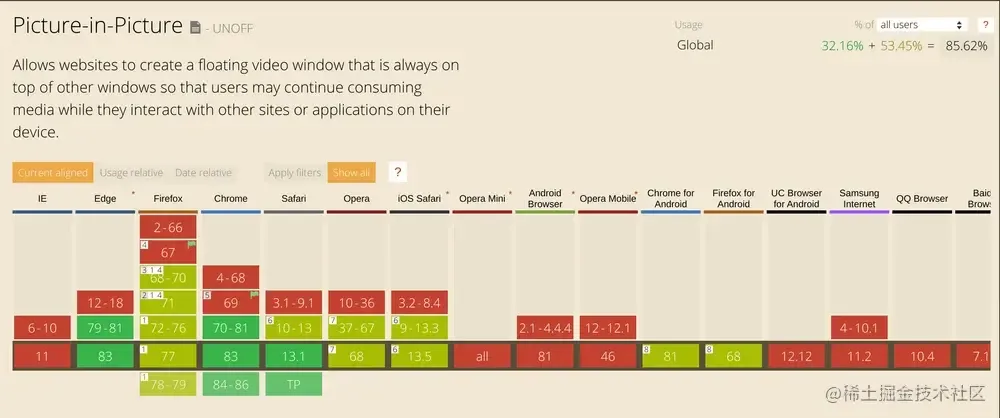
请参考 caniuse.com 获取最新的表格信息。
下面的代码能帮我们实现该功能。在其他事件监听器下添加此代码。
| // index.js | |
| document.addEventListener('DOMContentLoaded', () => { | |
| if (!('pictureInPictureEnabled' in document)) { | |
| pipButton.classList.add('hidden'); | |
| } | |
| }); |
正如本教程我们要做的那样,我们先需要选中相关的控制器:
| // index.js | |
| const pipButton = document.getElementById('pip-button') |
然后创建切换 Picture-in-Picture 模式的函数:
| // index.js | |
| // togglePip toggles Picture-in-Picture mode on the video | |
| async function togglePip() { | |
| try { | |
| if (video !== document.pictureInPictureElement) { | |
| pipButton.disabled = true; | |
| await video.requestPictureInPicture(); | |
| } else { | |
| await document.exitPictureInPicture(); | |
| } | |
| } catch (error) { | |
| console.error(error) | |
| } finally { | |
| pipButton.disabled = false; | |
| } | |
| } |
我创建了一个名为 togglePip 的异步函数,以便我们可以在 requestPictureInPicture() 方法拒绝时捕获到错误,这可能由于多种原因导致。在真实的应用中,你可能想向用户展示错误信息,而不是打印到控制台上。
接着,在 pipButton 元素上添加 click 事件,然后添加 togglePip 函数到该事件处理器中。
| // index.js | |
| pipButton.addEventListener('click', togglePip); |
现在,添加 pipButton 应该进入或者退出画中画模式。你也可以通过点击(画中画模式)右上角的关闭按钮关闭 PiP 窗口。

切换视频控件
视频控件会占用一些空间并阻挡用户查看一些内容。当它们不被使用的时候将其隐藏起来比较好,然后当鼠标移动到视频上方再显示它们。
为了实现这个目标,我们编写两个函数,如下:
| // index.js | |
| // hideControls hides the video controls when not in use | |
| // if the video is paused, the controls must remain visible | |
| function hideControls() { | |
| if (video.paused) { | |
| return; | |
| } | |
| videoControls.classList.add('hide'); | |
| } | |
| // showControls displays the video controls | |
| function showControls() { | |
| videoControls.classList.remove('hide'); | |
| } |
这里我们想做的就是,当鼠标离开视频上方就隐藏控件。但是当视频停止播放的时候,我们确保控件总是展示的,所以在 hideControls() 函数中添加条件判断。
为了实现这个,我们将在 video 元素和 videoControls 元素上使用 onmouseenter 和 onmouseleave 事件处理器,如下:
| // index.js | |
| video.addEventListener('mouseenter', showControls); | |
| video.addEventListener('mouseleave', hideControls); | |
| videoControls.addEventListener('mouseenter', showControls); | |
| videoControls.addEventListener('mouseleave', hideControls); |
添加键盘快捷键
我们将添加到播放器的最后一个特性是使用快捷键控制视频播放。实际上,就是当我们按下特定的键时,运行我们指定函数的事情。我们将实现的快捷键如下:
k:播放或者暂停视频m:视频静音或者取消静音f:切换全屏p:切换画中画模式
这里我们要做的就是监听 document 中 keyup 事件,检测按下的快捷键并返回相关的函数。
| // index.js | |
| // keyboardShortcuts executes the relevant functions for | |
| // each supported shortcut key | |
| function keyboardShortcuts(event) { | |
| const { key } = event; | |
| switch(key) { | |
| case 'k': | |
| togglePlay(); | |
| animatePlayback(); | |
| if (video.paused) { | |
| showControls(); | |
| } else { | |
| setTimeout(() => { | |
| hideControls(); | |
| }, 2000); | |
| } | |
| break; | |
| case 'm': | |
| toggleMute(); | |
| break; | |
| case 'f': | |
| toggleFullScreen(); | |
| break; | |
| case 'p': | |
| togglePip(); | |
| break; | |
| } | |
| } |
如上,一个 switch 声明被用来检测哪个快捷键被按下,然后执行相关的代码。两秒后调用 hideControl 函数的原因是模仿 YouTube 上的行为,当使用快捷键播放视频时候,控件不会立马消失,而是有一个短暂的延时。
| // index.js | |
| document.addEventListener('keyup', keyboardShortcuts); |
总结
改进视频播放器的方法还有很多,但是本教程篇幅已经很长了,所以我不得不在这里停下来。如果你对额外的功能感兴趣,下面是些想法:
- 添加对字幕的支持
- 添加对播放速度的支持
- 添加快速前进或者倒放视频的功能
- 添加选择视频分辨率(
720p, 480p, 360p, 240p)的功能
我希望本教程对你有帮助。相关代码 GitHub。
Thanks for reading, and happy coding!