目录
- vue封装自己的Svg图标组件库
- 安装及配置方法
- vue使用svg封装图标组件,代替img图片提高性能
- 可行性分析
- 实践方案
- 总结
vue封装自己的Svg图标组件库
安装及配置方法
一、安装组件svg-sprite-loader
npm install svg-sprite-loader --save-dev || yarn add svg-sprite-loader
二、在src/components下新建文件夹及文件SvgIcon/index.vue,index.vue添加如下内容:
<template>
  <div
    v-if="isExternal"
    :style="styleExternalIcon"
    class="svg-external-icon svg-icon"
    v-on="$listeners"
  />
  <svg v-else :class="svgClass" aria-hidden="true" v-on="$listeners">
    <use :xlink:href="iconName" rel="external nofollow"  rel="external nofollow"  />
  </svg>
</template>

<script>
//导入公共方法,校验传入的iconClass是否为外部链接
//匹配http或者 https
import { isExternal } from '@/utils/validate'
export default {
  name: 'SvgIcon',
  props: {
    iconClass: {
      type: String,
      required: true
    },
    className: {
      type: String,
      default: ''
    }
  },
  computed: {
  //匹配http或者 https
    isExternal () {
      return isExternal(this.iconClass)
    },
    iconName () {
      return `#icon-${this.iconClass}`
    },
    svgClass () {
      if (this.className) {
        return 'svg-icon ' + this.className
      } else {
        return 'svg-icon'
      }
    },
    styleExternalIcon () {
      return {
        mask: `url(${this.iconClass}) no-repeat 50% 50%`,
        '-webkit-mask': `url(${this.iconClass}) no-repeat 50% 50%`
      }
    }
  }
}
</script>

<style scoped>
.svg-icon {
  width: 1em;
  height: 1em;
  vertical-align: -0.15em;
  fill: currentColor;
  overflow: hidden;
}

.svg-external-icon {
  background-color: currentColor;
  mask-size: cover !important;
  display: inline-block;
}
</style>
在src下新建utils/validate.js,定义公共的方法,用于校验传入的iconClass是否为外部链接,内容如下:

//匹配http或者 https
export function isExternal(path) {
  return /^(https?:|mailto:|tel:)/.test(path)
}
三、在src下新建icons文件夹,及icons文件夹下svg文件夹、index.js文件,将svg图片放入svg文件夹中,在 index.js文件中添加如下内容
import Vue from 'vue'
import SvgIcon from '@/components/SvgIcon'// svg 组件

// 全局注册svg组件
Vue.component('svg-icon', SvgIcon)
// 工程化导入svg图片
const req = require.context('./svg', false, /\.svg$/)
const requireAll = requireContext => requireContext.keys().map(requireContext)
requireAll(req)
四、在main.js中引入svg
import '@/icons' // icon
五、配置 vue.config.js(主要为打包进行设置)
const path = require('path')
// 将传入的相对路径转换成绝对路径
function resolve (dir) {
  return path.join(__dirname, dir)
}
module.exports = {
  chainWebpack (config) {
    // set svg-sprite-loader
    config.module
      .rule('svg')
      .exclude.add(resolve('src/icons'))
      .end()
    config.module
      .rule('icons')
      .test(/\.svg$/)
      .include.add(resolve('src/icons'))
      .end()
      .use('svg-sprite-loader')
      .loader('svg-sprite-loader')
      .options({
        symbolId: 'icon-[name]'
      })
      .end()
  }

}
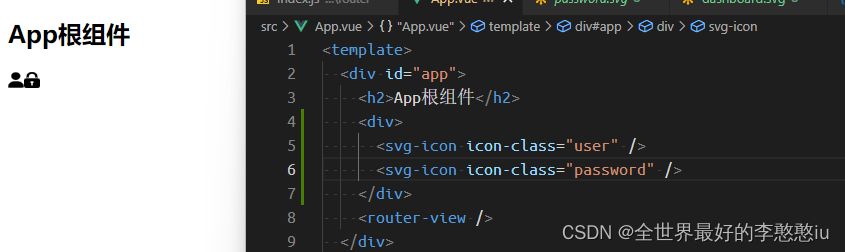
六、在组件中使用
 <div>
      <svg-icon icon-class="user" />//传入svg文件名称
      <svg-icon icon-class="password" />
    </div>
vue使用svg封装图标组件,代替img图片提高性能
可行性分析
如何在vue中使用svg封装图标组件,代替img图片提高性能。
- 1: 配置:svg-sprite-loader
- 2:自定义 svg-icon组件
- 3:导出
.svg模块
目录介绍
|-src
|-main.js
|-icons
|-svg
|-user.svg
|-psd.svg
|-index.js
|-SvgIcon.vue
|-vue.config.js
说明
为了让字体图标模块成为,独立于组件,独立于项目的模块
- 1:优点:在任意的项目中都可以引用。需要什么图标下载独赢svg就可以了
- 2:未完成:整个常见图标,发布npm 提供给更多的开发者使用
- 3: 注意:如果在组件库中,不能使用vue.config.js 使用打包工具配置文件
1. 使用说明
<svg-icon iconClass="user" className="use" />

<style>
.use{
font-size:100px;
}
</style>
属性 | 类型是否必填 | 作用 |
iconClass | string|必填 | 设置使用哪个图片,值为.svg文件名 |
className | string|非必填 | 自定义图标样式 |
实践方案
封装SvgIcon组件
<template>

  <svg :class="svgClass" aria-hidden="true" v-on="$listeners">

      <!-- xlink:href=#dl-icon-lqz -->

    <use :xlink:href="iconName" rel="external nofollow"  rel="external nofollow"  />

  </svg>

</template>


<script>

export default {

  name: "SvgIcon",

  props: {

    iconClass: {

      type: String,

      required: true,

    },

    className: {

      type: String,

      default: "",

    },

  },

  computed: {

    svgClass() {

      if (this.className) {

        return `svg-icon ${this.className}`;

      }

      return "svg-icon";

    },

    iconName() {

      return `#dl-icon-${this.iconClass}`;

    },

  },

};

</script>


<style scoped>

.svg-icon{

  width: 1em;

  height: 1em;

  fill: currentColor;

  overflow: hidden;

}


</style>
1. 准备好对应的svg文件
去阿里图标库下载需要的svg文件,一个图标一个svg文件并放在 src/icon/svg目录下
阿里图标链接地址](https://www.iconfont.cn/))
2. 配置.svg模块
2.1 安装:svg-sprite-loader
npm i svg-sprite-loader -D
2.2 vue.config.js中配置svg-sprite-loader
//vue.config.js

const path = require('path');

// 在vue.config.js中没有配置 resolve 方法, 需要自定义一个

function resolve(dir) {

  return path.join(__dirname, dir);

}

module.exports = {

  chainWebpack: (config) => {

    config.module.rules.delete('svg'); // 重点:删除默认配置中处理svg

    config.module

      .rule('svg-sprite-loader') // rule 匹配规则

      .test(/\.svg$/) // 用正则匹配 文件

      .include  // 包含 包括

      .add(resolve('src/icon')) // 处理svg目录

      .end()

      .use('svg-sprite-loader')   // 配置loader  use() 使用哪个loader

      .loader('svg-sprite-loader')// 加载loader

      .options({

        // [name] 变量。一般表示匹配到的文件名 xxx.svg

        // 注意: symbolId  在  <use xlink:href="#dl-icon-svg文件名" rel="external nofollow"  />

        symbolId: 'dl-icon-[name]', // 将所有的.svg 集成到 symbol中,当使用 类名 icon-文件名

      });

  },

};
3. 导出所有.svg 注册组件
// index.js

// 引入vue

import Vue from 'vue';

// 引入svgIcon组件

import SvgIcon from './SvgIcon.vue';

// 注册为全局组件

Vue.component('svg-icon', SvgIcon);

// 引入当前svg目录下的文件、不遍历子目录、匹配以'.svg'为结尾的文件

/**

 * webpack 是模块化打包工具

 * require.context()  返回上下文构造函数webpackContext。存放了所有匹配到的模块信息

 * 参一:设置配置模块目录

 * 参二:表示是否匹配子目录 true 匹配 false 不匹配

 * 参三:正则, 匹配文件的正则表达式。

 *

 * webpackContext.keys() 返回所有匹配到模块的文件地址 【集合】

 */

const webpackContext = require.context('./svg', false, /\.svg$/);

// // 相当于 req.keys().forEach(key => req(key)), req.keys()是匹配到的svg文件的路径数组

const requireAll = (requireContext) => {

    // requireContext.keys()   匹配的 文件路径数组

    return requireContext.keys().map(requireContext)

};

// // 得到一个完整解析的module数组

requireAll(webpackContext);

// 实现:webpackApi方式自动化导入模块,代替 import...from方式```
运行icon/index.js
// msin.js
import '@/icon/inde.js'
接下来就可以使用 svg-icon图标组件了