目录
- 前言
- 一、创建服务器
- 二、返回响应数据
- 返回复杂对象数据
- 返回html文档数据
- 三、设置响应头和状态码
- 四、实现路由接口
- 创建简易路由应用
- 五、处理URL
- URL格式转换
- URL路径拼接
- 正确转换文件路径
- 转换为Options Url对象
- 六、跨域处理
- 后端设置跨域
- jsonp接口
- 七、Node作为中间层使用
- 模拟get请求(转发跨域数据)
- 模拟post请求(服务器提交)
- 八、使用Node实现爬虫
前言
这一节我们去学习NodeJs的内置模块:http、url、querystring ,并使用它们来搭建我们的node后端服务器,正式迈入后端开发!
一、创建服务器
http是node的内置模块,我们可以直接引入它进行使用,http这个模块内有一个createServer方法,这个方法可以帮助我们快速创建一个服务器:
// 引入http模块
const http = require("http");

// 创建服务器
http.createServer((req, res) => {
  // req:接受浏览器传的参数
  // res:返回渲染的内容
}).listen(3000, () => { // 服务器端口号为3000
    console.log("服务器启动啦!");
});
另一种写法(推荐写法):
const http = require("http");

// 创建服务器
const server = http.createServer();

server.on("request", (req, res) => {
    // req:接受浏览器传的参数
    // res:返回渲染的内容
});

server.listen(3000,() => { // 服务器端口号为3000
    console.log("服务器启动啦!");
});
createServer方法返回一个服务器对象,对象内有一个listen方法,可以设置服务器启动的端口号和启动成功的回调内容
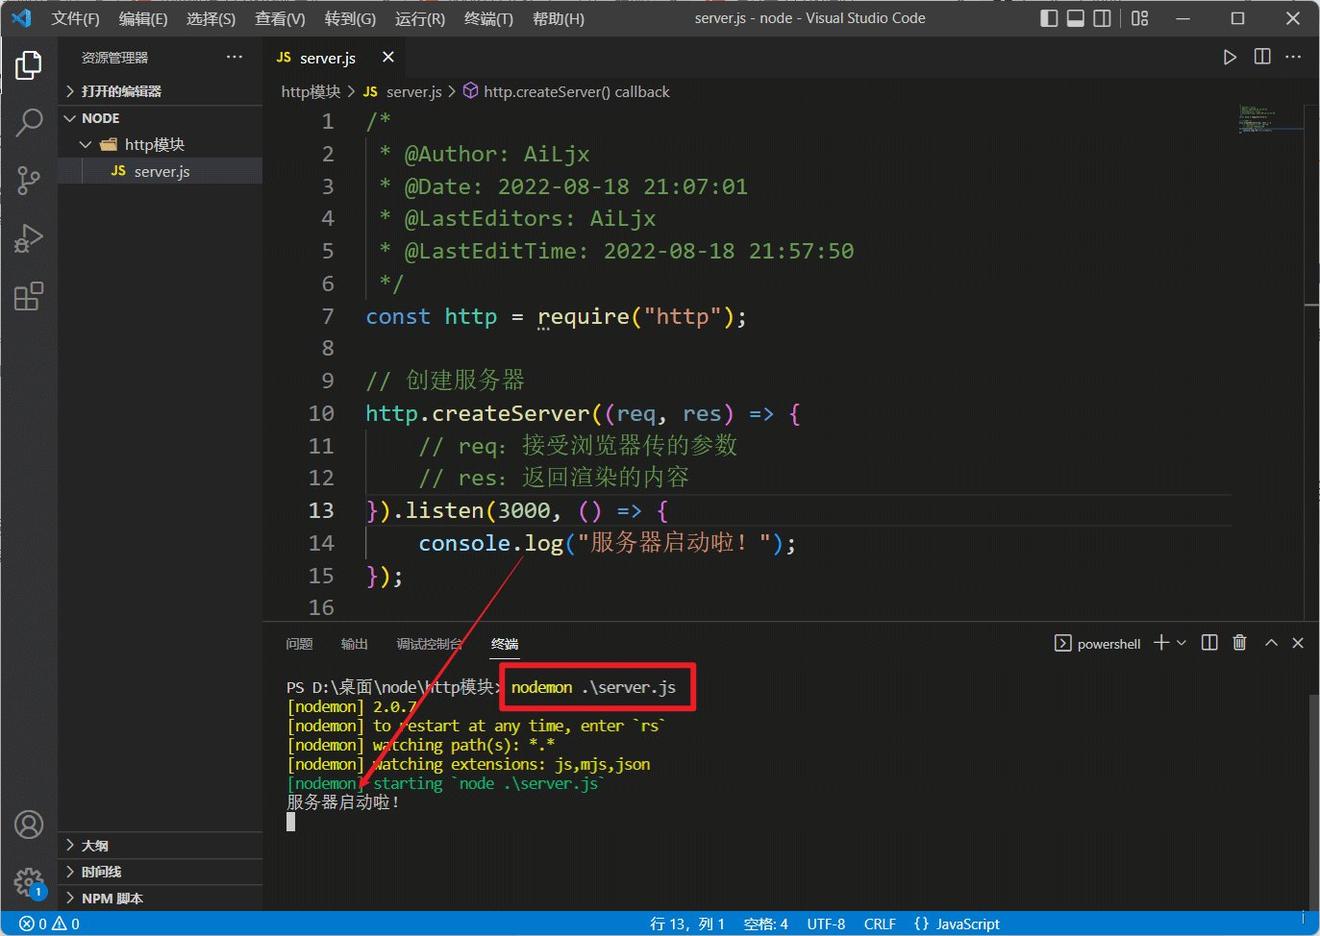
通过nodemon运行这个文件(nodemon可以在我们修改文件后帮助我们自动重启服务器),控制台打印出了我们在listen中设置的回调内容,说明服务器启动成功了
我们直接在浏览器访问http://localhost:3000/时会发现浏览器一直在转圈圈加载
注意: 直接在浏览器地址栏里访问服务器接口,相当于是使用get请求访问服务器接口(并且没有跨域限制)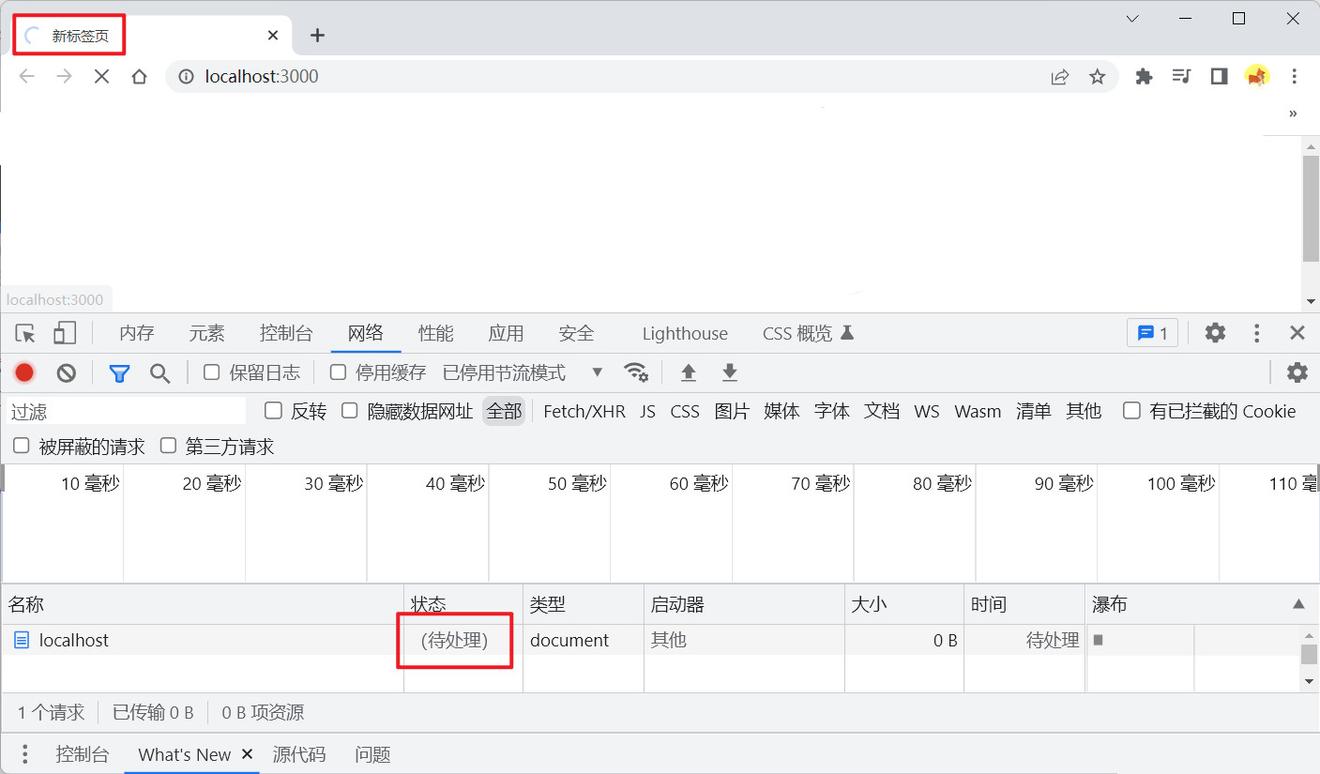
这是因为我们并没有在我们创建的node服务器中返回任何内容
二、返回响应数据
我们可以通过我们定义的res(response对象)参数向客户端发送响应内容:
const http = require("http");

// 创建服务器
http.createServer((req, res) => {
    // req:接受浏览器传的参数
    // res:返回渲染的内容

    // 传递数据
    res.write("hello world");
    res.write("Ailjx");
    res.end();
}).listen(3000, () => {
    console.log("服务器启动啦!");
});
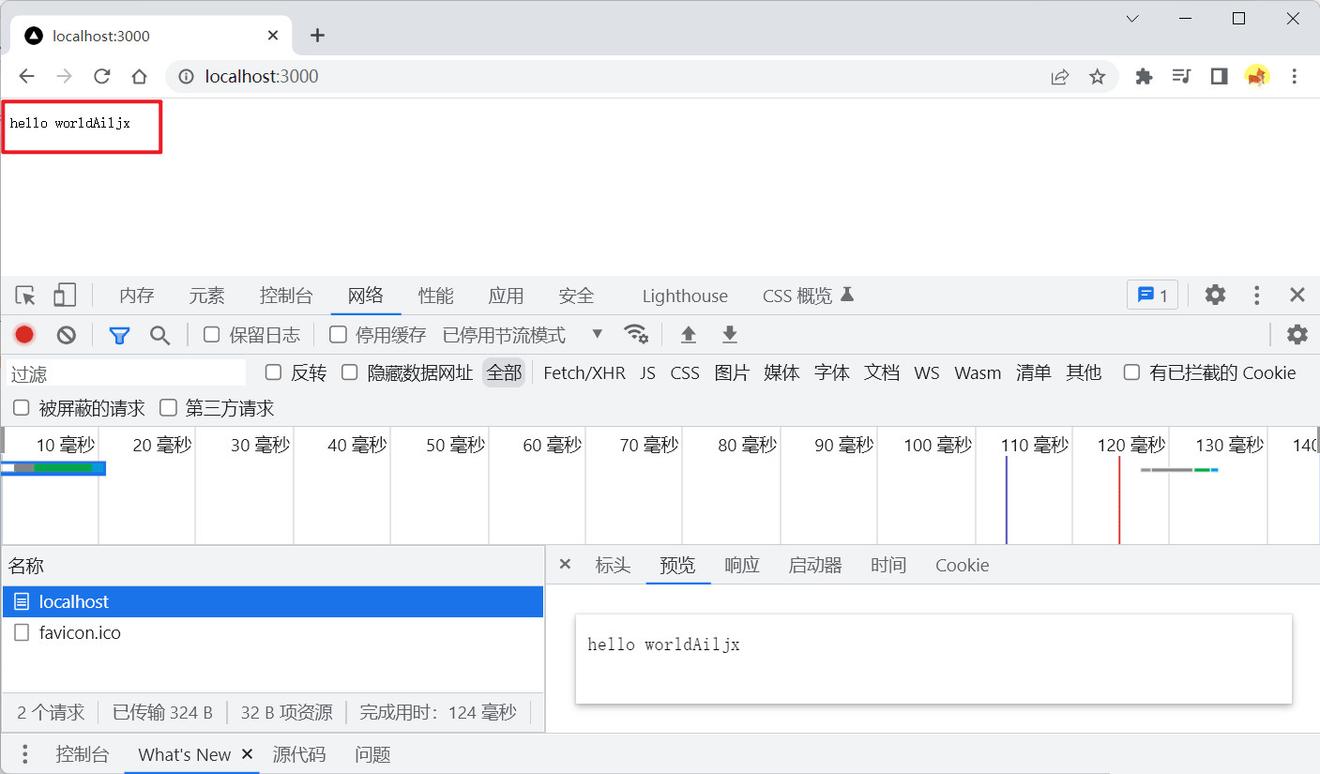
write方法传递内容,可以调用多次write传递多条内容,内容必须是字符串格式最后必须调用end方法告诉请求的调用者我们响应结束了也可以直接在end方法内传递内容,效果与使用write方法相同,但end方法只能调用一次
运行上述代码,我们直接在浏览器调用服务器接口:
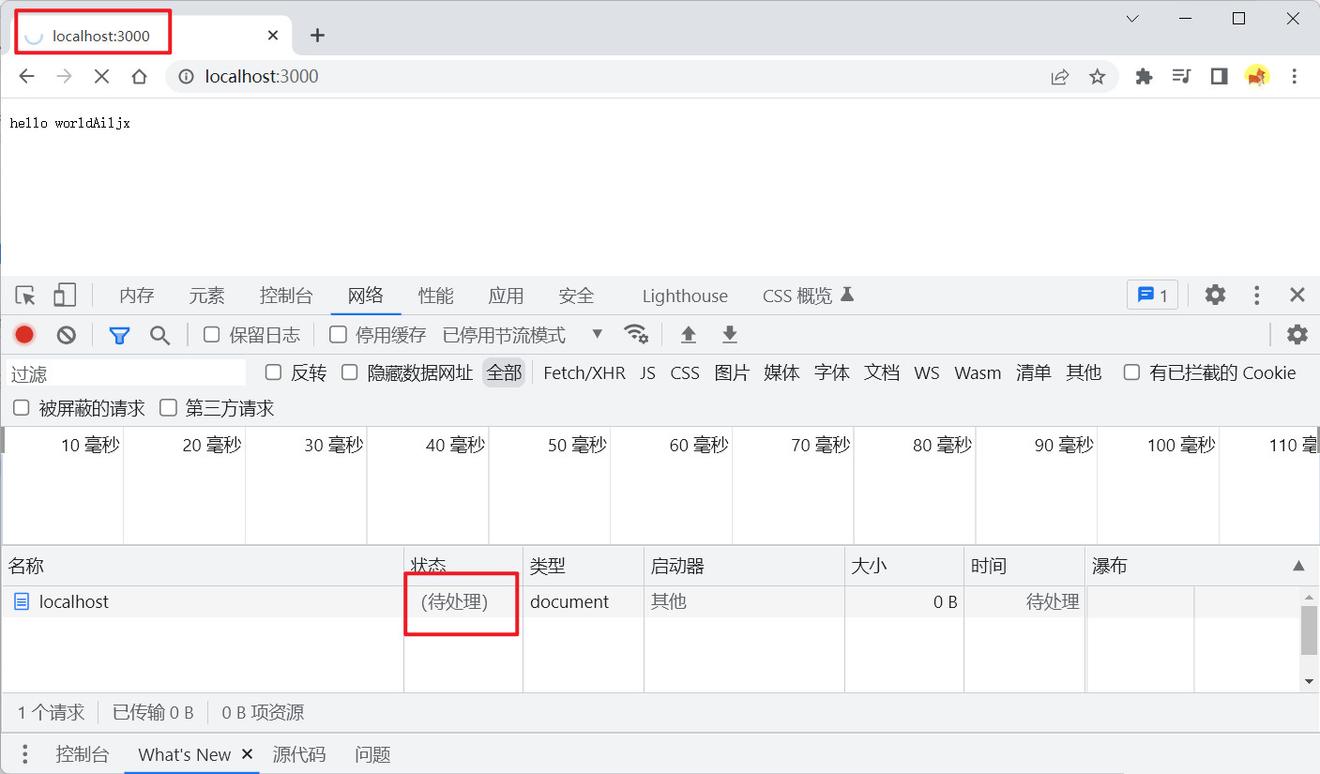
如果服务器中不调用end方法,浏览器会收不到服务器传递的响应结束的信号,便会一直加载请求:
返回复杂对象数据
可以传递复杂对象数据,但必须是字符串(JSON)的格式:
const http = require("http");

// 创建服务器
http.createServer((req, res) => {
    // end方法也可以传递内容,效果与write相同
    res.end("{name:{me:'Ailjx'}}");
    // 或者res.end(JSON.stringify({ name: { me: "Ailjx" } }));
}).listen(3000, () => {
    console.log("服务器启动啦!");
});
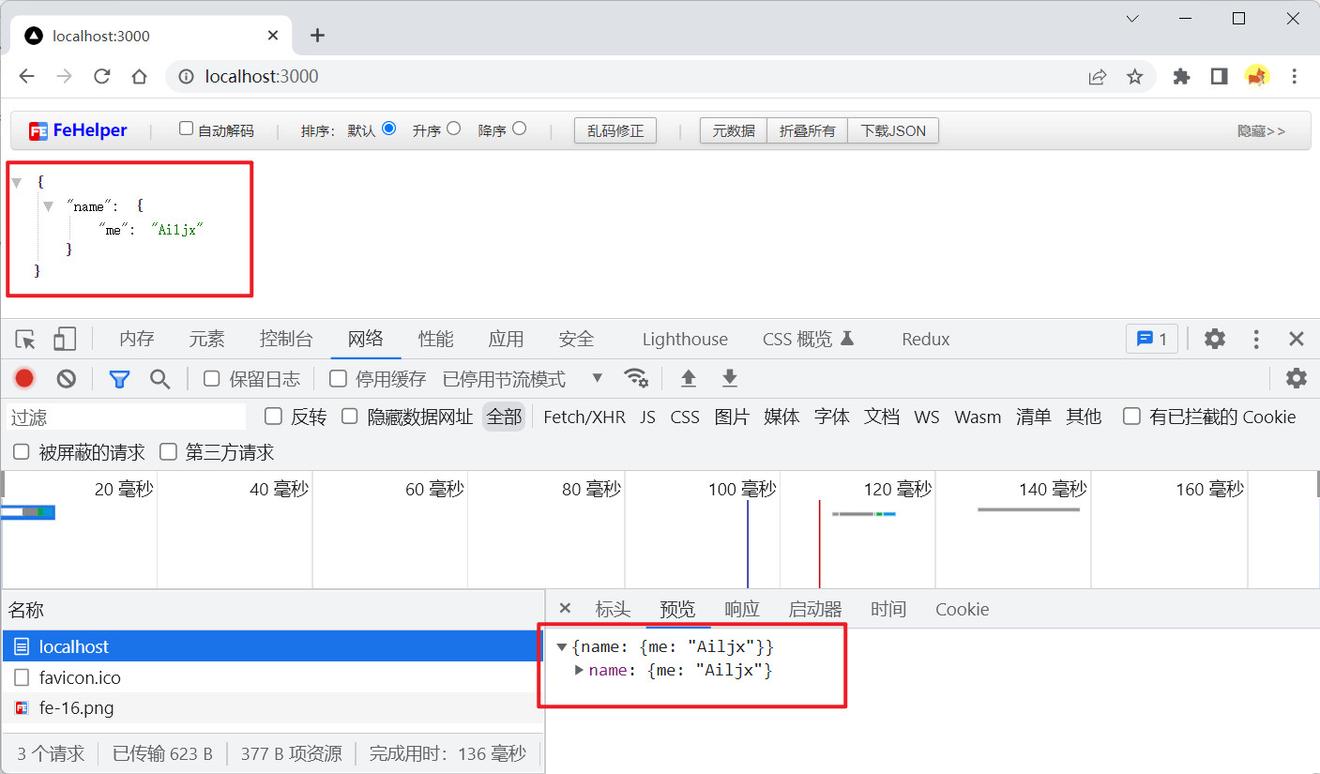
上面浏览器显示的数据被格式化了,是因为我在浏览器中安装了FeHelper(前端助手)插件,能够自动格式化JSON数据
返回html文档数据
const http = require("http");

// 创建服务器
http.createServer((req, res) => {
    // 传递html内容
    res.end(`
            <h1>我是Ailjx,你好!</h1>
    `);
}).listen(3000, () => {
    console.log("服务器启动啦!");
});
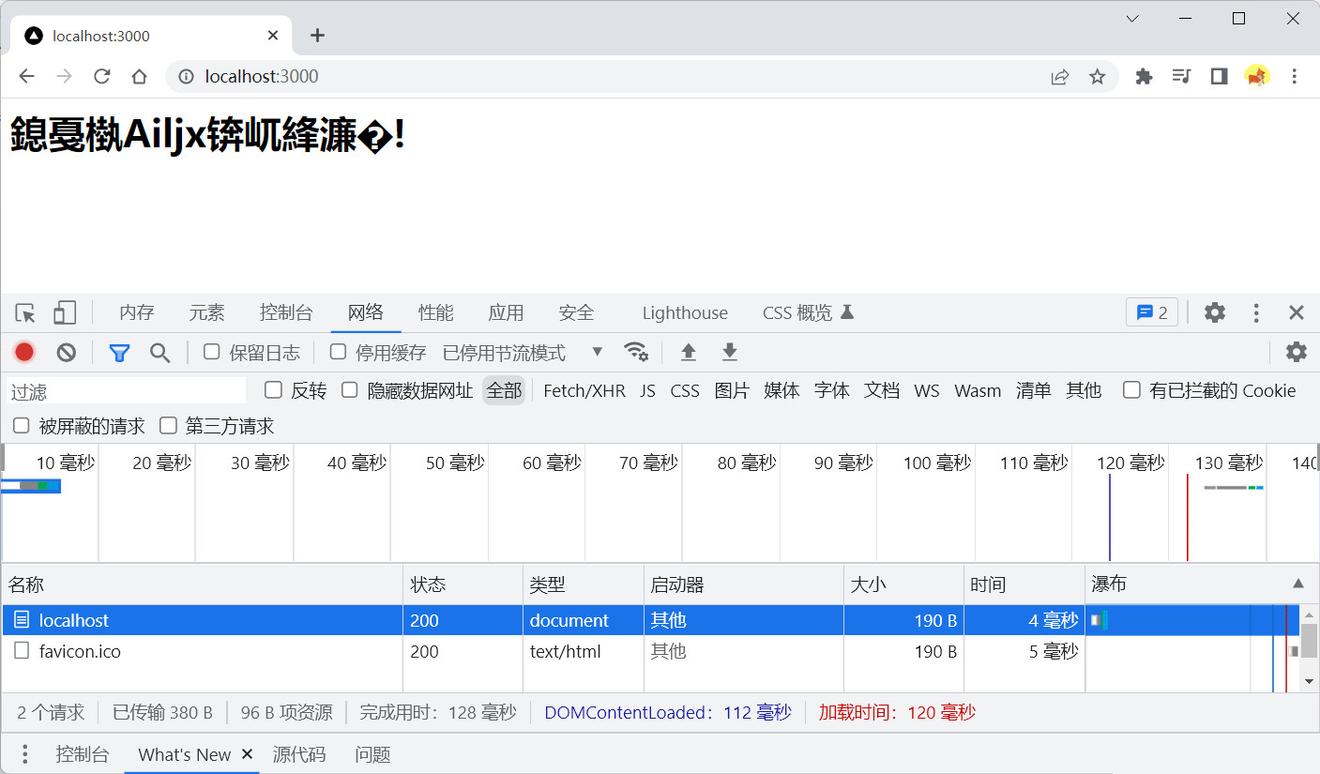
这时发现我们传递的中文乱码了,我们可以在响应头的Content-Type中指定utf-8的字符集来解析中文,下面会讲到
三、设置响应头和状态码
我们可以使用response对象的writeHead方法来同时设置状态码和响应头信息:
const http = require("http");

// 创建服务器
http.createServer((req, res) => {
    // 设置相应头,第一参数为状态码,第二个参数为响应头配置,第二个参数可不填
    res.writeHead(200, { "Content-Type": "text/html;charset=utf-8" });
    // 传递html内容
    res.end(`
            <h1>我是Ailjx,你好!</h1>
    `); // 直接在end中传递,效果与write方法相同
}).listen(3000, () => {
    console.log("服务器启动啦!");
});
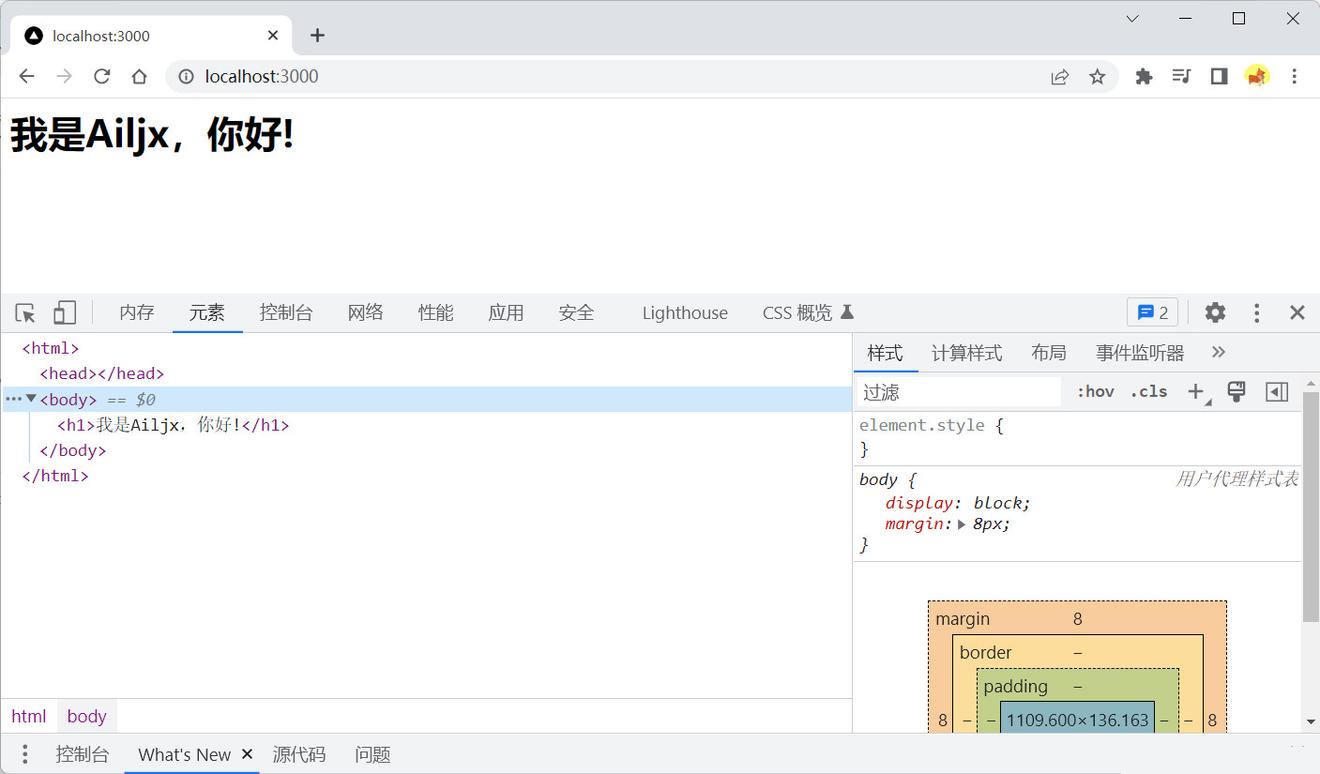
我们也可以使用setHeader单独设置响应头信息,statusCode单独设置状态码:
const http = require("http");

// 创建服务器
http.createServer((req, res) => {
    // 设置相应头信息
    res.setHeader("Content-Type", "text/html;charset=utf-8");
    // 设置状态码
    res.statusCode = 200;
    // 传递html内容
    res.end(`
            <h1>我是Ailjx,你好!</h1>
    `); // 直接在end中传递,效果与write方法相同
}).listen(3000, () => {
    console.log("服务器启动啦!");
});
四、实现路由接口
上面我们已经成功创建了一个服务器,并能够使用res参数中的write或end方法向调用者发送内容,但发送的这些内容是不会随着我们请求的路径而变化的:
const http = require("http");

// 创建服务器
const server = http.createServer();

server.on("request", (req, res) => {
    res.end("Ailjx");
});

server.listen(3000);
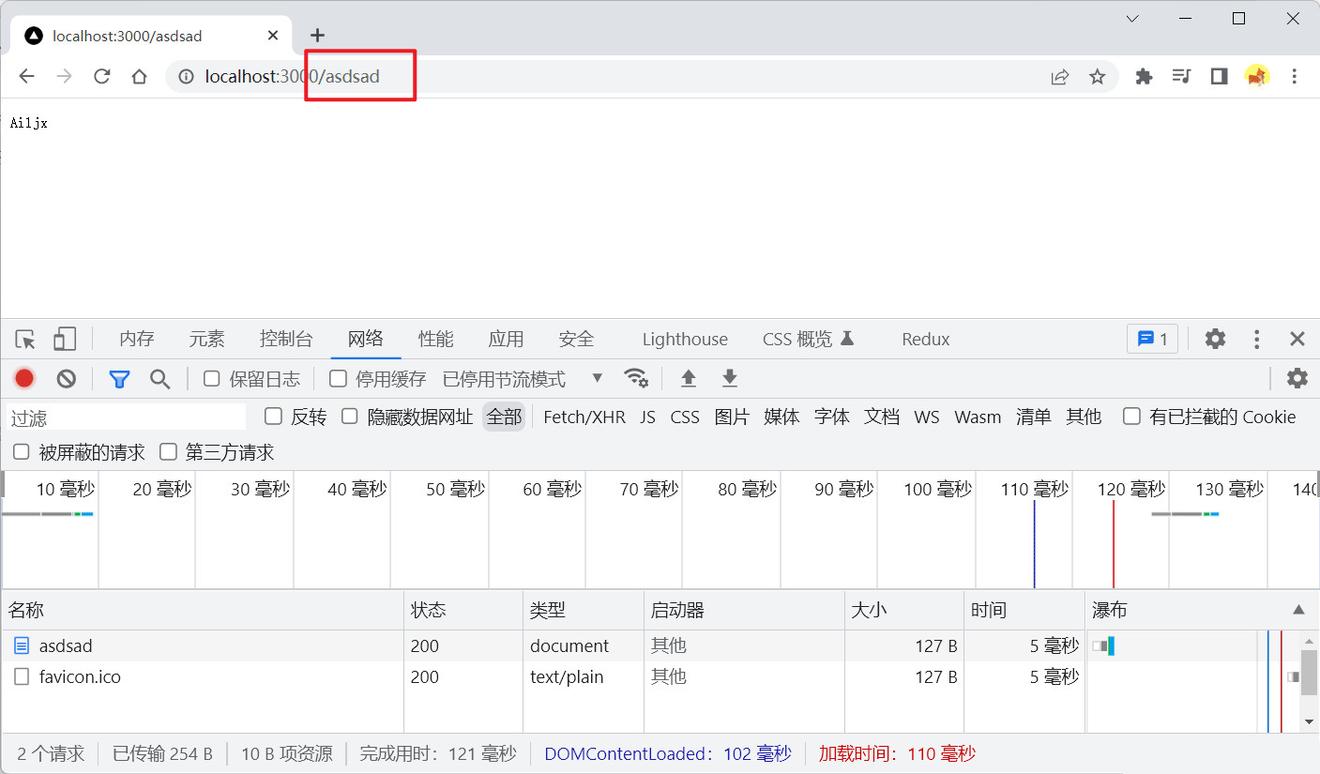
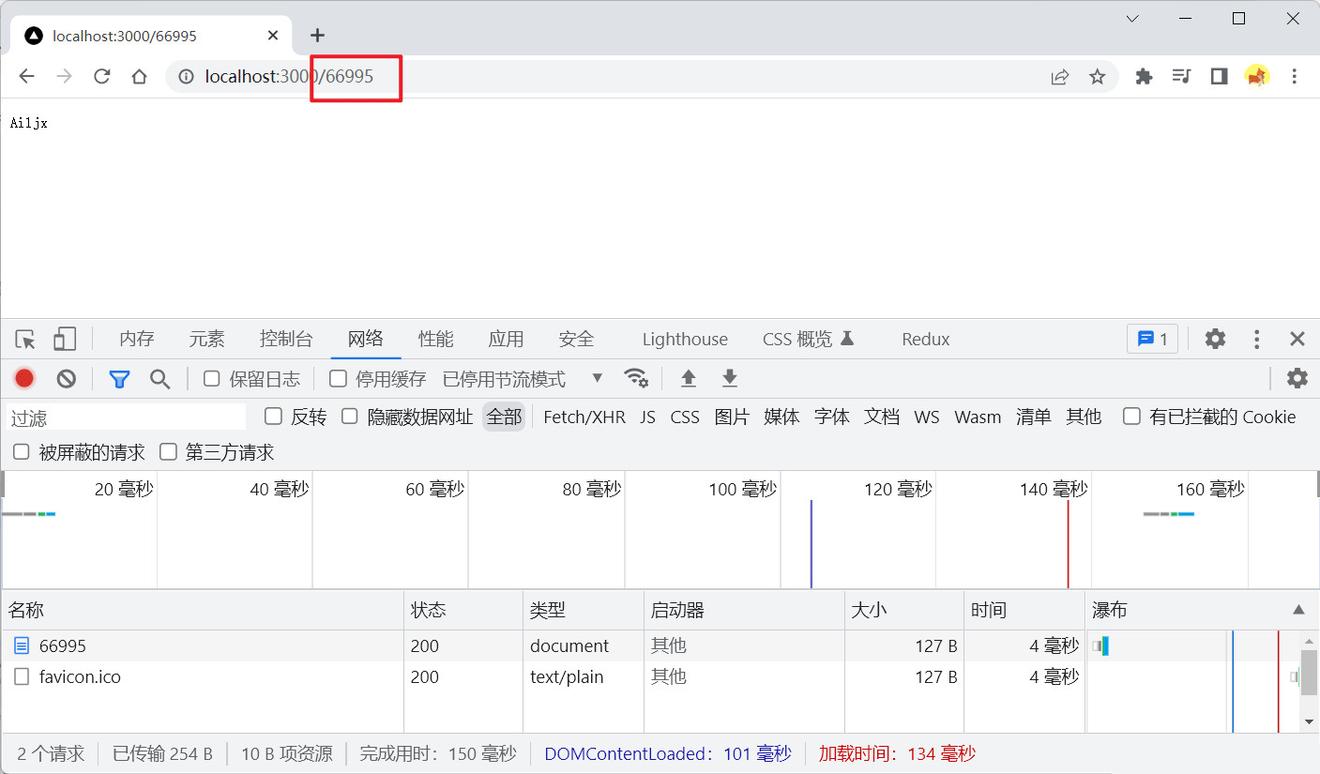
可以看到,我们请求(访问)不同路径,服务器返回的数据都是一样的,而我们在实际开发中往往是需要不同的路径有不同的数据
这时我们就可以利用我们创建服务器时定义的req参数(request对象)来获取用户请求的路径从而判断需要返回哪些数据:
const http = require("http");

// 创建服务器
const server = http.createServer();

server.on("request", (req, res) => {
    // req.url拿到用户请求的路径
    console.log(req.url);
    res.end();
});
server.listen(3000);
运行代码,之后在浏览器访问调用一下http://localhost:3000/list,控制台会打印出:
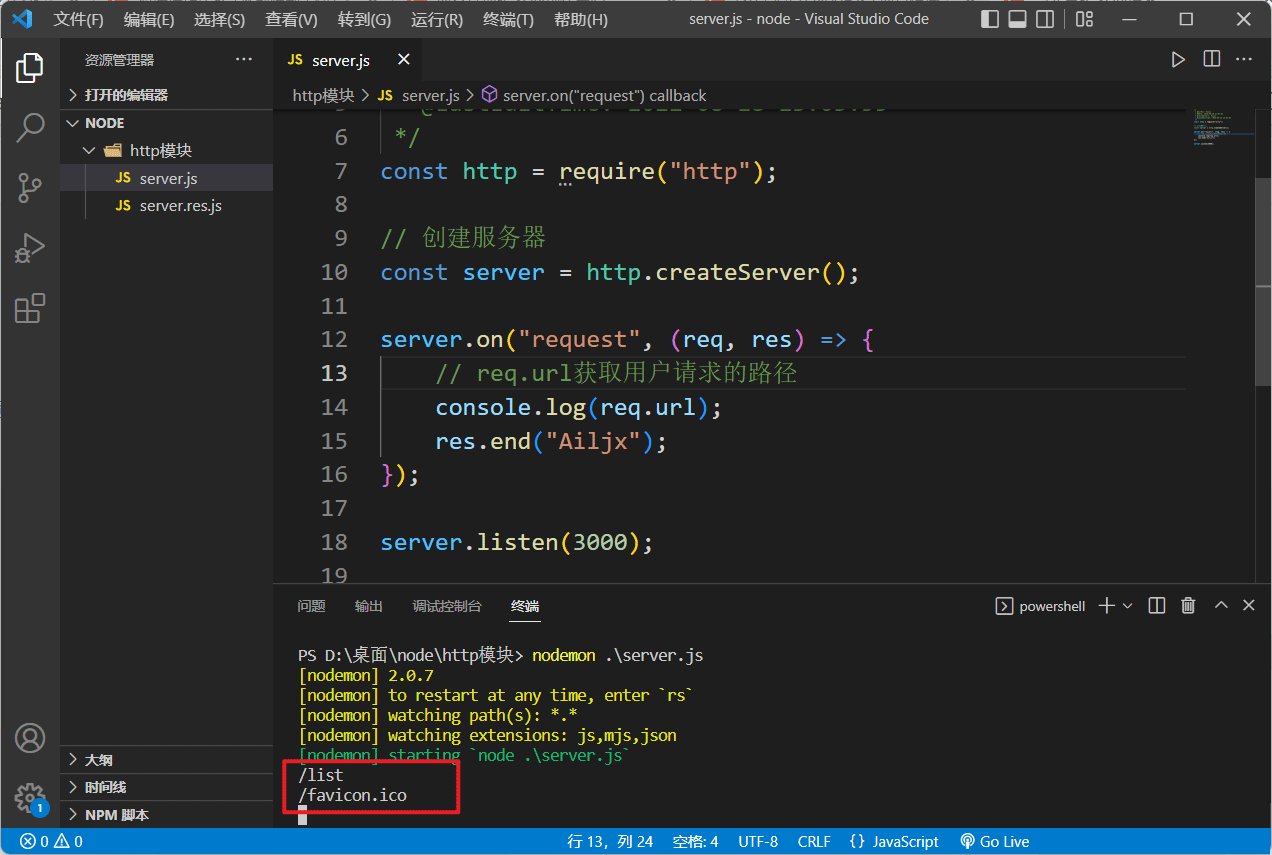
可以看到我们访问的/list路径确实被打印出来了,但怎么还打印了一个/favicon.ico呢?
这其实是浏览器在访问一个域名时会自动访问该域名下的/favicon.ico静态文件,来作为网页标签栏的小图标,所以我们的服务器才会打印出/favicon.ico
如果是普通的ajax调用接口是不会出现这种情况的,这里我们是为了方便,直接使用浏览器访问接口来进行演示,所以才出现这种请求,我们可以简单做一下处理:
const http = require("http");
// 创建服务器
const server = http.createServer();
server.on("request", (req, res) => {
    // req.url获取用户请求的路径
    if (req.url === "/favicon.ico") {
    	// 读取本地图标
        return;
    }
    console.log(req.url);
    res.end("Ailjx");
});
server.listen(3000);
这样当服务器收到/favicon.ico请求时就能直接跳过不对其进行处理
创建简易路由应用
现在,我们开始实现一个简易的路由应用,我们先创建两个模块:
renderContent.js用来根据用户请求路径来返回对应的内容:
function renderContent(url) {
    switch (url) {
        case "/api/home":
            return `
                {
                    page:'首页'
                }
            `;
        case "/api/about":
            return `
                {
                    page:'关于页'
                }
                `;

        default:
            return "404";
    }
}
exports.renderContent = renderContent;
renderStatus.js用来根据用户请求的路径来返回对应的响应状态码:
function renderStatus(url) {
    const arr = ["/api/home", "/api/about"];
    return arr.includes(url) ? 200 : 404;
}

module.exports = {
    renderStatus,
};
之后在我们的服务器文件server.js中调用这两个模块:
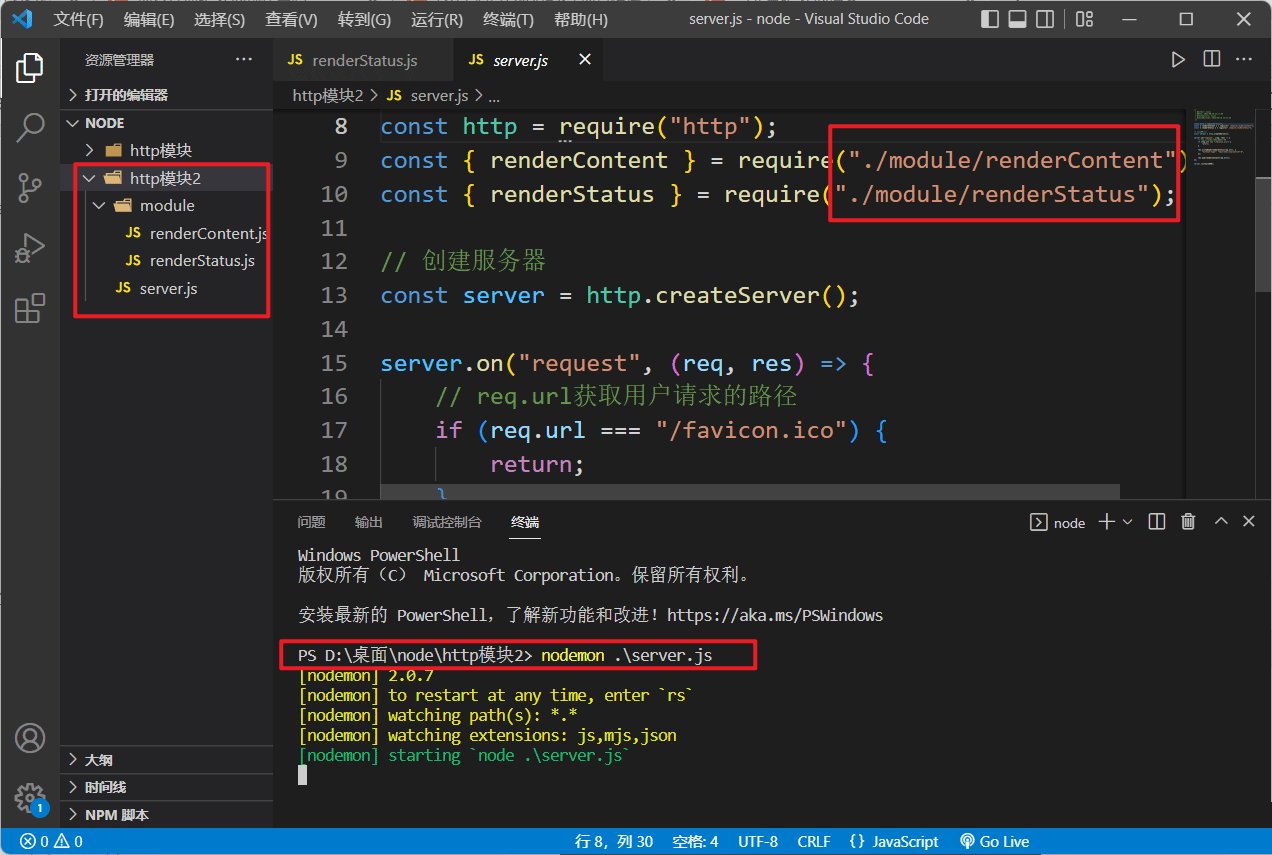
const http = require("http");
const { renderContent } = require("./module/renderContent");
const { renderStatus } = require("./module/renderStatus");

// 创建服务器
const server = http.createServer();

server.on("request", (req, res) => {
    // req.url获取用户请求的路径
    if (req.url === "/favicon.ico") {
        return;
    }
	// 响应头
    res.writeHead(renderStatus(req.url), {
    	 // 标志返回JSON数据
        "Content-Type": "application/json",
    });
	// 返回的内容
    res.end(renderContent(req.url));
});

server.listen(3000);
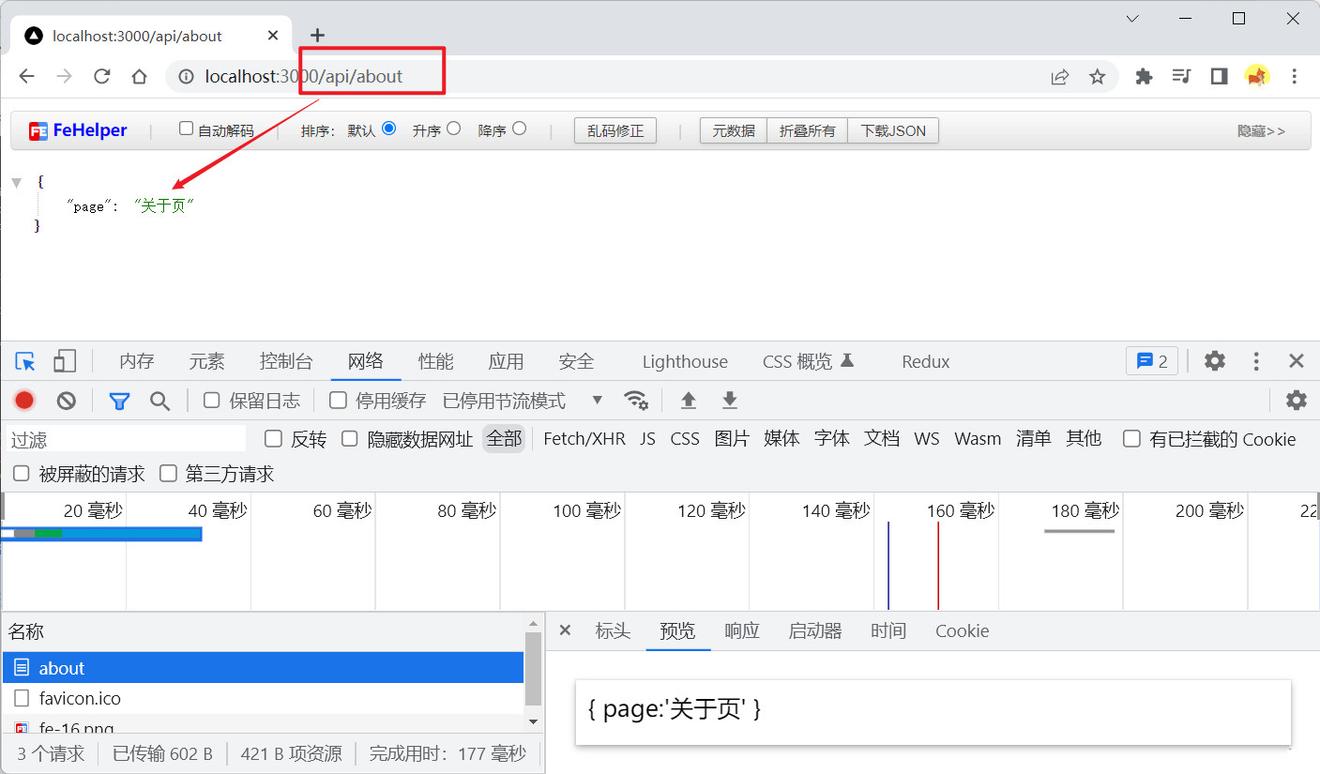
之后启动服务器,在浏览器调用接口查看效果:
五、处理URL
在上面我们通过判断req.url来实现了简易的路由接口应用,但当用户调用带有url参数的接口时,这就会出现问题:
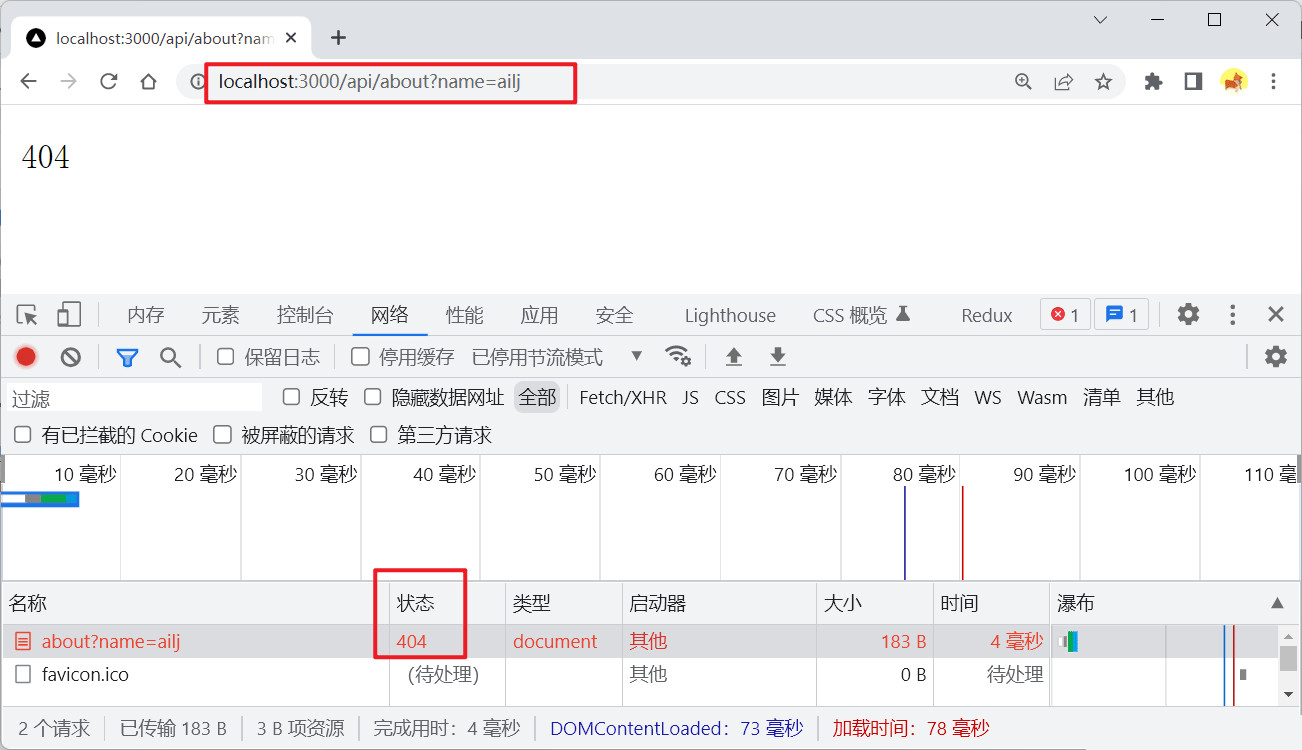
这是因为这时req.url为/api/about?name=ailj而并不是/api/about,我们可以手动的对这个字符串进行处理来获得正确的路由路径,也可以使用node.js的内置模块url来处理
URL格式转换
修改上面的server.js文件:
const http = require("http");
const url = require("url");
const { renderContent } = require("./module/renderContent");
const { renderStatus } = require("./module/renderStatus");
// 创建服务器
const server = http.createServer();
server.on("request", (req, res) => {
    // req.url获取用户请求的路径
    if (req.url === "/favicon.ico") {
        return;
    }
    // 新版使用全局的URL构造函数
    // 传两个参数用法
    const myUrl = new URL(req.url, "http://127.0.0.1:3000").pathname;
    // 传一个参数用法
    // const myUrl = new URL("http://127.0.0.1:3000" + req.url).pathname;
    console.log(new URL(req.url, "http://127.0.0.1:3000"));
    res.writeHead(renderStatus(myUrl), {
        "Content-Type": "application/json",
    });

    res.end(renderContent(myUrl));
});

server.listen(3000, () => {
    // 服务器端口号为3000
    console.log("服务器启动啦!");
});
全局的构造函数UR可以将完整的 url地址转换成url对象(WHATWG URL标准的对象)
我们可以对其传递两个参数,第一个是用户请求的路径(路由),第二个参数是地址的根域名(我们这里是本地启动的服务器,根域名为http://127.0.0.1:3000)也可以直接传递一个参数,该参数是带有域名的完整url地址当我们访问http://localhost:3000/api/about?name=ailjx时server.js会打印出:
URL {
  href: 'http://127.0.0.1:3000/api/about?name=ailjx',
  origin: 'http://127.0.0.1:3000',
  protocol: 'http:',
  username: '',
  password: '',
  host: '127.0.0.1:3000',
  hostname: '127.0.0.1',
  port: '3000',
  pathname: '/api/about',
  search: '?name=ailjx',
  searchParams: URLSearchParams { 'name' => 'ailjx' },
  hash: ''
}
上面Url对象里 searchParams是url的参数部分,是一个迭代器对象URLSearchParams对象
 // searchParams对象是一个迭代器对象
 const query = new URL(req.url, "http://127.0.0.1:3000").searchParams;
 // 使用get方法获取指定的值
 console.log(query.get("name")); // ailjx
我们还可以从组成部分构造 URL 并获取构造的字符串:
const myURL = new URL("https://www.baidu.com");
myURL.port = "443";
myURL.pathname = "/ad/index.html";
myURL.search = "?id=8&name=mouse";
myURL.hash = "#tag=110";
// 获取构造的 URL 字符串,请使用href属性访问器
console.log(myURL.href); // https://www.baidu.com/ad/index.html?id=8&name=mouse#tag=110
或者:
const pathname = '/a/b/c';
const search = '?d=e';
const hash = '#fgh';
const myURL = new URL(`https://example.org${pathname}${search}${hash}`);
console.log(myURL.href);
使用url.format方法可以自定义序列化url字符串,format方法接收两个参数:
new URL返回的一个WHATWG URL格式的对象- 配置对象:
fragment:序列化的网址字符串是否包含片段,默认为trueauth:序列化的网址字符串是否包含用户名和密码,默认为trueunicode:是否将出现在URL字符串的主机组件中的Unicode字符直接编码而不是Punycode编码,默认是falsesearch:序列化的网址字符串是否包含搜索查询(参数),默认为true
const myURL = new URL(
    "https://username:password@URL路径序列化测试?name=ailjx#foo"
);

console.log(
    url.format(myURL, {
        fragment: false, // 不显示片段(#foo)
        unicode: true, // 不转化Unicode字符(中文字符)
        auth: false, // 不包含用户名和密码(username:password)
        search: false, // 不显示参数(?name=ailjx)
    })
);
// 打印结果: 'https://url路径序列化测试/'
旧版Node使用parse和format处理URL:
注意:旧版的parse方法官方表示已弃用,format方法在新版中使用方式有所更改
const http = require("http");
const url = require("url");
const { renderContent } = require("./module/renderContent");
const { renderStatus } = require("./module/renderStatus");
// 创建服务器
const server = http.createServer();
server.on("request", (req, res) => {
    // req.url获取用户请求的路径
    if (req.url === "/favicon.ico") {
        return;
    }
    console.log(url.parse(req.url));

    const myUrl = url.parse(req.url).pathname;
    res.writeHead(renderStatus(myUrl), {
        "Content-Type": "application/json",
    });

    res.end(renderContent(myUrl));
});
server.listen(3000, () => {
    // 服务器端口号为3000
    console.log("服务器启动啦!");
});
url模块的parse方法可以将完整的url地址转换成url对象,如当我们访问http://localhost:3000/api/about?name=ailjx时server.js会打印出:
Url {
  protocol: null,
  slashes: null,
  auth: null,
  host: null,
  port: null,
  hostname: null,
  hash: null,
  search: '?name=ailjx',
  query: 'name=ailjx',
  pathname: '/api/about',
  path: '/api/about?name=ailjx',
  href: '/api/about?name=ailjx'
}
上面Url对象里 query 是url的参数部分,默认是字符串的格式,可以给parse方法传递第二个参数,将其转换成对象格式:
url.parse(req.url,true)
Url {
  protocol: null,
  slashes: null,
  auth: null,
  host: null,
  port: null,
  hostname: null,
  hash: null,
  search: '?name=ailjx',
  query: [Object: null prototype] { name: 'ailjx' },
  pathname: '/api/about',
  path: '/api/about?name=ailjx',
  href: '/api/about?name=ailjx'
}
这时通过url.parse(req.url, true).query.name就可以拿到ailjx这个参数
与parse方法相反的有一个format方法,它能将一个 url对象转换成url地址 :
const url = require("url");

const urlObject = {
    protocol: "https:",
    slashes: true,
    auth: null,
    host: "www.baidu.com:443",
    port: "443",
    hostname: "www.baidu.com",
    hash: "#tag=110",
    search: "?id=8&name=mouse",
    query: { id: "8", name: "mouse" },
    pathname: "/ad/index.html",
    path: "/ad/index.html?id=8&name=mouse",
};

const parsedObj = url.format(urlObject);

console.log(parsedObj); // https://www.baidu.com:443/ad/index.html?id=8&name=mouse#tag=110
URL路径拼接
URL构造函数,传递两个字符串路径时能够实现路径的拼接:
let myURL = new URL('http://Example.com/', 'https://example.org/');
// http://example.com/

myURL = new URL('https://Example.com/', 'https://example.org/');
// https://example.com/

myURL = new URL('foo://Example.com/', 'https://example.org/');
// foo://Example.com/

myURL = new URL('http:Example.com/', 'https://example.org/');
// http://example.com/

myURL = new URL('https:Example.com/', 'https://example.org/');
// https://example.org/Example.com/

myURL = new URL('foo:Example.com/', 'https://example.org/');
// foo:Example.com/
旧版Node使用resolve方法拼接路径:
注意:旧版node的resolve方法官方表示已弃用const url = require('url')
var a = url.resolve("/one/two/three", "four"); // /one/two/four
// var a = url.resolve("/one/two/three/", "four"); // /one/two/three/four
// var a = url.resolve("/one/two/three", "/four"); // /four
// var a = url.resolve("/one/two/three/", "/four"); // /four
var b = url.resolve("http://example.com/", "/one");
// var b = url.resolve("http://example.com/", "one");
// var b = url.resolve("http://example.com", "one");
// var b = url.resolve("http://example.com", "/one");
// 以上b的结果都是:http://example.com/one
var c = url.resolve("http://example.com/one", "two");
// var c = url.resolve("http://example.com/one", "/two");
// var c = url.resolve("http://example.com/one/", "/two");
// var c = url.resolve("http://example.com/one/a/b", "/two");
// 以上c的结果都是:http://example.com/two
var d = url.resolve("http://example.com/one/", "two"); // http://example.com/one/two
var e = url.resolve("http://example.com/one/aaa", "http://example.com/one/two");
// var e = url.resolve("/one/aaa", "http://example.com/one/two");
// 以上e的结果都是:http://example.com/one/two
resolve方法并不是简单的将两个路径直接拼接在一起,而是具有它自己的一些拼接规则:
- 如果第二个路径(接收的第二个参数)开头前带
/,则将直接用第二个路径替代第一个路径的路由部分(不会替代第一个路径的根域名,如上面的最后一个变量c所示:/two替代了/one/a/b) - 如果第二个路径开头前不带
/,第一个路径结尾处不带/,则第二个路径将会替代第一个路径的最后一个路由,如上边的第一个变量a和第一个变量c - 第二个路径开头前不带
/,第一个路径结尾处带/,则直接将第二个路径拼接在第一个路径后面,如上边的第变量d和第二个变量a - 如果第二个路径包含根域名(
http://xxx),则直接以第二个路径为主(第一个路径失效) 处理URL路径参数
注意:querystring方法官方表示已弃用NodeJS有一个内置模块querystring,它里面的parse和stringify方法可以帮助我们快速处理URL上的形如id=8&name=mouse的参数:
const querystring = require("querystring");
var qs = "id=8&name=Ailjx";
// parse:路径将参数转化为对象
var parsed = querystring.parse(qs);
console.log(parsed.id, parsed.name); // 8 Ailjx

var qo = {
    x: 3,
    y: 4,
};
//stringify:将对象转化为路径参数
var parsed = querystring.stringify(qo);
console.log(parsed); // x=3&y=4
querystring中还有一对能够转义特殊字符的方法: escape/unescape:
const querystring = require("querystring");
var str = 'ns"--';
// escape:将特殊字符转义
var escaped = querystring.escape(str);
console.log(escaped); //ns%22--

// unescape:恢复转义的特殊字符
console.log(querystring.unescape(escaped)); // ns"--
对于特殊字符的转义在一些特殊情况下特别重要,例如我们通过用户传递的参数来向mysql数据库查询数据,我们为了防止用户传递的参数与sql语句发送冲突,就可以对该参数进行转义,以防止sql注入
例如有一条含有用户传递的param参数的sql语句:
let sql = `select * from users where name = "${param}" and del_status=1`
上面的sql语句在正常情况下是只能查询到一条数据,如:
// let param = 'Ailjx' ,对应的sql语句如下:
select * from users where name = "Ailjx" and del_status=1
但当param与sql语句冲突时:
// let param = 'ns"--',对应的sql语句如下:
select * from tb_nature where nature = "ns"-- " and del_status=1
可以看到del_status被参数中的--注释掉了,失去了作用,这时这条sql能查询到多条数据,这就是sql注入的危害,也就是我们需要转义特殊字符的原因
正确转换文件路径
url模块针对转换文件路径提供了单独的fileURLToPath和pathToFileURL方法,它们不仅能正确进行文件路径的转换而且能自动适配不同的操作系统
fileURLToPath该方法能够正确将文件网址url转换成文件路径:
const { fileURLToPath } = require("url");

console.log(new URL("file:///C:/path/").pathname); // 获得错误路径:/C:/path/
console.log(fileURLToPath("file:///C:/path/")); // 获得正确路径:C:\path\ (Windows)

console.log(new URL("file://nas/foo.txt").pathname); //  获得错误路径:/foo.txt
console.log(fileURLToPath("file://nas/foo.txt")); //  获得正确路径: \\nas\foo.txt (Windows)

console.log(new URL("file://c://你好.txt").pathname); //  获得错误路径:/c://%E4%BD%A0%E5%A5%BD.txt
console.log(fileURLToPath("file://c://你好.txt")); //  获得正确路径: c:\\你好.txt (Windows)
pathToFileURL方法,能够将文件路径转换成文件网址url对象:
const { pathToFileURL } = require("url");
console.log(new URL("/foo#1", "file:").href); // 错误: file:///foo#1
console.log(pathToFileURL("/foo#1").href); // 正确:   file:///D:/foo%231

console.log(new URL("/some/path%.c", "file:").href); // 错误: file:///some/path%.c
console.log(pathToFileURL("/some/path%.c").href); // 正确:   file:///D:/some/path%25.c
转换为Options Url对象
urlToHttpOptions方法可以将new URL返回的WHATWG URL对象转换成http.request()或https.request()需要的Options Url对象
http.request()和https.request()在下面会讲到
const { urlToHttpOptions } = require("url");
const myURL = new URL('https://a:b@測試?abc#foo');
console.log(urlToHttpOptions(myURL));
/*
{
  protocol: 'https:',
  hostname: 'xn--g6w251d',
  hash: '#foo',
  search: '?abc',
  pathname: '/',
  path: '/?abc',
  href: 'https://a:b@xn--g6w251d/?abc#foo',
  auth: 'a:b'
}
*/
六、跨域处理
在不做处理的情况下,前后端交互会出现CORS跨域的问题,如:
定义一个简单的服务器:
server.js
const http = require("http");
const url = require("url");
const server = http.createServer();
server.on("request", (req, res) => {
    const urlObj = url.parse(req.url, true);
    switch (urlObj.pathname) {
        case "/api/user":
            // 模拟数据
            const userinfo = {
                name: "Ailjx",
            };
            res.end(JSON.stringify(userinfo));
            break;
        default:
            res.end("404");
            break;
    }
});
server.listen(3000, () => {
    console.log("服务器启动啦!");
});
可以看到上面我们定义的服务器并没有设置跨域,我们直接在html文件内请求该服务器的接口:
index.html
<body>
    <div>jsonp接口测试</div>
    <script>
        fetch('http://localhost:3000/api/user')
        .then(res => res.json())
        .then(res => console.log(res))
    </script>
</body>
打开该html文件,可以看到果然出现了CORS跨域的报错
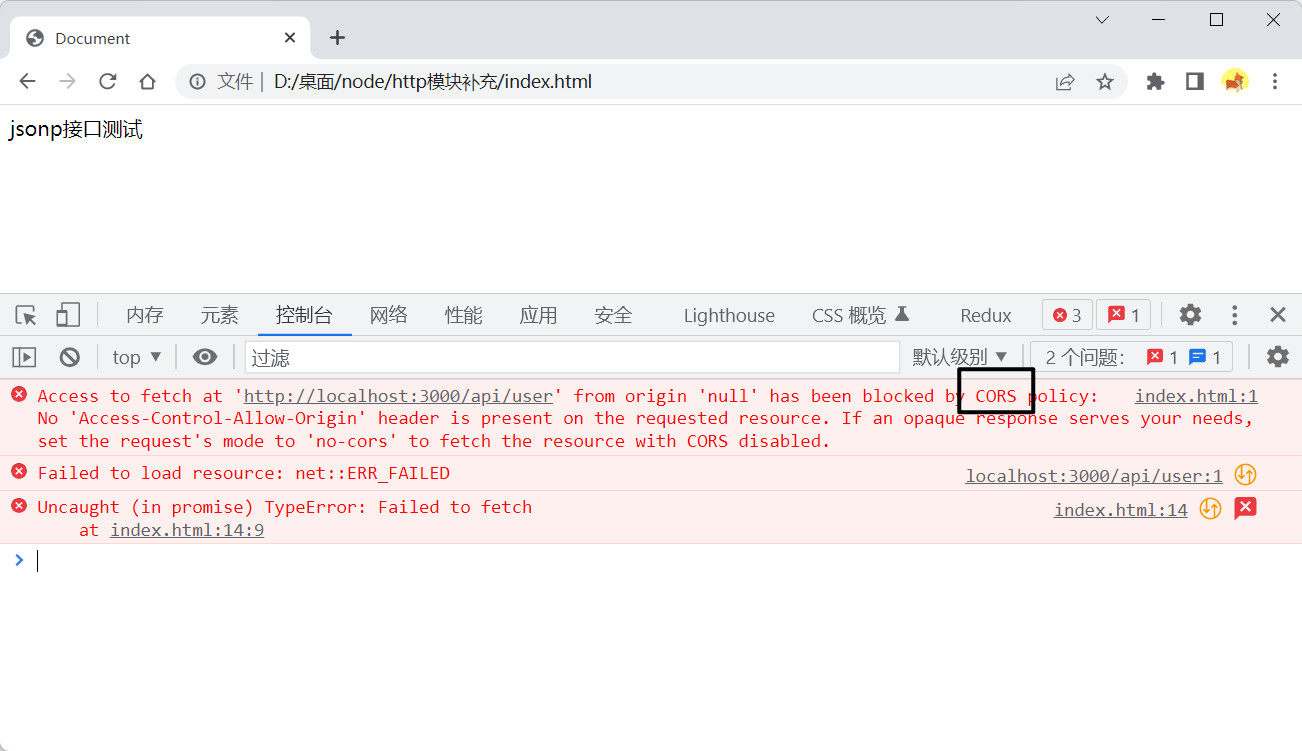
这种问题有多种解决方案:
- 后端设置响应头来允许前端访问服务器(只需要后端进行修改)
- 前后端使用
jsonp方式进行交互(前后端都需要进行相应修改) - 前端配置代理(只需要前端进行修改,这在像
vue,react等这些框架中经常使用)
后端设置跨域
后端可以直接在响应头里设置跨域,而前端不需要做额外的操作
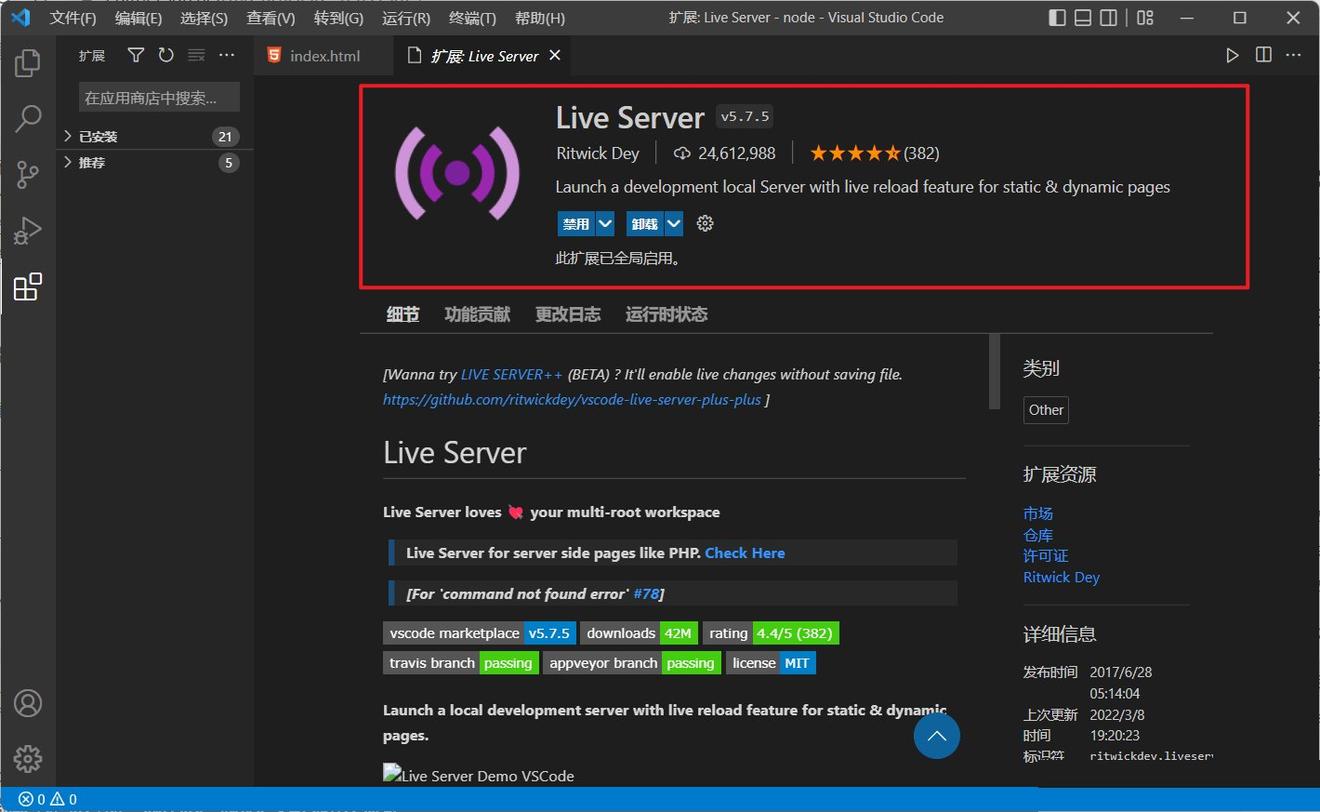
我们下载一个vscode的Live Server插件,用于在线运行html文件:
右键html文件选择Open with Live Server:
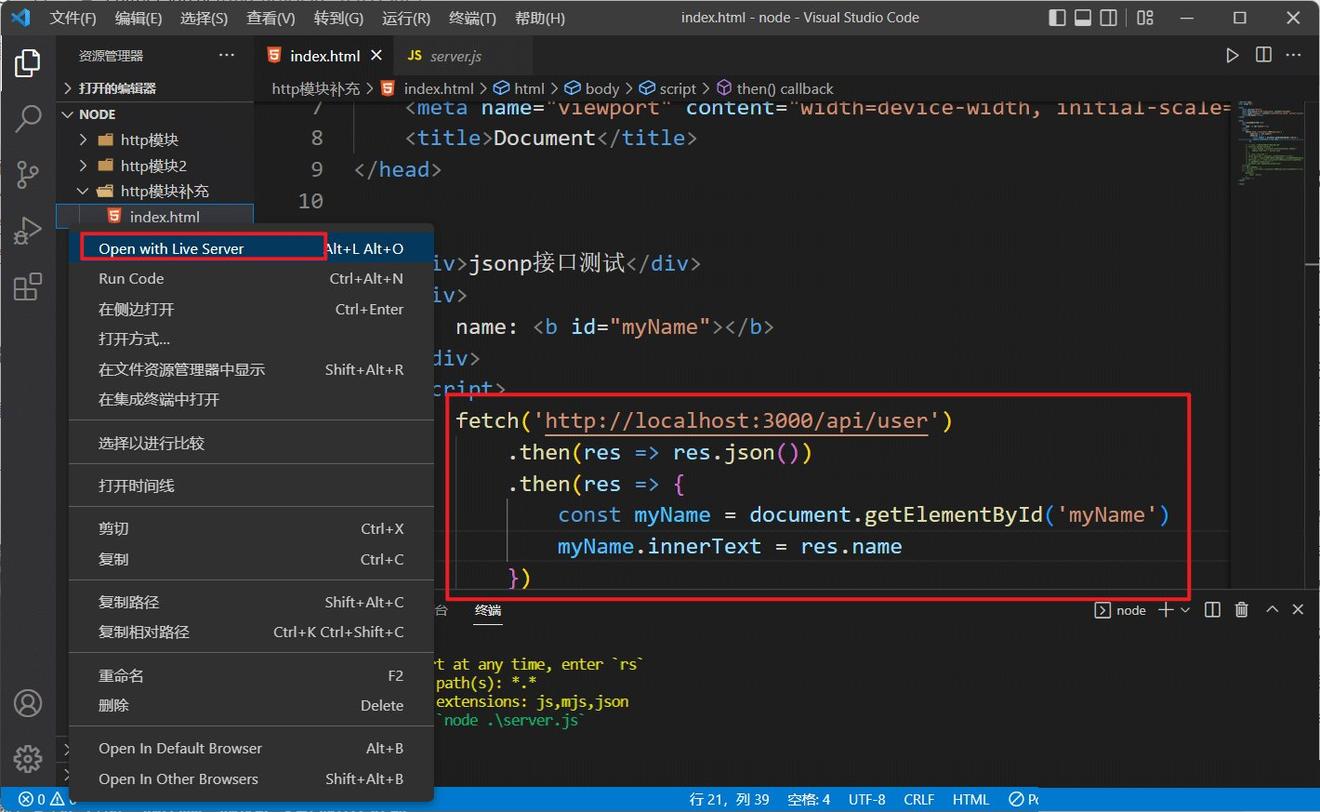
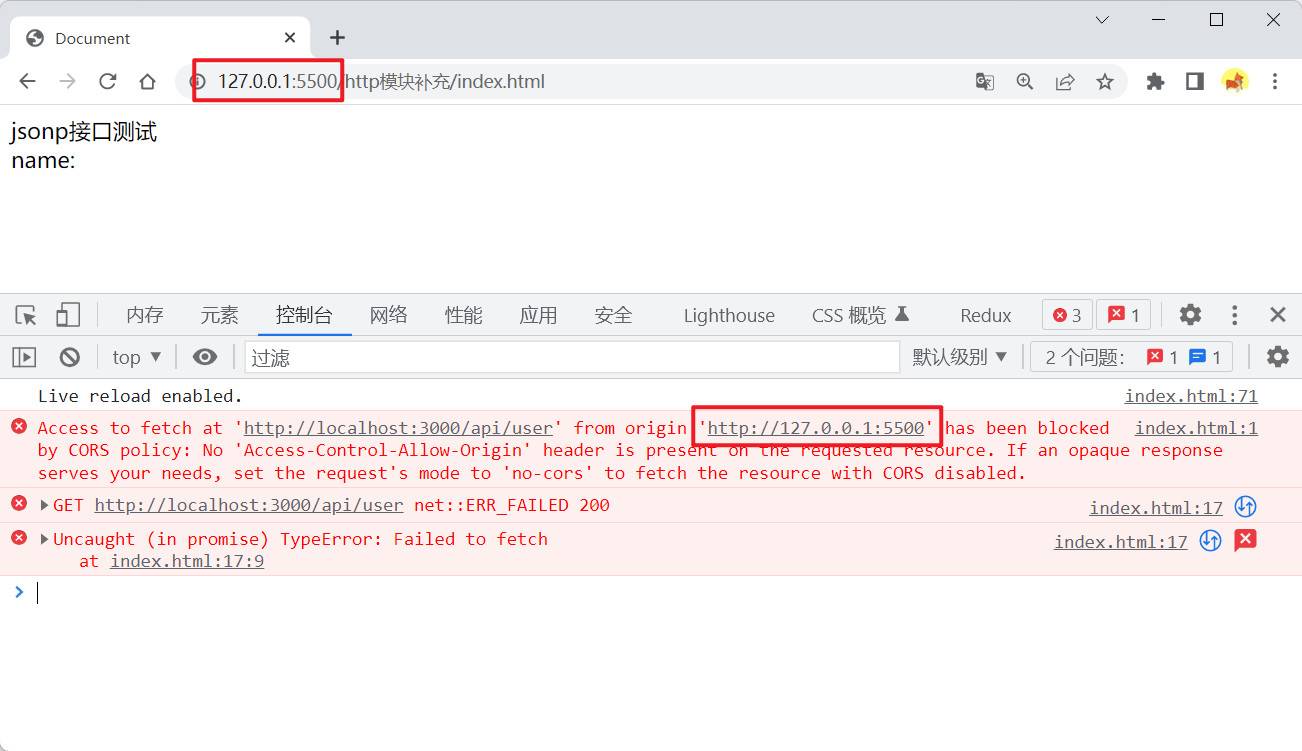
打开后发现前端html的在线运行地址为http://127.0.0.1:5500,我们在后端返回数据的响应头里允许该地址访问即可:
修改一下上边的server.js
const http = require("http");
const url = require("url");
const server = http.createServer();
server.on("request", (req, res) => {
    const urlObj = url.parse(req.url, true);
    res.writeHead(200, {
        "content-type": "application/json;charset=utf-8",
         // 设置跨域允许http://127.0.0.1:5500访问
        "Access-Control-Allow-Origin": "http://127.0.0.1:5500",
         // "Access-Control-Allow-Origin": "*", 也可以使用'*',代表允许所有地址访问
    });
    switch (urlObj.pathname) {
        case "/api/user":
            // 模拟数据
            const userinfo = {
                name: "Ailjx",
            };
            res.end(JSON.stringify(userinfo));
            break;
        default:
            res.end("404");
            break;
    }
});

server.listen(3000, () => {
    console.log("服务器启动啦!");
});
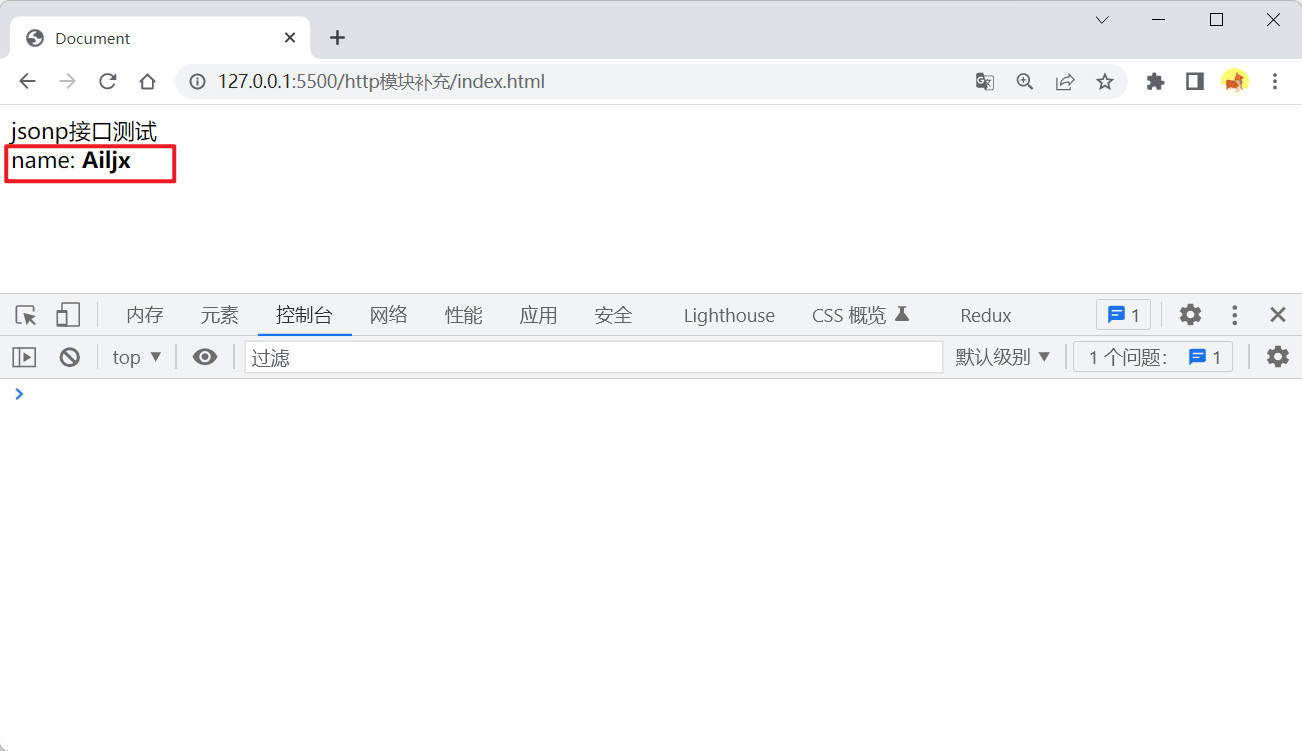
这时前端就能正常调用该接口了:
jsonp接口
我们知道html的script标签可以引入js文件,并且重要的是使用script标签引入js没有跨域的要求,所以我们可以在script标签的src属性中调用我们的接口来获取后端返回的数据
前端处理:
<body>
    <div>jsonp接口测试</div>
    <div>
        name: <b id="myName"></b>
    </div>
    <script>
        // 定义一个接收后端返回数据的函数
        function getUser(params) {
            const myName = document.getElementById('myName')
            // 可以做一些操作
            myName.innerText = params.name
        }
        // 创建一个script标签
        const myScript = document.createElement('script')
        // script标签的src内调用接口,需要将我们定义的接收数据的函数名传递给后端
        myScript.src = 'http://localhost:3000/api/user?cb=getUser'
        // 向文档内插入该script标签
        document.body.appendChild(myScript)
    </script>
</body>
或者直接用script调用后端接口:
<body>
    <div>jsonp接口测试</div>
    <div>
        name: <b id="myName"></b>
    </div>
    <script>
        // // 定义一个接收后端返回数据的函数
        function getUser(params) {
            const myName = document.getElementById('myName')
            myName.innerText = params.name
        }
    </script>
    <!-- 调用后端接口 -->
    <script src="http://localhost:3000/api/user?cb=getUser"></script>
</body>
后端处理:
const http = require("http");
const url = require("url");
const server = http.createServer();

server.on("request", (req, res) => {
    const urlObj = url.parse(req.url, true);
    switch (urlObj.pathname) {
        case "/api/user":
            // 模拟数据
            const userinfo = {
                name: "Ailjx",
            };
            // urlObj.query.cb是前端传递的接收数据的函数名称
            // 返回给前端一个函数调用
            res.end(`${urlObj.query.cb}(${JSON.stringify(userinfo)})`);
            break;
        default:
            res.end("404");
            break;
    }
});

server.listen(3000, () => {
    console.log("服务器启动啦!");
});
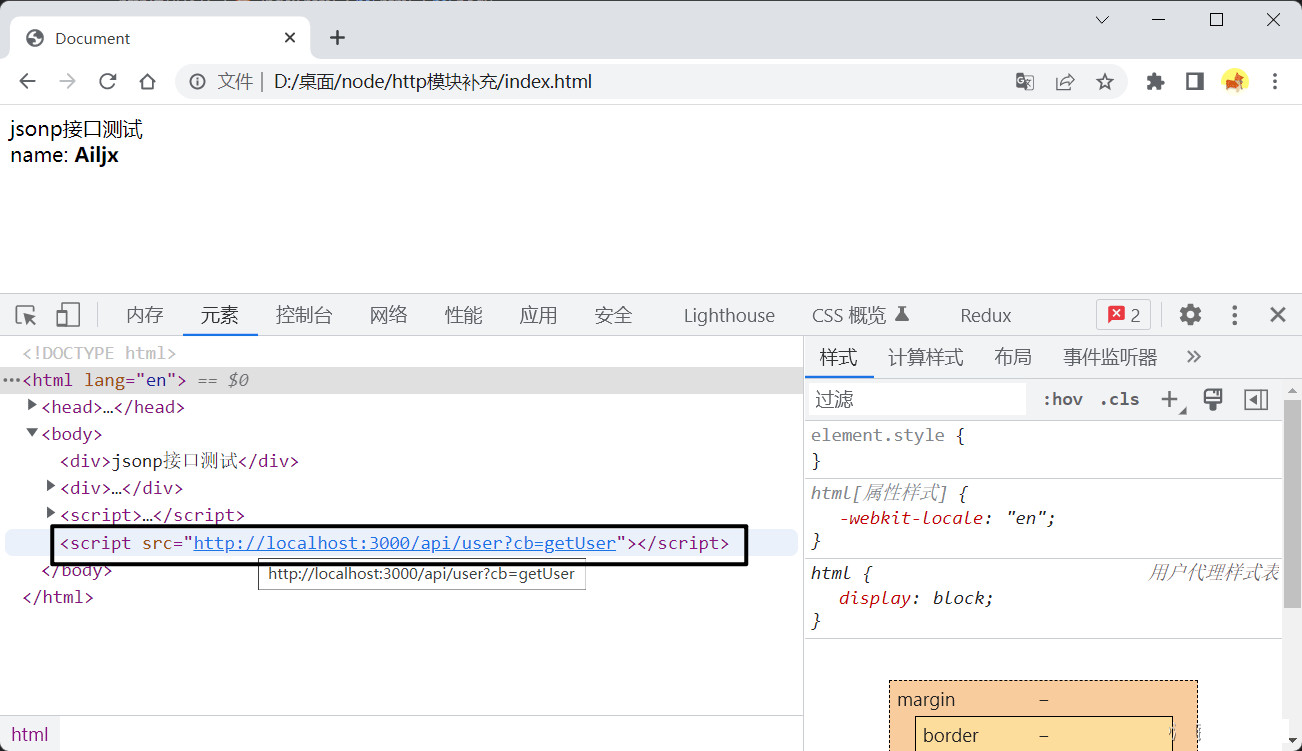
可以看到使用jsonp的原理就是在script标签中调用后端接口,因为script标签内的js代码是立即执行的
所以我们需要提前定义一个接收后端参数的处理函数,然后将该函数名传递给后端,后端根据这个函数名返回给前端一个该函数的调用并将需要给前端的数据作为该函数的参数
上述代码的最终效果如下:
<script>
    // 定义一个接收后端返回数据的函数
    function getUser(params) {
        const myName = document.getElementById('myName')
        myName.innerText = params.name
    }
</script>
  <!-- <script src="http://localhost:3000/api/user?cb=getUser"></script>的效果如下 -->
<script>
    getUser({
        name: "Ailjx",
    })
</script>
七、Node作为中间层使用
上面我们使用node搭建了后端服务器,使其作为服务端运行,但其实node还能当作客户端反过来去调用其它服务端的接口,这使得node成为了一个中间层
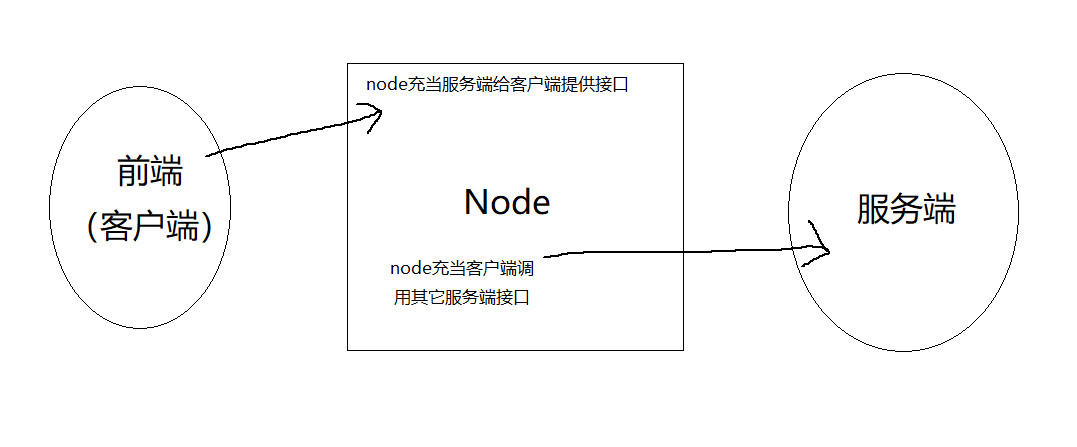
因为跨域只是浏览器的限制,服务端之间的通信并不存在跨域的问题,这样我们就能借助node去调用第三方具有跨域限制的接口,这是将node作为中间层的一个非常实用的功能
模拟get请求(转发跨域数据)
在猫眼电影网上随便找了一个带有跨域的接口,我们直接调用时会报CORS跨域问题:
<h1>使用node模拟get请求</h1>
<script>
    fetch('https://i.maoyan.com/api/mmdb/movie/v3/list/hot.json?ct=%E8%A5%BF%E5%8D%8E&ci=936&channelId=4')
        .then(res => res.json())
        .then(res => {
            console.log(res);
        })
</script>
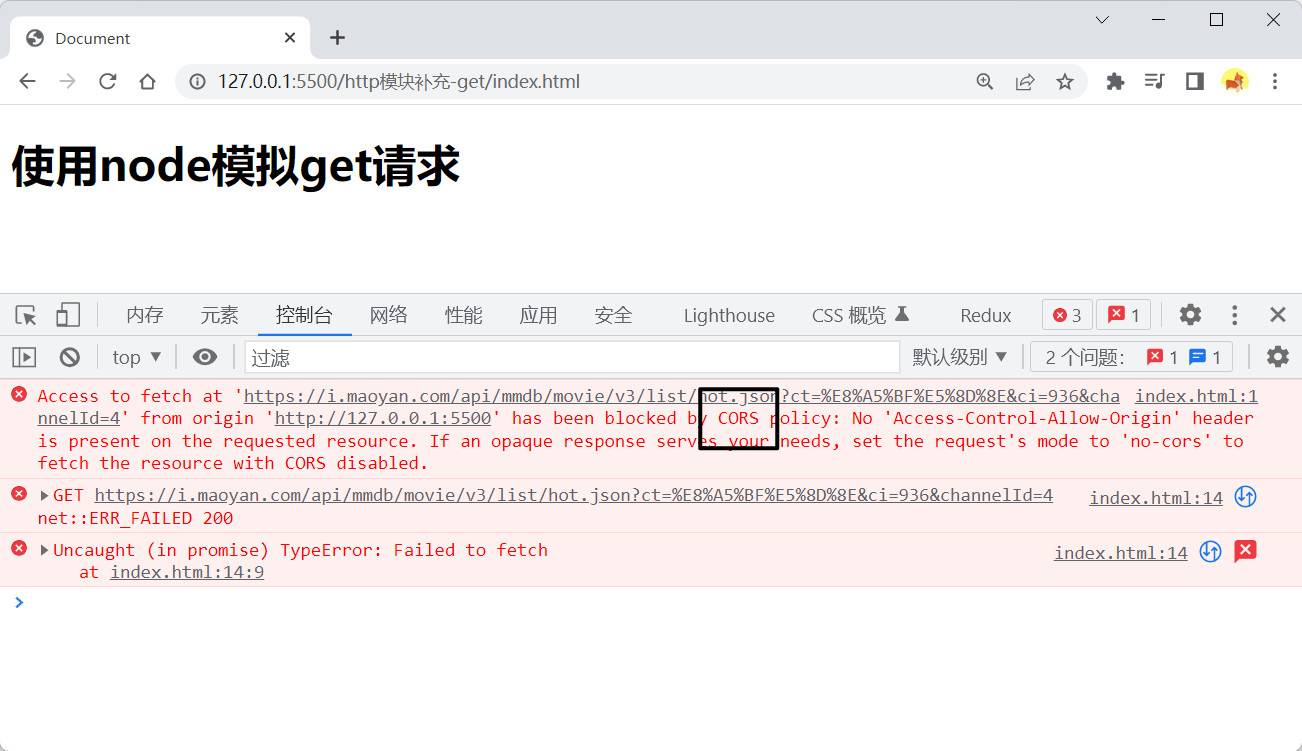
这时我们可以利用node帮我们去请求这个接口的数据:
const http = require("http");
const https = require("https");
// http和https的区别仅在于一个是http协议一个是https协议
const url = require("url");

const server = http.createServer();

server.on("request", (req, res) => {
    const urlObj = url.parse(req.url, true);

    res.writeHead(200, {
        "content-type": "application/json;charset=utf-8",
        "Access-Control-Allow-Origin": "http://127.0.0.1:5500",
    });

    switch (urlObj.pathname) {
        case "/api/maoyan":
            // 我们定义的httpget方法:使node充当客户端去猫眼的接口获取数据
            httpget((data) => res.end(data));
            break;

        default:
            res.end("404");
            break;
    }
});

server.listen(3000, () => {
    console.log("服务器启动啦!");
});

function httpget(cb) {
    // 定义一个存放数据的变量
    let data = "";
    // 因为猫眼的接口是https协议的,所以我们需要引入https
    // http和https都具有一个get方法能够发起get请求,区别是一个是http协议,一个是https协议
    // http get方法第一个参数为接口地址,第二个参数为回调函数
    https.get(
        "https://i.maoyan.com/api/mmdb/movie/v3/list/hot.json?ct=%E8%A5%BF%E5%8D%8E&ci=936&channelId=4",
        (res) => {
            // http get方法获取的数据是一点点返回的,并不是直接返回全部
            // 监听data,当有数据返回时就会被调用
            res.on("data", (chunk) => {
                // 收集数据
                data += chunk;
            });
            // 监听end,数据返回完毕后调用
            res.on("end", () => {
                cb(data);
            });
        }
    );
}
之后我们调用我们node的接口即可:
<h1>使用node模拟get请求</h1>
<script>
    fetch('http://localhost:3000/api/maoyan')
        .then(res => res.json())
        .then(res => {
            console.log(res);
        })
</script>
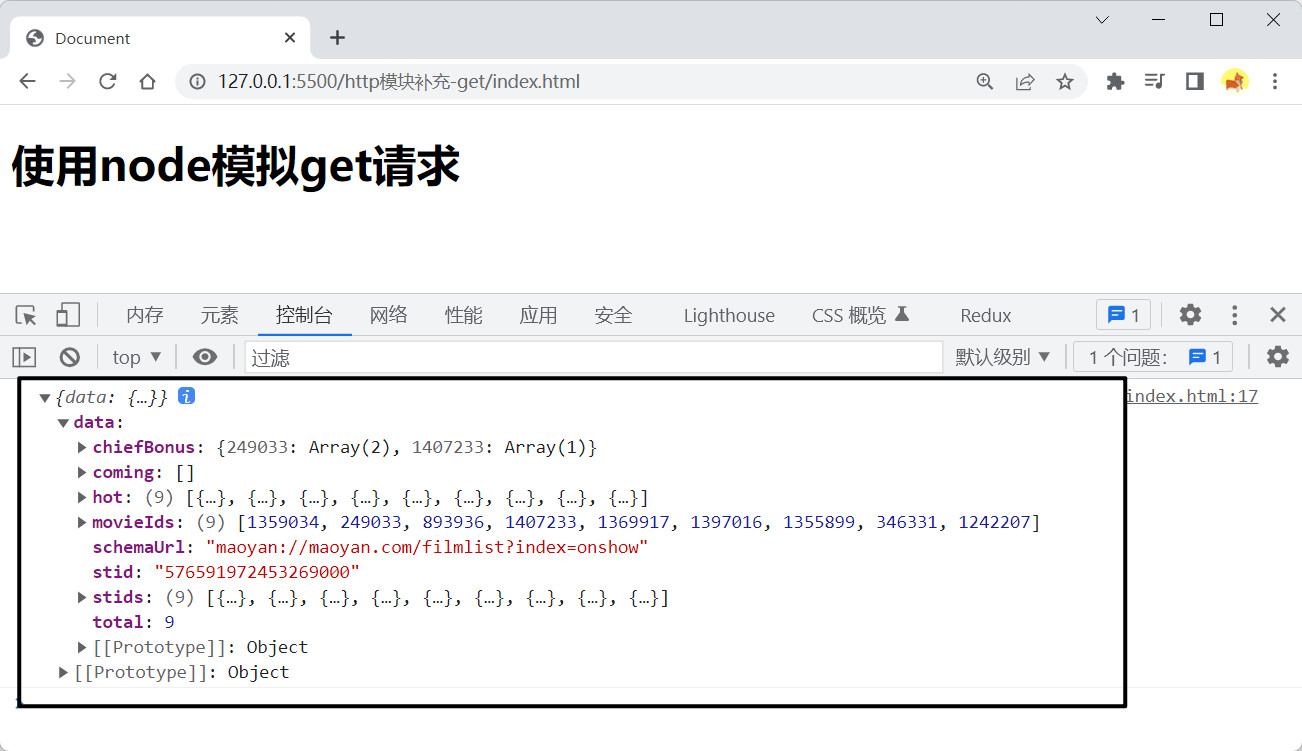
这里node即作为服务端给我们提供接口/api/maoyan,又充当了一下客户端去调用猫眼的接口,这样我们就绕过了猫眼的跨域限制获取了它的数据
模拟post请求(服务器提交)
使用node模拟post请求需要使用http或https的request方法来进行请求的配置,稍微有点麻烦:
http和https模块的区别仅在于一个是http协议一个是https协议
const http = require("http");
const https = require("https");
const url = require("url");
const server = http.createServer();
server.on("request", (req, res) => {
    const urlObj = url.parse(req.url, true);

    res.writeHead(200, {
        "content-type": "application/json;charset=utf-8",
        "Access-Control-Allow-Origin": "http://127.0.0.1:5500",
    });

    switch (urlObj.pathname) {
        case "/api/xiaomiyoumin":
            // httpPost方法:使node充当客户端去小米有品的post接口获取数据
            httpPost((data) => res.end(data));
            break;

        default:
            res.end("404");
            break;
    }
});

server.listen(3000, () => {
    console.log("服务器启动啦!");
});

function httpPost(cb) {
    // 定义一个存放数据的变量
    let data = "";
    // 这是小米有品的一个post接口:"https://m.xiaomiyoupin.com/mtop/market/search/placeHolder"
    // 这个接口调用时需要传“[{}, { baseParam: { ypClient: 1 } }]”这样一个参数才能返回数据

    // 配置Options Url请求对象
    const options = {
        // 域名
        hostname: "m.xiaomiyoupin.com",
        // 接口端口号,443代表https,80代表http
        port: "443",
        // 路径
        path: "/mtop/market/search/placeHolder",
        // 请求方式
        method: "POST",
        // 请求头
        Headers: {
            // 表示接收json数据
            "Content-Type": "application/json",
        },
    };

    // http request方法第一个参数为请求对象,第二个参数为回调函数,request方法返回一个值(),在该值内通过调用write向post请求传递数据
    const req = https.request(options, (res) => {
        // 监听data,当有数据返回时就会被调用
        res.on("data", (chunk) => {
            // 收集数据
            data += chunk;
        });
        // 监听end,数据返回完毕后调用
        res.on("end", () => {
            cb(data);
        });
    });
    // 发送post的参数
    // req.write(JSON.stringify([{}, { baseParam: { ypClient: 1 } }]));
    // 这里的使用与我们server服务器中的req参数使用方式差不多,不要忘记最后调用end方法,并且也可以直接在end方法内传递数据
    req.end(JSON.stringify([{}, { baseParam: { ypClient: 1 } }]));
}
<body>
    <h1>使用node模拟post请求</h1>
    <script>
        fetch('http://localhost:3000/api/xiaomiyoumin')
            .then(res => res.json())
            .then(res => {
                console.log(res);
            })
    </script>
</body>
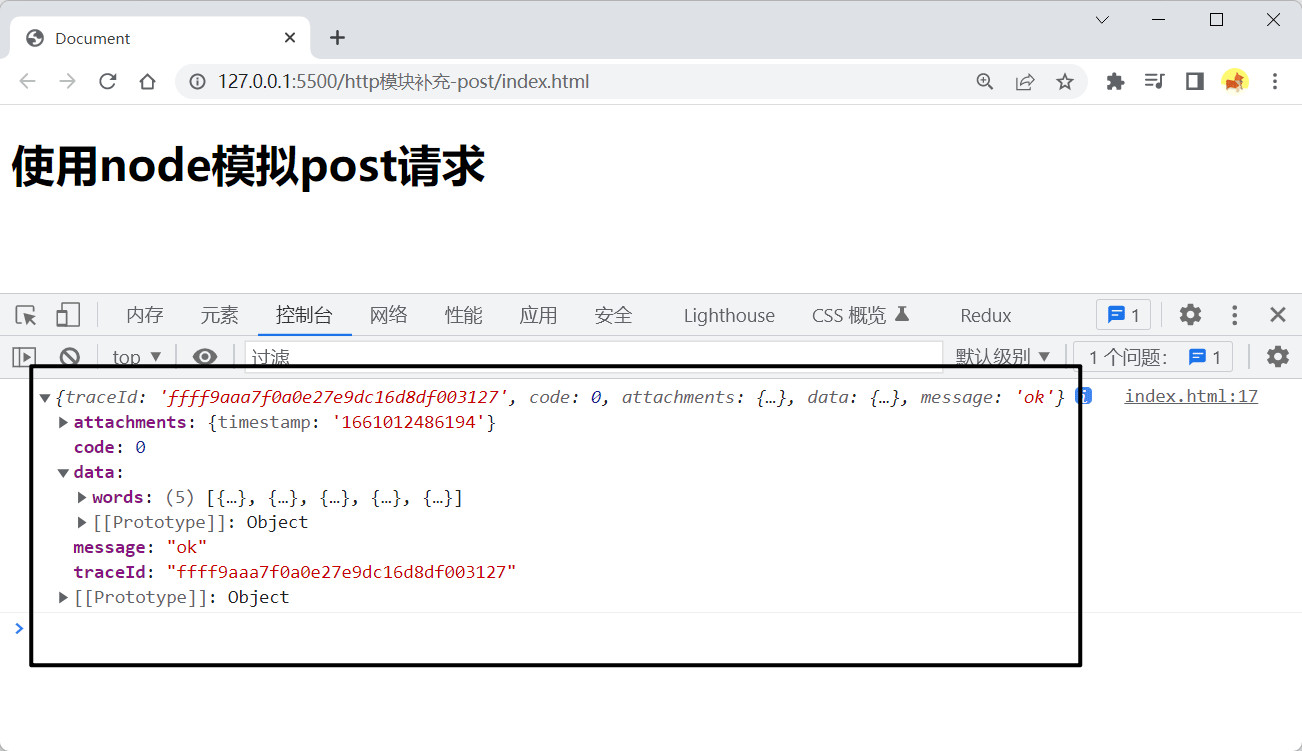
八、使用Node实现爬虫
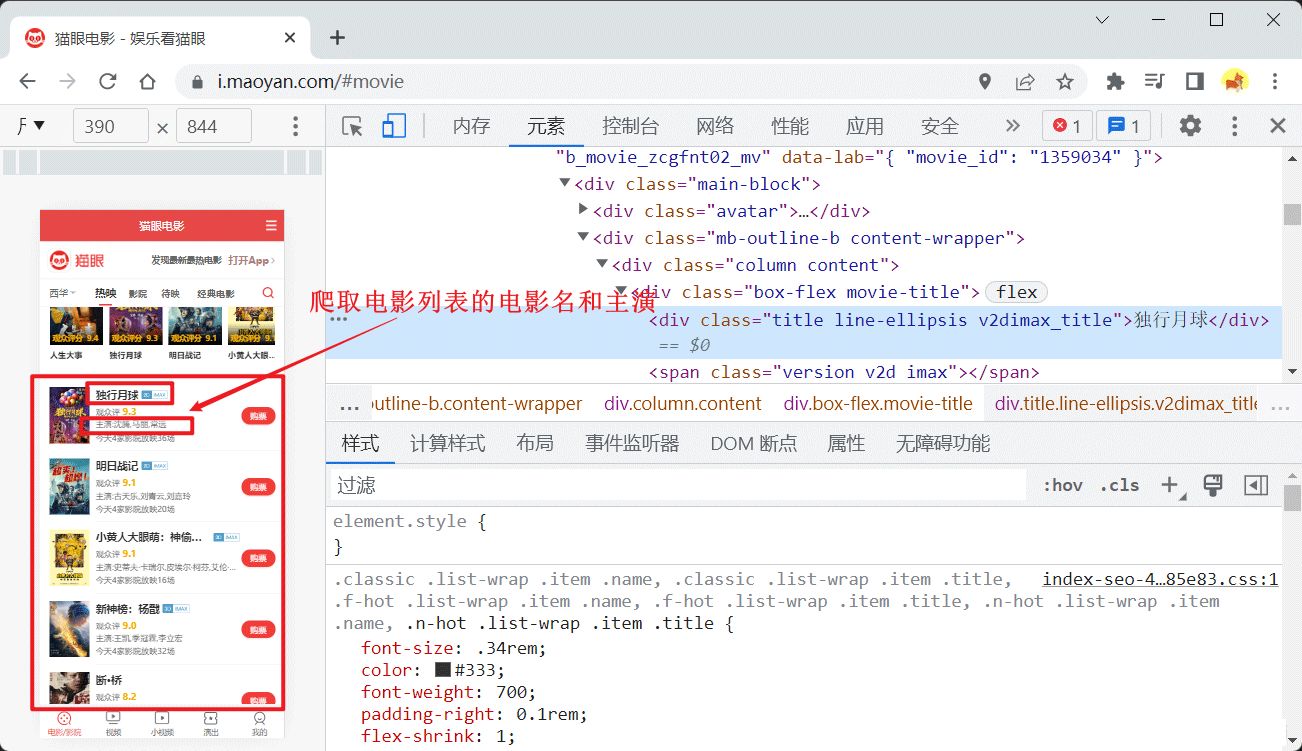
我们使用node的一个cheerio包也可以实现爬虫功能,如我们爬取猫眼移动端https://i.maoyan.com首页的一些数据:
我们在一个文件夹内打开终端,先生成package.json文件:
npm init
安装cheerio:
npm i cheerio
文件夹内创建我们的服务器文件server.js:
const https = require("https");
const http = require("http");
const cheerio = require("cheerio");

http.createServer((request, response) => {
    response.writeHead(200, {
        "content-type": "application/json;charset=utf-8",
    });
    const options = {
        hostname: "i.maoyan.com",
        port: 443,
        path: "/",
        method: "GET",
    };
    // 获取页面数据
    const req = https.request(options, (res) => {
        let data = "";
        res.on("data", (chunk) => {
            data += chunk;
        });

        res.on("end", () => {
            response.end(data);
        });
    });

    req.end();
}).listen(3000);
上面演示了使用https.request方法配置get请求(接口为:https://i.maoyan.com)的写法,你也可以直接使用https.get进行调用
通过浏览器调用我们的服务器:
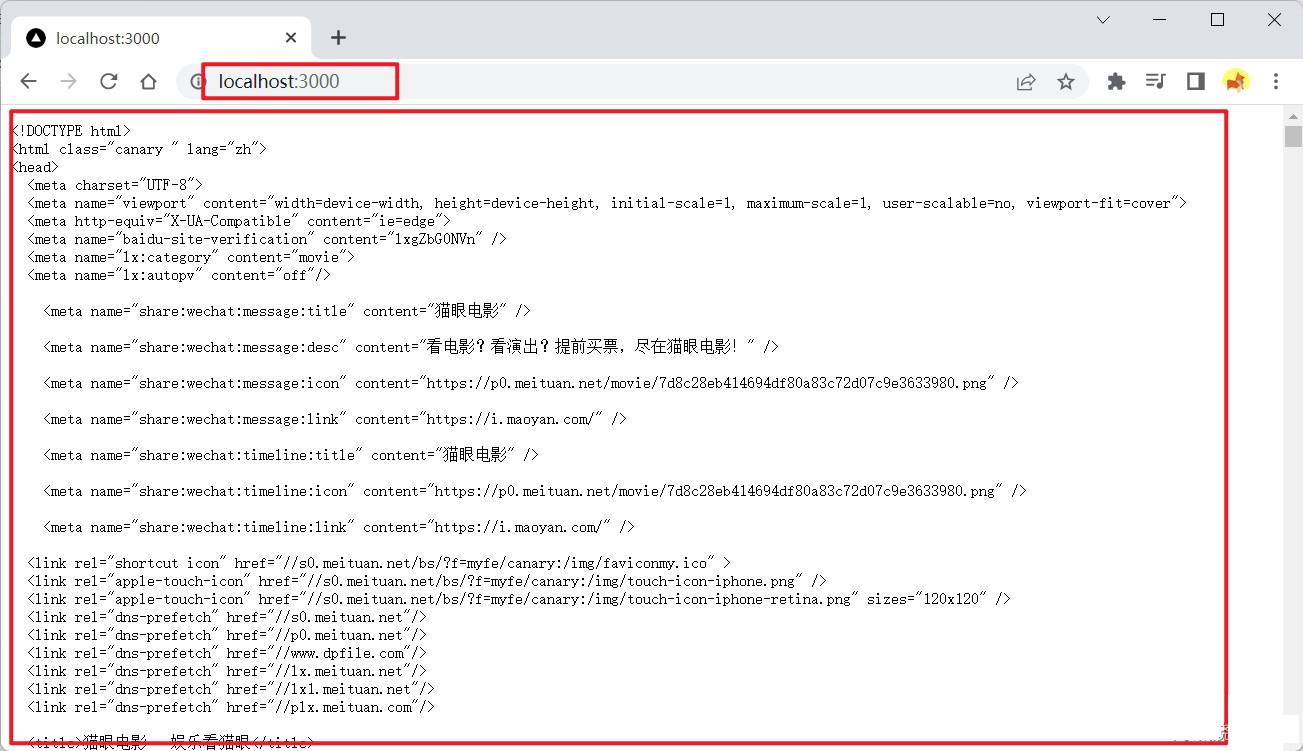
可以看到我们成功获取了猫眼移动端首页的html文档,我们需要的数据都在文档中了,之后我们只需将我们需要的数据提取出来,这里就将用到cheerio:
const https = require("https");
const http = require("http");
const cheerio = require("cheerio");
http.createServer((request, response) => {
    response.writeHead(200, {
        "content-type": "application/json;charset=utf-8",
    });

    const options = {
        hostname: "i.maoyan.com",
        port: 443,
        path: "/",
        method: "GET",
    };
    // 获取页面数据
    const req = https.request(options, (res) => {
        let data = "";
        res.on("data", (chunk) => {
            data += chunk;
        });

        res.on("end", () => {
            // 处理页面数据
            filterData(data);
        });
    });
    function filterData(data) {
        let $ = cheerio.load(data);
        // 获取class="column content"的元素
        let $movieList = $(".column.content");
        // console.log($movieList);
        let movies = [];
        $movieList.each((index, value) => {
            movies.push({
                // 获取class为movie-title下的class为title的元素的文本值
                title: $(value).find(".movie-title .title").text(),
                detail: $(value).find(".detail .actor").text(),
            });
        });

        response.end(JSON.stringify(movies));
    }

    req.end();
}).listen(3000);
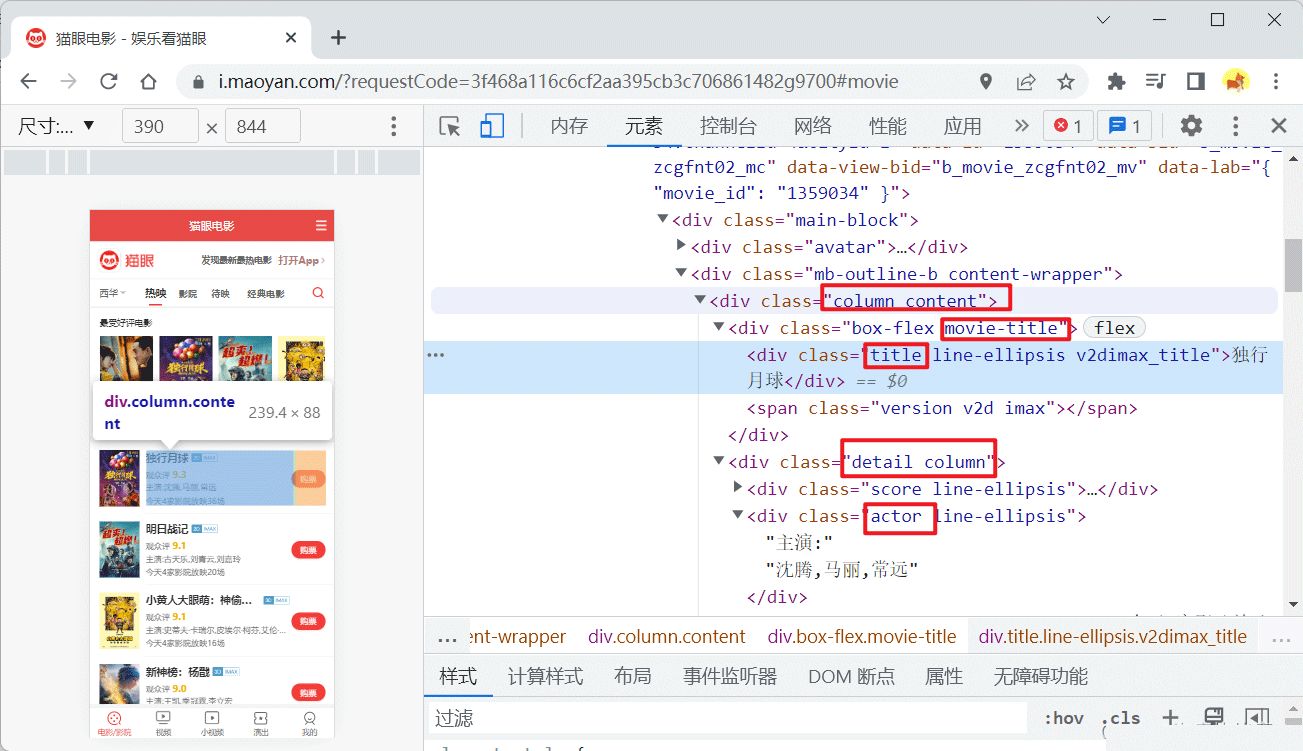
cheerio.load接收html文档字符串,它返回一个对象,该对象与jQuery相似,我们可以对其使用jQuery的语法进行操作
上面使用的class类名都是在猫眼首页文档的对应类名,如:
重新访问一下我们的服务器:
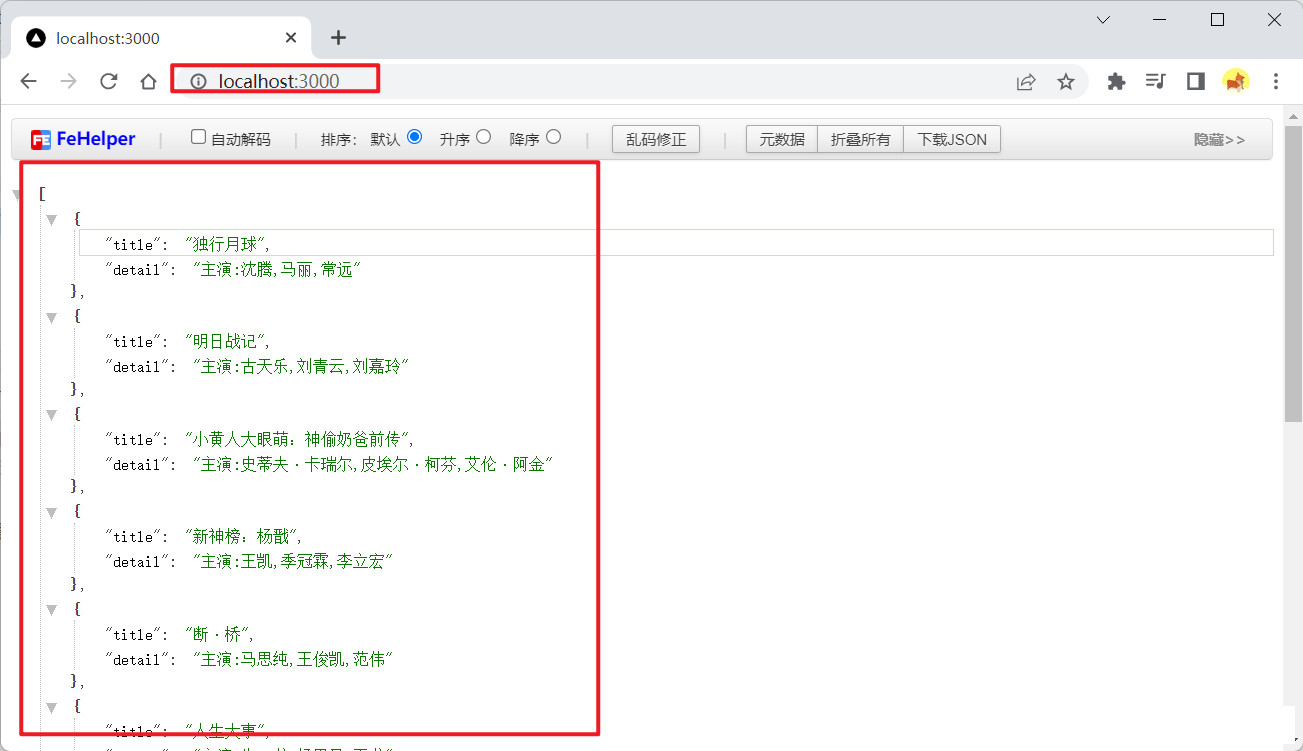
可以看到我们已经爬虫成功!
如果在请求https://i.maoyan.com接口时获取不到数据,可能是我们浏览器上的猫眼网进入了验证操作,我们在访问我们服务器的这个浏览器上打开https://i.maoyan.com进行验证一下,之后我们就能请求到https://i.maoyan.com的html文档内容了