在学习Vue-cli之前,我们已经学习了前端体系、前后端分离的演变、Vue入门、Vue的基本语法、Vue组件、Vue路由、Axios等内容。如果你还没学习,可以阅读我之前的文章《快速了解前端体系》《前后端分离的演变史,了解一下》、《Vue快速入门》等进行快速学习。
接下来我们就来学习标准前端化工程Vue-cli。
Vue-cli
什么是Vue-cli?
Vue-cli是官方提供的一个脚手架工具,我们可以利用它快速生成前端化的工程模板,十分方便好用。
其功能主要有:
- 统一的目录
- 快速调试
- 单元测试
- 在线运行
- ......
环境安装
使用npm进行全局安装,如果是首次安装可能速度会有点慢。
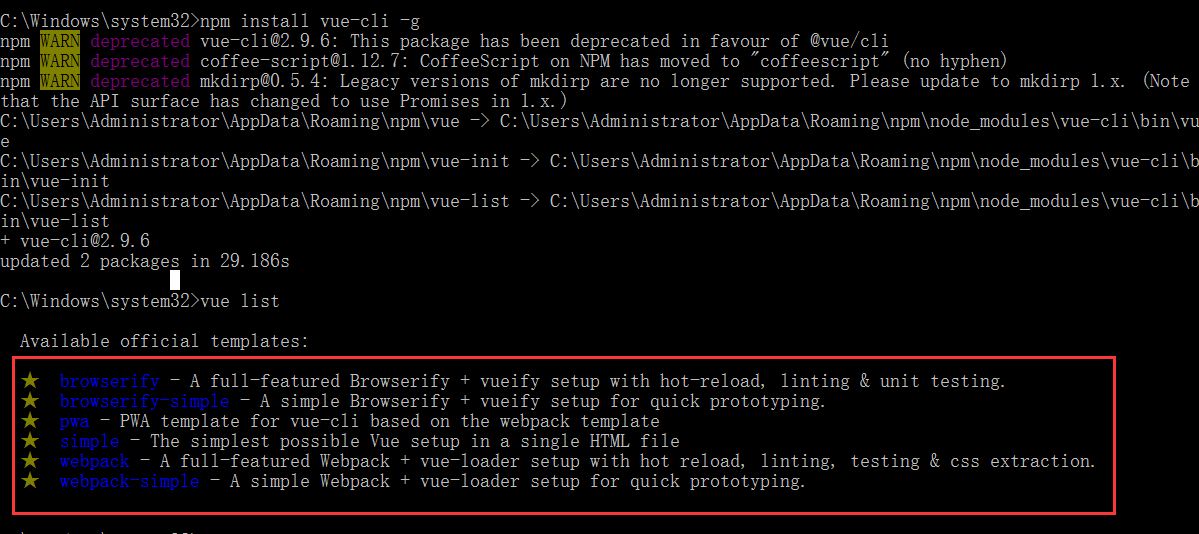
npm install vue-cli -g
检测我们安装的Vue应用。
vue list
第一个Vue-cli前端程序
1、新建文件夹vue-cli。
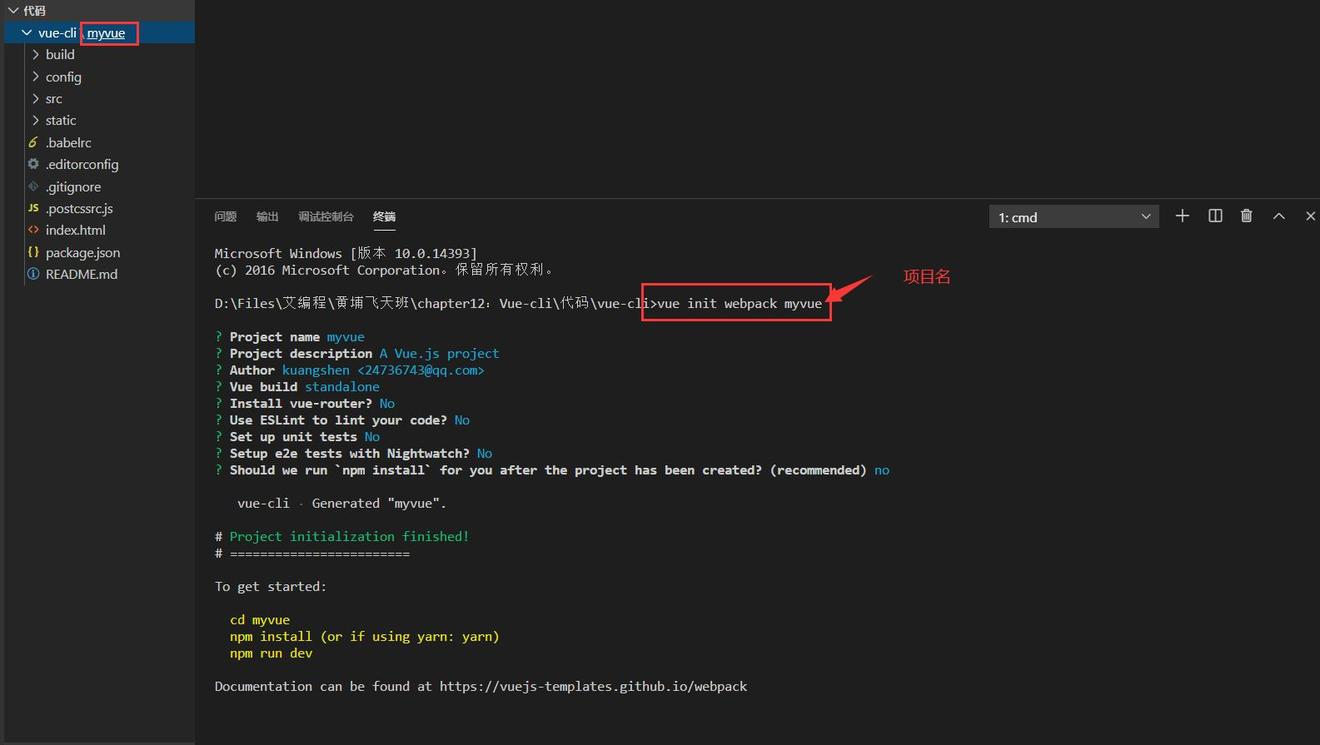
2、创建一个基于webpack模板的Vue应用程序。
vue init webpack myvue
建议初学前端化工程的朋友除了Project name、Project description、Author和Vue build,其他问题全部选择no!
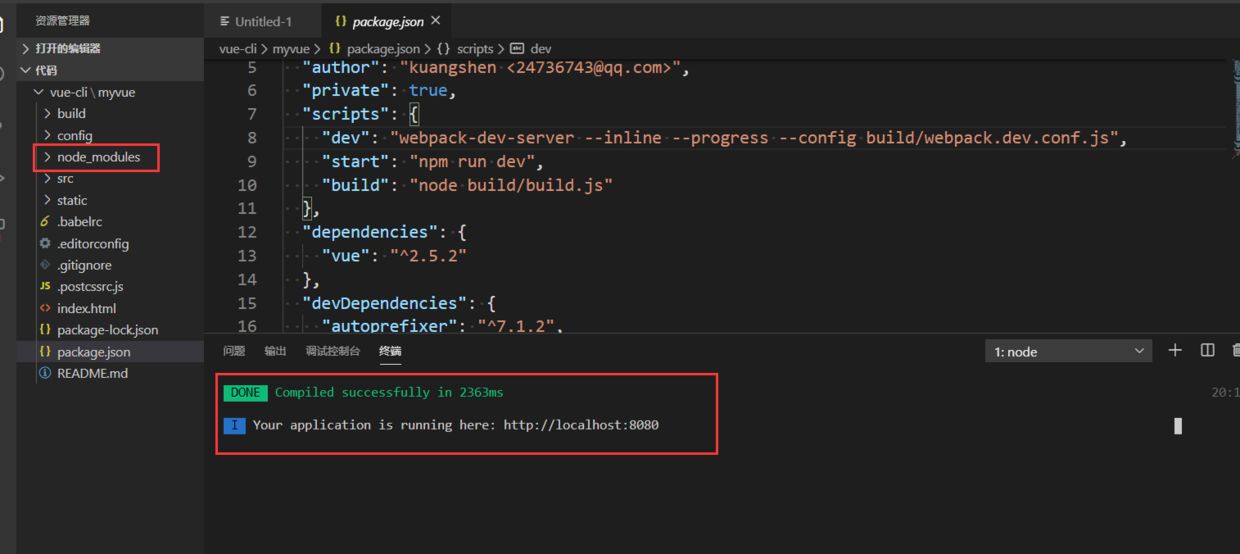
3、安装依赖(一般下载的前端工程是没有任何依赖的),运行程序。
cd myvue #进入当前项目目录
npm install #安装所有依赖
npm run dev #启动项目
4、程序启动成功后,按住Ctrl键,鼠标单击终端中显示的http://localhost:8080,即可打开浏览器访问网页进行测试。

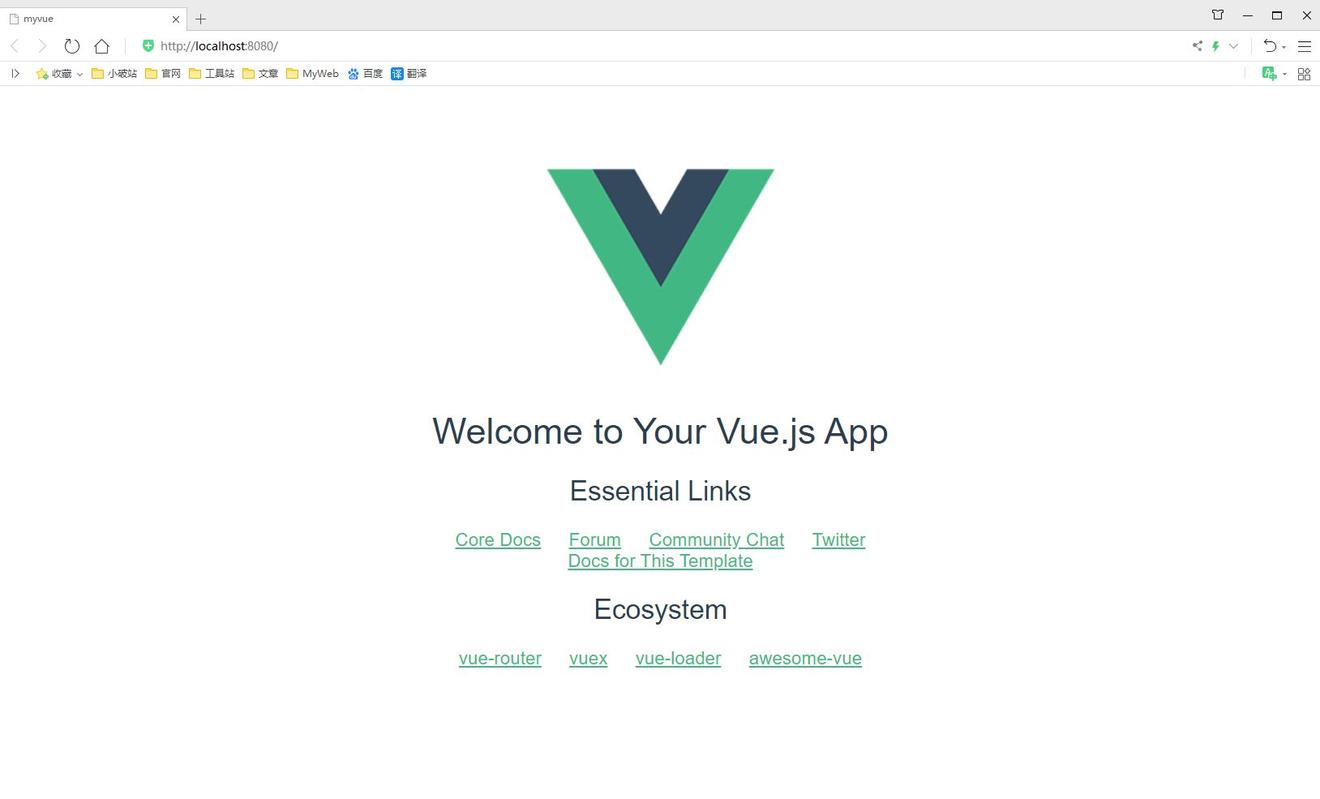
如上图所示,现在我们已经创建了一个标准的前端化工程了,之后就基于这个工程进行操作了。
Vue-cli目录结构分析
Vue-cli工程的目录结构如下图所示。

主要目录文件的作用:
- build和config:webpack配置文件和项目配置文件。
- node_modules:这个目录一般在开源项目中都不存在,我们拿到项目的第一步就是安装所有依赖(npm install)。
- src:项目的源码目录(Vue项目和js代码)。
- static:静态资源文件。
- .babelrc:Babel配置文件(ES6语法转换为ES5语法)。
- .editorconfig:编辑器配置。
- .gitignore:git文件忽略配置。
- .postcssrc.js:CSS相关的配置文件,即导入CSS插件。
- index.html:首页,所有的页面都是通过这里跳转的,实际开发是不使用这个文件的。
- package.json:项目的配置文件,包括名称、版本、描述、作者、依赖、启动脚本等。
src目录
src就是我们编写前端项目的源目录,所有代码都写在这个目录里面。
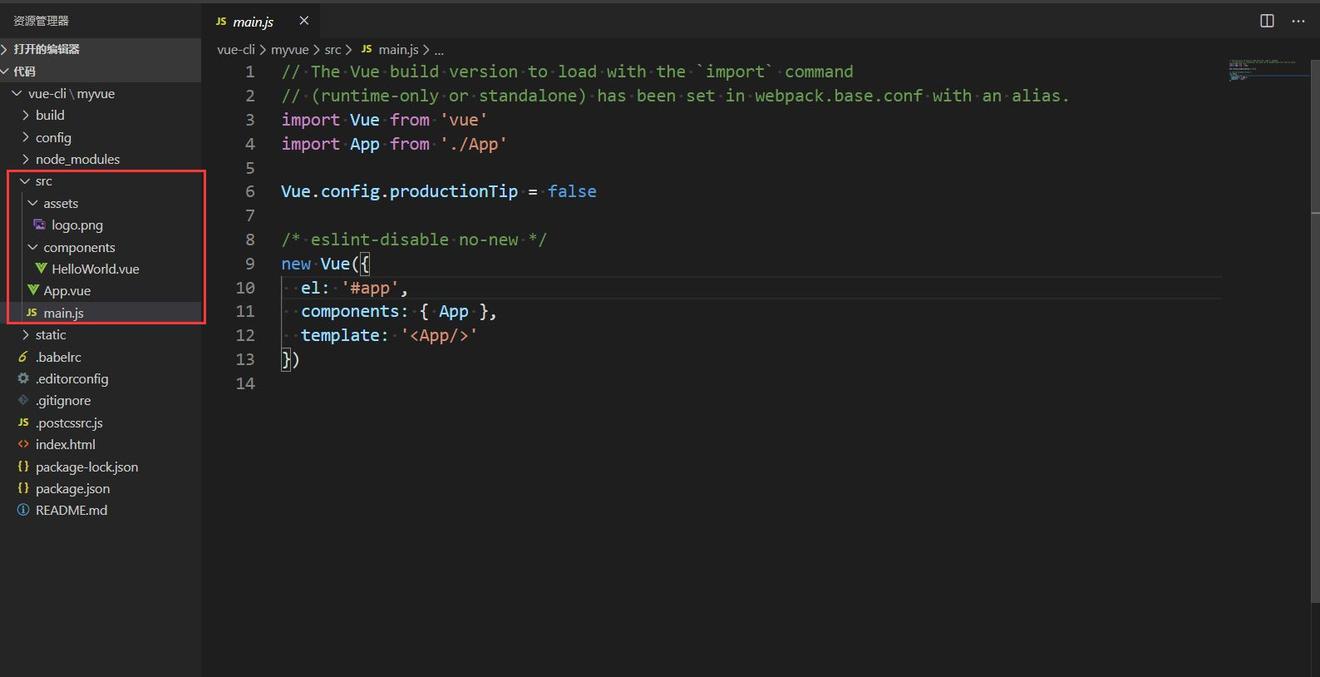
main.js
main.js是项目的主入口,所有的程序都是有这样一个主入口的。
// The Vue build version to load with the `import` command
// (runtime-only or standalone) has been set in webpack.base.conf with an alias.
// es6语法,导入组件和依赖!
import Vue from 'vue' // vue 依赖
import App from './App' // 导入组件
Vue.config.productionTip = false // 关闭浏览器控制台关于环境的提示!
/* eslint-disable no-new */
// vue的核心对象
new Vue({
el: '#app', // 节点
components: { App }, // 组件
template: '<App/>' // 模板
})
App.vue
App.vue是配置路由跳转的标准的Vue模板页面。
<!-- HTML 代码模板 -->
<template>
<div id="app">
<!-- 配置路由跳转 -->
<router-link to="/hello"></router-link>
<!--显示跳转页面的内容-->
<router-view/>
<HelloWorld/>
</div>
</template>
<!--JS 代码 -->
<script>
// JS 代码, 导入我们自己写的模块!
import HelloWorld from './components/HelloWorld'
// 导入对象App,在其他地方导入的话就可以直接使用了!
export default {
name: 'App',
components: {
HelloWorld // 组件!
}
}
</script>
<!--CSS 样式: 如果没有加 scoped 就是全局生效,如果增加了就是当前页面生效!-->
<style>
#app {
font-family: 'Avenir', Helvetica, Arial, sans-serif;
-webkit-font-smoothing: antialiased;
-moz-osx-font-smoothing: grayscale;
text-align: center;
color: #2c3e50;
margin-top: 60px;
}
</style>
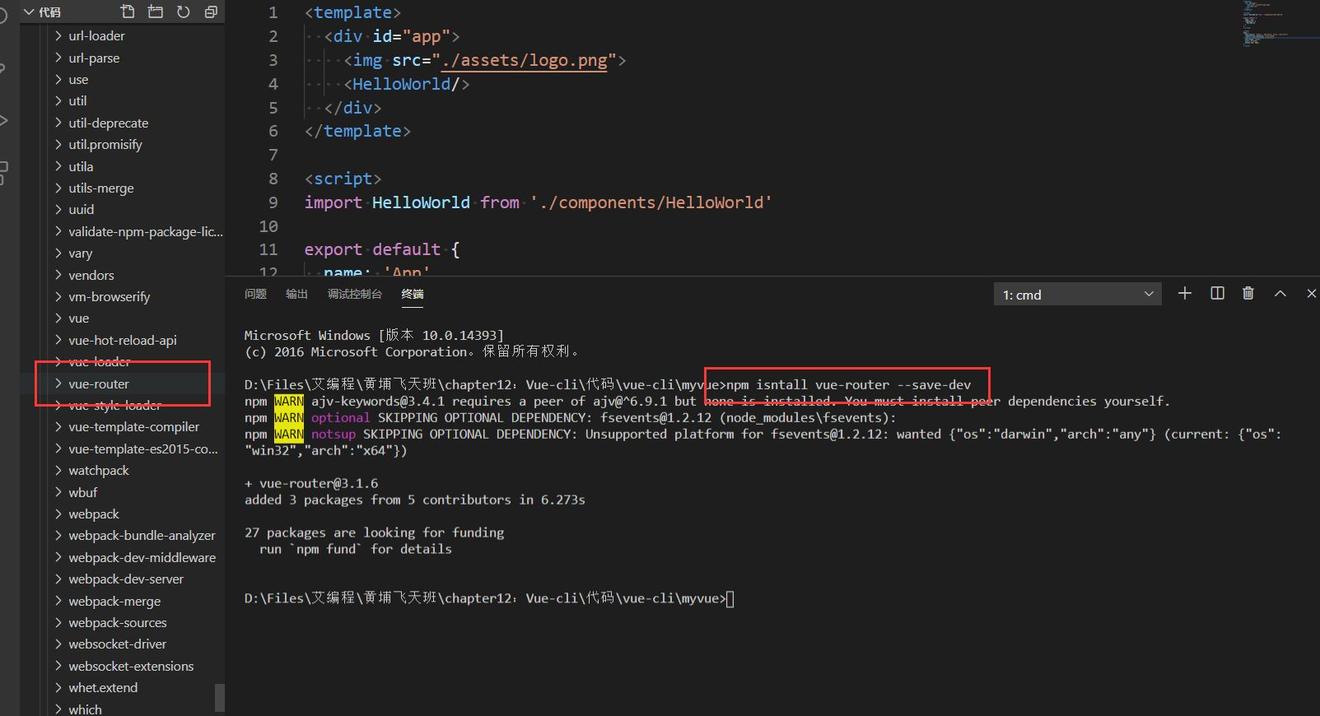
标准的路由
准备工作
vue-router是Vue的官方路由,可以和Vue无缝集成。
1、在项目中安装vue-router。
npm install vue-router --save-dev
2、在模板化工程中导入和使用它。
//导入我们的路由组件
import VueRouter from 'vue-router'
//显式的调用Vue路由
Vue.use(VueRouter)
测试
1、清空项目中的多余内容。
2、在Components目录下创建和定义我们自己的组件。
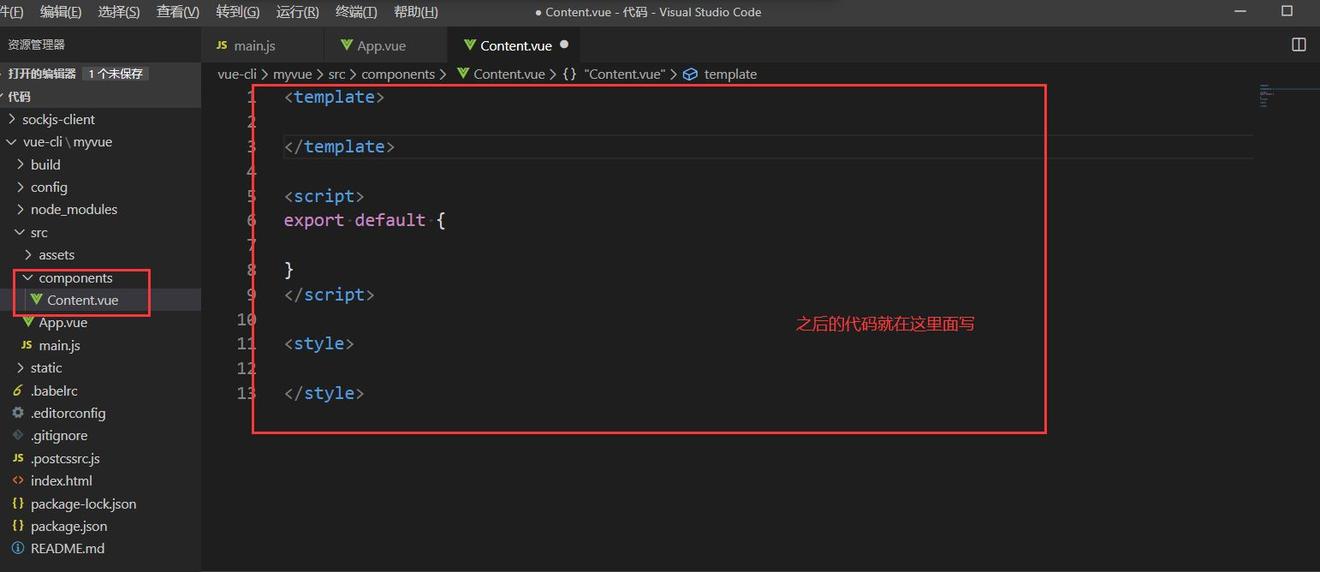
<template>
<div>
<h1>内容页</h1>
</div>
</template>
<script>
export default {
name: 'Content'
}
</script>
3、在router目录下的index.js中编写安装路由。

4、编写我们自己的路由组件。
// 导入Vue
import Vue from 'vue'
// 导入我们的路由组件
import VueRouter from 'vue-router'
// 显示的调用Vue路由
Vue.use(VueRouter);
// 导入我们自己写的组件, 不需要增加 .vue 后缀!
import Content from '../components/Content'
import Main from '../components/Main'
// 配置路由
export default new VueRouter({
// 就是我们上周讲的
routes: [
// 规则1 , content 内容页跳转规则!
{
path: '/content',
name: 'content',
component: Content
},
// 规则2
{
path: '/main',
name: 'main',
component: Main
}
]
})
5、在main.js中配置路由。
// The Vue build version to load with the `import` command
// (runtime-only or standalone) has been set in webpack.base.conf with an alias.
import Vue from 'vue'
import App from './App'
Vue.config.productionTip = false
// 导入我们的路由规则, 自动识别 index.js
import router from './router'
/* eslint-disable no-new */
new Vue({
el: '#app',
router, // 挂载路由!这里实际上相当于router:router,参数同名可省略
components: { App },
template: '<App/>'
})
6、在App.vue中使用即可。
<template>
<div id="app">
<router-link to="/main">首页</router-link>
<router-link to="/content">内容</router-link>
<!-- 出口,展现路由内容的地方! -->
<router-view></router-view>
</div>
</template>
<script>
export default {
name: 'App'
}
</script>
<style>
#app {
font-family: "Avenir", Helvetica, Arial, sans-serif;
-webkit-font-smoothing: antialiased;
-moz-osx-font-smoothing: grayscale;
text-align: center;
color: #2c3e50;
margin-top: 60px;
}
</style>
404配置(扩展)
1、编写404.vue组件。
<template>
<div>
<h1>页面不存在!404</h1>
</div>
</template>
<script>
export default {
name: 'NotFound'
}
</script>
2、在index.js中配置路由。
//省略export default new VueRouter({routers;[...]})
// 关于404,路由会优先匹配精准的,然后匹配通用!
{
    path: '*',//通配,但是会优先匹配NotFound组件
    component: NotFound
}
路由模式
Vue-cli工程有两种路由模式:
- hash:默认路由模式,路径会带#,如:http://localhost:8080/#/main
- history:不带#,就是我们常常看到的网页路由,如:http://localhost:8080/main 可以在index.js中配置路由模式。
export default new VueRouter({
  mode: 'history', // 配置路由模式!
  routes: []
}
配置完成后访问网页路径中就不会有#了。