本文实例为大家分享了Android传感器简单使用的具体代码,供大家参考,具体内容如下
1. SensorManager类
SensorManager类用来管理各个传感器:通过SensorManager创建实例,并用getSystemService(SENSOR_SERVICE)获取传感器服务。
使用其getSensorList()方法,可以获取所有可用的传感器该方法返回一个List<Sensor>,即Sensor对象的列表。
注意:当不使用或Activity暂停的时候,要关闭感应器:屏幕关闭时,系统不会自动关闭感应器,这会导致耗电增加,关闭的方法,就是解除对传感器的监听。
2. Sensor类
Sensor实例对应一个具体的传感器,通过判断Sensor的类型,来处理器传感器信息,类型如下:
方向传感器(Orientation sensor):SENSOR_TYPE_ORIENTATION
加速感应器(Accelerometer sensor):SENSOR_TYPE_ACCELEROMETER
陀螺仪传感器(Gyroscope sensor):SENSOR_TYPE_GYROSCOPE
磁场传感器(Magnetic field sensor):SENSOR_TYPE_MAGNETIC_FIELD
接近(距离)感应器(Proximity sensor):SENSOR_TYPE_PROXIMITY
光线传感器(Light sensor):SENSOR_TYPE_LIGHT
气压传感器(Pressure sensor):SENSOR_TYPE_PRESSURE
温度传感器(Temperature sensor): SENSOR_TYPE_TEMPERATURE
重力感应器(Gravity sensor,Android 2.3引入):SENSOR_TYPE_GRAVITY
线性加速感应器(Linear acceleration sensor ,Android 2.3引入):SENSOR_TYPE_LINEAR_ACCELERATION
旋转矢量传感器(Rotation vector sensor,Android 2.3引入): SENSOR_TYPE_ROTATION_VECTOR
相对湿度传感器(Relative humidity sensor,Android 4.0引入)
近场通信(NFC)传感器(Android 2.3引入),NFC和其他不一样,具有读写功能。
3. SensorEventListener 监听器
使用SensorEventListener可以监听传感器的各种事件,主要使用onSensorChanged()事件来获取传感器的信息。
onSensorChanged()事件的参数为SensorEvent对象,SensorEvent包含以下信息:
· 传感器类型: Sensor sensor
· 传感器数值精度:int accuracy
· 传感器具体值:float[ ] values
通过访问SensorEvent中的信息来获取具体数值。
4. 使用传感器的步骤
· 1. 定义SensorManager,并获取SensorManager实例;
· 2. 定义Sensor,并指定传感器;
· 3. 为定义的传感器注册事件监听事件:sensorManager.registerListener(三个参数),三个参数分别为:SensorEventListener、Sensor、更新速率;
· 4. 创建SensorEventListener监听器,获取传感器的值;
· 5. 退出应用时,应注销传感器事件的监听:sensorManager.unregisterListener(Sensor sensor)。
☆☆☆Android Studio实现在加速度传感器的使用
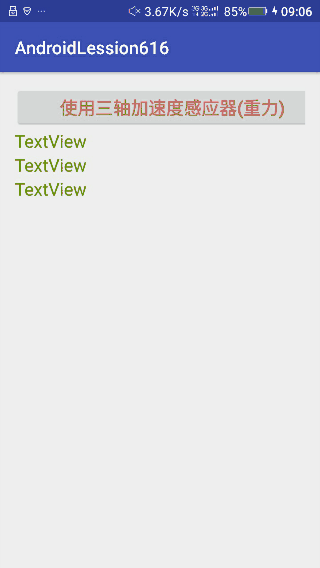
1.打开Android Studio,新建工程后,在activity_main.xml中界添加一个按钮和三个TextView。
| <RelativeLayout xmlns:android="http://schemas.android.com/apk/res/android" | |
| xmlns:tools="http://schemas.android.com/tools" | |
| android:id="@+id/activity_main" | |
| android:layout_width="match_parent" | |
| android:layout_height="match_parent" | |
| android:paddingBottom="@dimen/activity_vertical_margin" | |
| android:paddingLeft="@dimen/activity_horizontal_margin" | |
| android:paddingRight="@dimen/activity_horizontal_margin" | |
| android:paddingTop="@dimen/activity_vertical_margin" | |
| tools:context="lession.example.com.androidlession616.MainActivity"> | |
| <LinearLayout | |
| android:orientation="vertical" | |
| android:layout_width="match_parent" | |
| android:layout_height="match_parent"> | |
| <Button | |
| android:text="使用三轴加速度感应器(重力)" | |
| android:layout_width="356dp" | |
| android:layout_height="wrap_content" | |
| android:id="@+id/button" | |
| android:textColor="@android:color/holo_red_dark" | |
| android:textSize="20sp" /> | |
| <TextView | |
| android:text="TextView" | |
| android:layout_width="match_parent" | |
| android:layout_height="wrap_content" | |
| android:layout_below="@+id/button" | |
| android:id="@+id/textView" | |
| android:textColor="@android:color/holo_green_dark" | |
| android:textSize="20sp" /> | |
| <TextView | |
| android:text="TextView" | |
| android:layout_width="match_parent" | |
| android:layout_height="wrap_content" | |
| android:id="@+id/textView2" | |
| android:textColor="@android:color/holo_green_dark" | |
| android:textSize="20sp" /> | |
| <TextView | |
| android:text="TextView" | |
| android:layout_width="match_parent" | |
| android:layout_height="wrap_content" | |
| android:id="@+id/textView3" | |
| android:textColor="@android:color/holo_green_dark" | |
| android:textSize="20sp" /> | |
| </LinearLayout> | |
| </RelativeLayout> |
2.在MainActivity中,编写代码。
| package lession.example.com.androidlession616; | |
| import android.hardware.Sensor; | |
| import android.hardware.SensorEvent; | |
| import android.hardware.SensorEventListener; | |
| import android.hardware.SensorManager; | |
| import android.os.Bundle; | |
| import android.support.v7.app.AppCompatActivity; | |
| import android.view.View; | |
| import android.widget.Button; | |
| import android.widget.TextView; | |
| public class MainActivity extends AppCompatActivity { | |
| private TextView tv1,tv2,tv3; | |
| private float x, y, z; | |
| protected void onCreate(Bundle savedInstanceState) { | |
| super.onCreate(savedInstanceState); | |
| setContentView(R.layout.activity_main); | |
| Button bt = (Button) findViewById(R.id.button); | |
| tv1 = (TextView) findViewById(R.id.textView); | |
| tv2 = (TextView) findViewById(R.id.textView2); | |
| tv3 = (TextView) findViewById(R.id.textView3); | |
| bt.setOnClickListener(new View.OnClickListener() { | |
| public void onClick(View v) { | |
| //通过服务得到传感器管理对象 | |
| SensorManager sensorMgr = (SensorManager) | |
| getSystemService(SENSOR_SERVICE); | |
| //得到重力传感器实例 | |
| //TYPE_ACCELEROMETER 加速度传感器(重力传感器)类型。 | |
| //TYPE_ALL 描述所有类型的传感器。 | |
| //TYPE_GYROSCOPE 陀螺仪传感器类型 | |
| //TYPE_LIGHT 光传感器类型 | |
| //TYPE_MAGNETIC_FIELD 恒定磁场传感器类型。 | |
| //TYPE_ORIENTATION 方向传感器类型。 | |
| //TYPE_PRESSURE 描述一个恒定的压力传感器类型 | |
| //TYPE_PROXIMITY 常量描述型接近传感器 | |
| //TYPE_TEMPERATURE 温度传感器类型描述 | |
| final Sensor sensor = sensorMgr.getDefaultSensor(Sensor.TYPE_ACCELEROMETER); | |
| SensorEventListener lsn = new SensorEventListener() { | |
| //表示不检测过期的方法 | |
| //传感器获取值改变时响应此函数 | |
| public void onSensorChanged(SensorEvent e) { | |
| x = e.values[0]; | |
| y = e.values[1]; | |
| z = e.values[2]; | |
| // x = e.values[SensorManager.DATA_X]; | |
| // y = e.values[SensorManager.DATA_Y]; | |
| // z = e.values[SensorManager.DATA_Z]; | |
| tv1.setText("x=" + x );//手机水平放置,左右x值 | |
| tv2.setText("y=" + y );//手机水平放置,前后y值 | |
| tv3.setText("z=" + z );//手机竖直放置,上下z值 | |
| } | |
| public void onAccuracyChanged(Sensor s, int accuracy) { | |
| } | |
| }; | |
| //注册listener,第三个参数是检测的精确度 | |
| sensorMgr.registerListener(lsn, sensor, SensorManager.SENSOR_DELAY_GAME); | |
| } | |
| }); | |
| } | |
| } |
运行结果:
☆☆☆Android Studio实现在光线传感器的使用
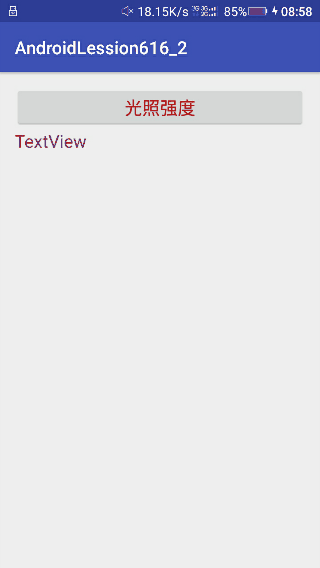
1.打开Android Studio,新建工程后,在activity_main.xml中界添加一个按钮和一个TextView。
| <RelativeLayout xmlns:android="http://schemas.android.com/apk/res/android" | |
| xmlns:tools="http://schemas.android.com/tools" | |
| android:id="@+id/activity_main" | |
| android:layout_width="match_parent" | |
| android:layout_height="match_parent" | |
| android:paddingBottom="@dimen/activity_vertical_margin" | |
| android:paddingLeft="@dimen/activity_horizontal_margin" | |
| android:paddingRight="@dimen/activity_horizontal_margin" | |
| android:paddingTop="@dimen/activity_vertical_margin" | |
| tools:context="lession.example.com.androidlession616_2.MainActivity"> | |
| <LinearLayout | |
| android:orientation="vertical" | |
| android:layout_width="match_parent" | |
| android:layout_height="match_parent"> | |
| <Button | |
| android:text="光照强度" | |
| android:layout_width="match_parent" | |
| android:layout_height="wrap_content" | |
| android:id="@+id/button" | |
| android:textColor="@android:color/holo_red_dark" | |
| android:textSize="20sp" /> | |
| <TextView | |
| android:text="TextView" | |
| android:layout_width="match_parent" | |
| android:layout_height="wrap_content" | |
| android:id="@+id/textView" | |
| android:textColor="@android:color/holo_green_dark" | |
| android:textSize="20sp" /> | |
| </LinearLayout> | |
| </RelativeLayout> |
2.在MainActivity中,编写代码。
| package lession.example.com.androidlession616_2; | |
| import android.content.Context; | |
| import android.hardware.Sensor; | |
| import android.hardware.SensorEvent; | |
| import android.hardware.SensorEventListener; | |
| import android.hardware.SensorManager; | |
| import android.support.v7.app.AppCompatActivity; | |
| import android.os.Bundle; | |
| import android.view.View; | |
| import android.widget.Button; | |
| import android.widget.TextView; | |
| public class MainActivity extends AppCompatActivity { | |
| protected void onCreate(Bundle savedInstanceState) { | |
| super.onCreate(savedInstanceState); | |
| setContentView(R.layout.activity_main); | |
| final TextView tv = (TextView) findViewById(R.id.textView); | |
| Button bt = (Button) findViewById(R.id.button); | |
| bt.setOnClickListener(new View.OnClickListener() { | |
| public void onClick(View v) { | |
| SensorManager mSManager = (SensorManager) | |
| getSystemService(Context.SENSOR_SERVICE); | |
| Sensor mSen = mSManager.getDefaultSensor(Sensor.TYPE_LIGHT); | |
| SensorEventListener mSEListener = new SensorEventListener() { | |
| public void onSensorChanged(SensorEvent event) { | |
| tv.setText("光照强度为:\n"+event.values[0]+"勒克斯"); | |
| } | |
| public void onAccuracyChanged(Sensor sensor, int accuracy) { | |
| } | |
| }; | |
| mSManager.registerListener(mSEListener,mSen,SensorManager.SENSOR_DELAY_NORMAL); | |
| } | |
| }); | |
| } | |
| } |
运行结果:
这就是传感器的简单使用。