目录
- 一. 案例: 表白墙 (使用模板引擎)
- 1. 首先创建 maven 项目
- 2. 创建好模板文件
- 3. 使用数据库存储数据.创建一个类用于数据库连接
- 4. 使用 监视器 来初始化 Thymeleaf
- 5. 编写 Servlet 代码
- 6. 注意事项
- 7. 部署之后 运行截图
- 二. 案例: 在线相册 (使用模板引擎)
- 1. 首先创建 maven 项目
- 2. 创建好模板文件
- 3. 这是通过访问文件夹里的图片的
- 4. 使用 监视器 来初始化 Thymeleaf
- 5. 编写加载页面的 Servlet代码
- 6. 编写提交图片的 Servlet 代码
- 7. 注意事项
- 8. 部署之后 运行截图
- 总结
一. 案例: 表白墙 (使用模板引擎)
1. 首先创建 maven 项目
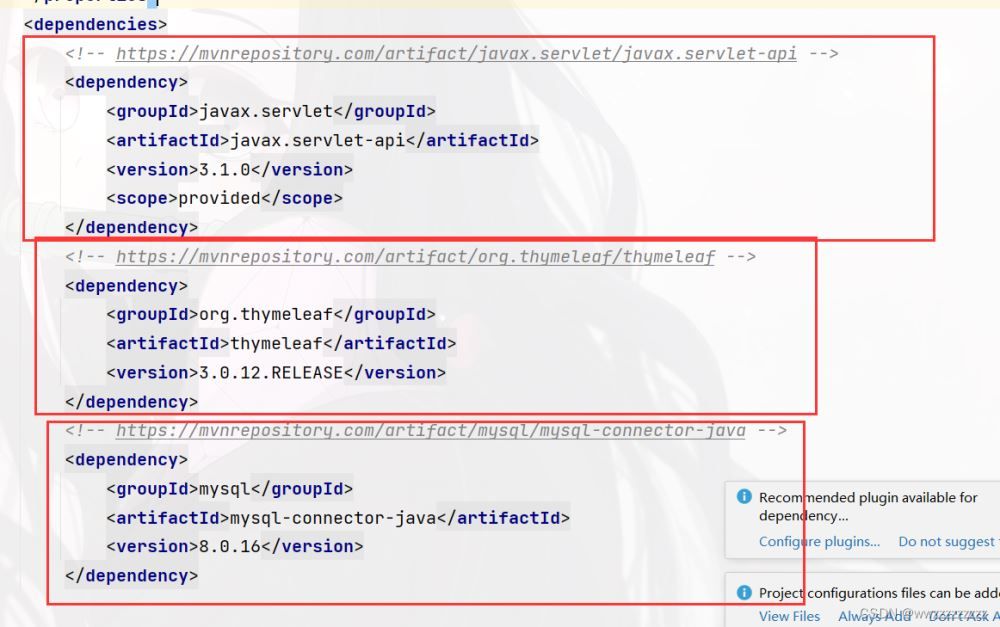
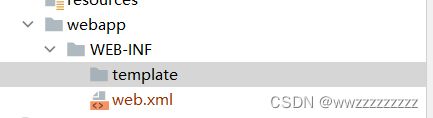
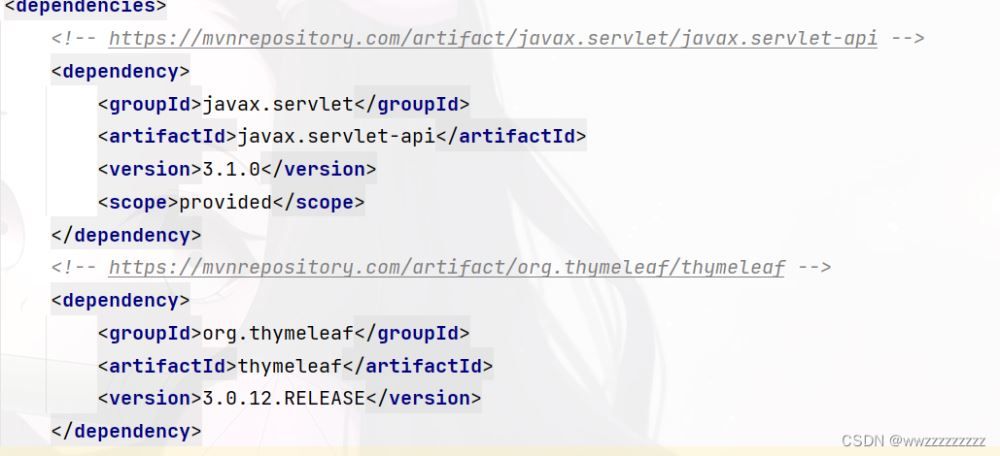
引入需要的依赖,创建必要的目录
2. 创建好模板文件

| <html lang="en"> | |
| <head> | |
| <meta charset="UTF-"> | |
| <meta http-equiv="X-UA-Compatible" content="IE=edge"> | |
| <meta name="viewport" content="width=device-width, initial-scale=.0"> | |
| <title>表白墙</title> | |
| </head> | |
| <body> | |
| <form action="confession" method="post"> | |
| <div class="parent"> | |
| <div id="wall">表白墙</div> | |
| <div id="remind">输入后点击提交,会将信息显示在表格中</div> | |
| <div class="one"><span class="two">谁:</span><input type="text" class="text" name="from"></div> | |
| <div class="one"><span class="two">对谁:</span><input type="text" class="text" name="to"></div> | |
| <div class="one"><span class="two">说什么:</span><input type="text" class="text" name="message"></div> | |
| <div class="one"><input type="submit" value="提 交" class="press"></div> | |
| <div class="elem" th:each="message : ${messages}"> | |
| <span th:text="${message.from}">wz</span>对<span th:text="${message.to}">zw</span>说: <span th:text="${message.message}">wzz</span> | |
| </div> | |
| </div> | |
| </form> | |
| <style> | |
| /* 去除浏览器默认样式 */ | |
| * { | |
| margin:; | |
| padding:; | |
| } | |
| /* 设置总宽度 */ | |
| .parent { | |
| width:px; | |
| margin: auto; | |
| } | |
| /* 设置表白墙样式 */ | |
| #wall { | |
| font-size:px; | |
| font-weight:; | |
| text-align: center; | |
| margin:px; | |
| } | |
| /* 设置提示信息样式 */ | |
| #remind{ | |
| font-size:px; | |
| text-align: center; | |
| color:gray; | |
| margin:px; | |
| } | |
| /* 设置弹性布局 */ | |
| .one { | |
| display: flex; | |
| justify-content: center; | |
| align-items: center; | |
| height:px; | |
| } | |
| /* 设置文字内容 */ | |
| .two { | |
| width:px; | |
| line-height:px; | |
| } | |
| /* 设置输入框 */ | |
| .one .text{ | |
| width:px; | |
| height:px; | |
| padding-left:px; | |
| } | |
| /* 提交按钮的设置 */ | |
| .one .press{ | |
| width:px; | |
| height:px; | |
| color:white; | |
| background-color: orange; | |
| border-radius:px; | |
| border: none; | |
| } | |
| /* 设置鼠标点击的时候改变颜色 */ | |
| .one .press:active{ | |
| background-color: red; | |
| } | |
| /* 提交之后内容的设置 */ | |
| .elem { | |
| text-align: center; | |
| margin:px; | |
| } | |
| </style> | |
| </body> | |
| </html> |
3. 使用数据库存储数据.创建一个类用于数据库连接
ConnectionDB 类
| import com.mysql.cj.jdbc.MysqlDataSource; | |
| import javax.sql.DataSource; | |
| import java.sql.Connection; | |
| import java.sql.PreparedStatement; | |
| import java.sql.ResultSet; | |
| import java.sql.SQLException; | |
| public class ConnectionDB { | |
| private static final String URL = "jdbc:mysql://.0.0.1:3306/confessionWall2?characterEncoding=utf-8&useSSL=true&serverTimezone=UTC"; | |
| private static final String USERNAME = "root"; | |
| private static final String PASSWORD = ""; | |
| private static volatile DataSource dataSource = null; | |
| public static DataSource getDataSource() { | |
| if(dataSource == null){ | |
| synchronized (ConnectionDB.class){ | |
| if(dataSource == null) { | |
| dataSource = new MysqlDataSource(); | |
| ((MysqlDataSource) dataSource).setURL(URL); | |
| ((MysqlDataSource) dataSource).setUser(USERNAME); | |
| ((MysqlDataSource) dataSource).setPassword(PASSWORD); | |
| } | |
| } | |
| } | |
| return dataSource; | |
| } | |
| public static Connection getConnection() throws SQLException { | |
| return getDataSource().getConnection(); | |
| } | |
| public static void close(Connection connection, PreparedStatement statement, ResultSet resultSet){ | |
| if(resultSet != null){ | |
| try { | |
| resultSet.close(); | |
| } catch (SQLException e) { | |
| e.printStackTrace(); | |
| } | |
| } | |
| if(statement != null){ | |
| try { | |
| statement.close(); | |
| } catch (SQLException e) { | |
| e.printStackTrace(); | |
| } | |
| } | |
| if(connection != null){ | |
| try { | |
| connection.close(); | |
| } catch (SQLException e) { | |
| e.printStackTrace(); | |
| } | |
| } | |
| } | |
| } |
4. 使用 监视器 来初始化 Thymeleaf
ThymeleafConfig 类
注意加上注解
| import org.thymeleaf.TemplateEngine; | |
| import org.thymeleaf.templateresolver.ServletContextTemplateResolver; | |
| import javax.servlet.ServletContext; | |
| import javax.servlet.ServletContextEvent; | |
| import javax.servlet.ServletContextListener; | |
| import javax.servlet.annotation.WebListener; | |
| public class ThymeleafConfig implements ServletContextListener { | |
| public void contextInitialized(ServletContextEvent servletContextEvent) { | |
| System.out.println("ServletContext 初始化完毕!"); | |
| ServletContext context = servletContextEvent.getServletContext(); | |
| TemplateEngine engine = new TemplateEngine(); | |
| ServletContextTemplateResolver resolver = new ServletContextTemplateResolver(context); | |
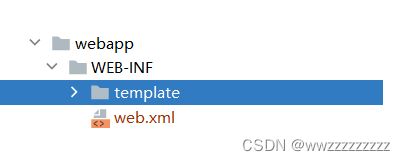
| resolver.setPrefix("/WEB-INF/template/"); | |
| resolver.setSuffix(".html"); | |
| resolver.setCharacterEncoding("utf-"); | |
| engine.setTemplateResolver(resolver); | |
| context.setAttribute("engine",engine); | |
| } | |
| public void contextDestroyed(ServletContextEvent servletContextEvent) { | |
| } | |
| } |
5. 编写 Servlet 代码
首先创建一个 Confession 类
| class Confession{ | |
| public String from; | |
| public String to; | |
| public String message; | |
| } |
① 重写 doGet 方法
| protected void doGet(HttpServletRequest req, HttpServletResponse resp) throws ServletException, IOException { | |
| resp.setContentType("text/html;charset=utf-"); | |
| List<Confession> list = load(); | |
| TemplateEngine engine = (TemplateEngine) getServletContext().getAttribute("engine"); | |
| WebContext webContext = new WebContext(req,resp,getServletContext()); | |
| webContext.setVariable("messages",list); | |
| engine.process("confessionwall",webContext, resp.getWriter()); | |
| } |
② 重写 doPost 方法
| resp.setContentType("text/html;charset=utf-"); | |
| Confession confession = new Confession(); | |
| confession.from = req.getParameter("from"); | |
| confession.to = req.getParameter("to"); | |
| confession.message = req.getParameter("message"); | |
| save(confession); | |
| resp.sendRedirect("confession"); |
③ 实现 load 方法
| private List<Confession> load() { | |
| List<Confession> list = new ArrayList<>(); | |
| Connection connection = null; | |
| PreparedStatement statement = null; | |
| ResultSet resultSet = null; | |
| try { | |
| connection = ConnectionDB.getConnection(); | |
| String sql = "select * from confession"; | |
| statement = connection.prepareStatement(sql); | |
| resultSet = statement.executeQuery(); | |
| while(resultSet.next()){ | |
| Confession confession = new Confession(); | |
| confession.from =resultSet.getString("from"); | |
| confession.to = resultSet.getString("to"); | |
| confession.message = resultSet.getString("message"); | |
| list.add(confession); | |
| } | |
| } catch (SQLException throwables) { | |
| throwables.printStackTrace(); | |
| } finally { | |
| ConnectionDB.close(connection,statement,resultSet); | |
| } | |
| return list; | |
| } |
④ 实现 save 方法
| private void save(Confession confession) { | |
| Connection connection = null; | |
| PreparedStatement statement = null; | |
| try{ | |
| connection = ConnectionDB.getConnection(); | |
| String sql = "insert into confession values (?,?,?)"; | |
| statement = connection.prepareStatement(sql); | |
| statement.setString(,confession.from); | |
| statement.setString(, confession.to); | |
| statement.setString(,confession.message); | |
| int ret = statement.executeUpdate(); | |
| if(ret ==){ | |
| System.out.println("插入成功"); | |
| }else{ | |
| System.out.println("插入失败"); | |
| } | |
| } catch (SQLException throwables) { | |
| throwables.printStackTrace(); | |
| } finally { | |
| ConnectionDB.close(connection,statement,null); | |
| } | |
| } |
6. 注意事项
注意模板引擎

注意 乱码的情况,要添加utf-8


用数据库的方法存数据,要先创建好数据库
| create database confessionWall; | |
| use confessionWall; | |
| create table confession( | |
| `from` varchar(), | |
| `to` varchar(), | |
| `message` varchar() | |
| ); |
还有一些必要的注解也要加上.


7. 部署之后 运行截图
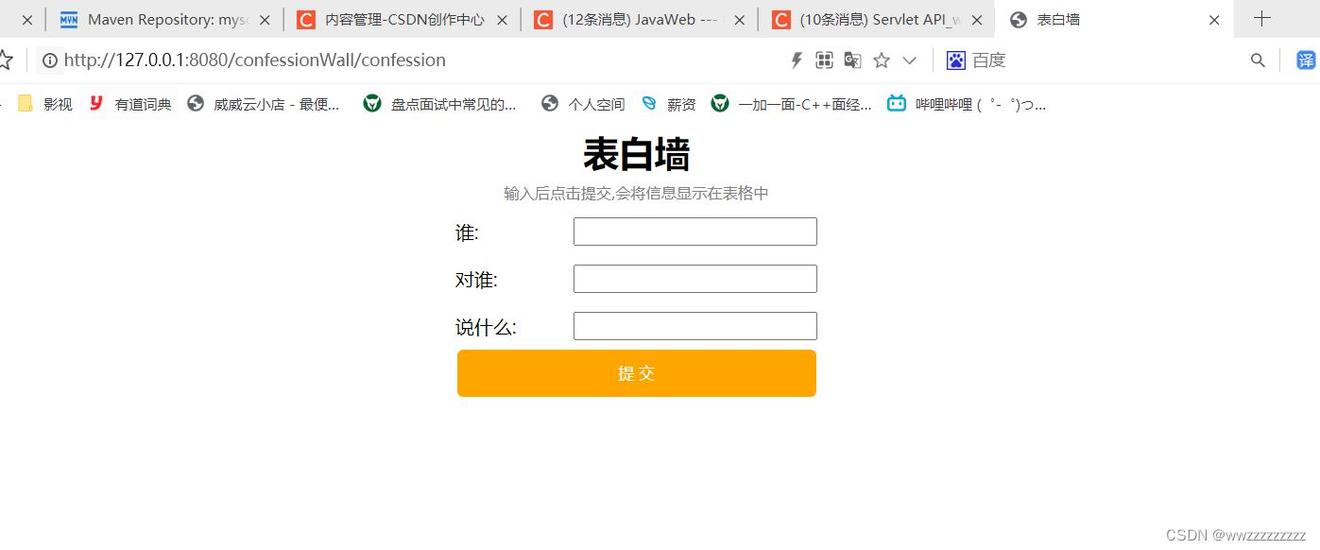
浏览器输入对应的URL
在数据库为空的时候界面如下

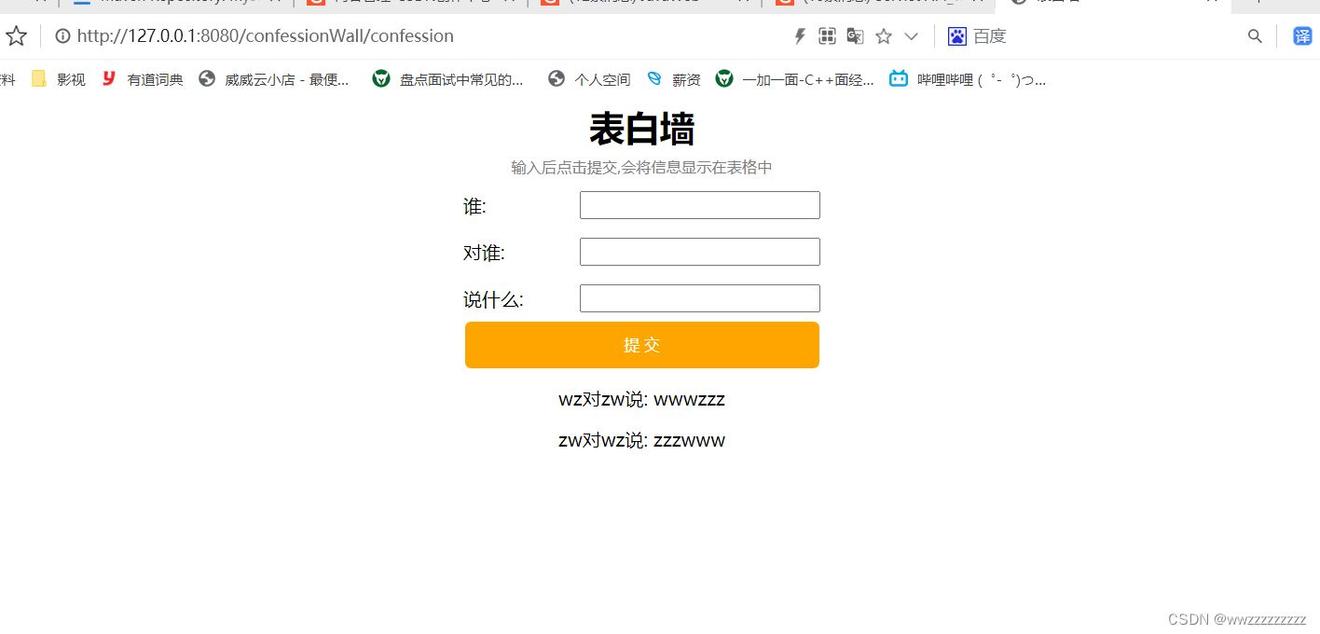
在输入几个数据之后 如下
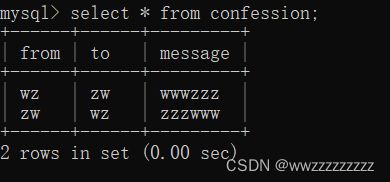
此时的数据库中表的内容
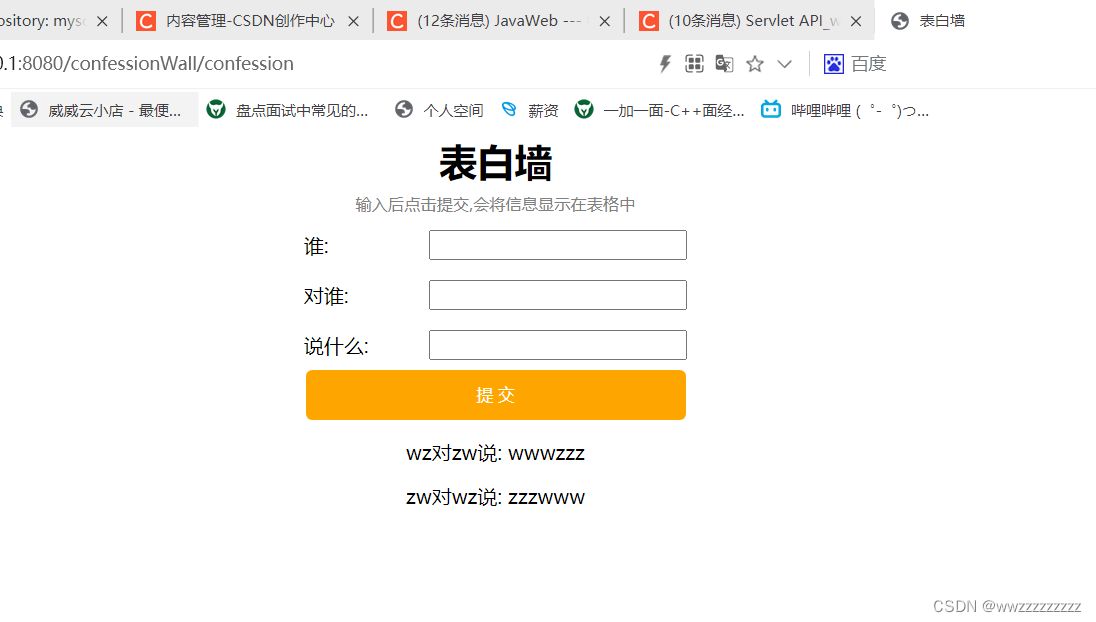
重新部署再进入URL发现数据还是存在.
二. 案例: 在线相册 (使用模板引擎)
1. 首先创建 maven 项目
引入必要的依赖,已经必要的目录
2. 创建好模板文件
image.html
| <html lang="en"> | |
| <head> | |
| <meta charset="UTF-"> | |
| <title>相册</title> | |
| <link rel="stylesheet" href="./style.css"> | |
| </head> | |
| <body> | |
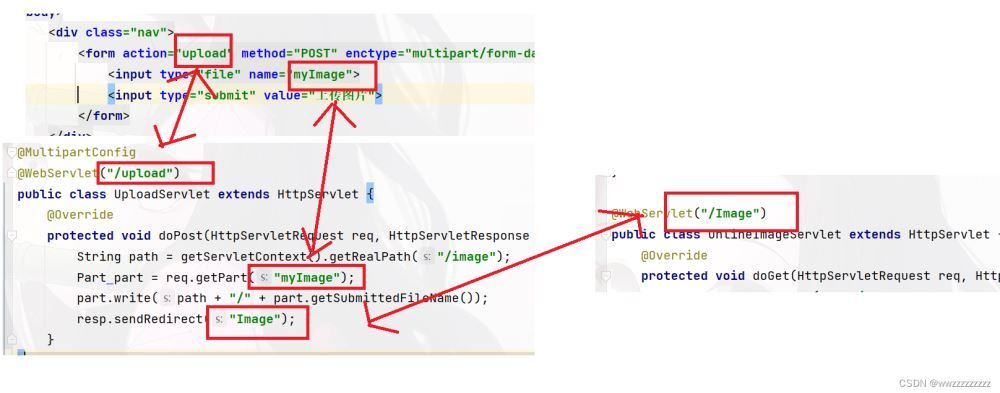
| <div class="nav"> | |
| <form action="upload" method="POST" enctype="multipart/form-data" > | |
| <input type="file" name="myImage"> | |
| <input type="submit" value="上传图片"> | |
| </form> | |
| </div> | |
| <div class="parent"> | |
| <!-- 第一组图片 --> | |
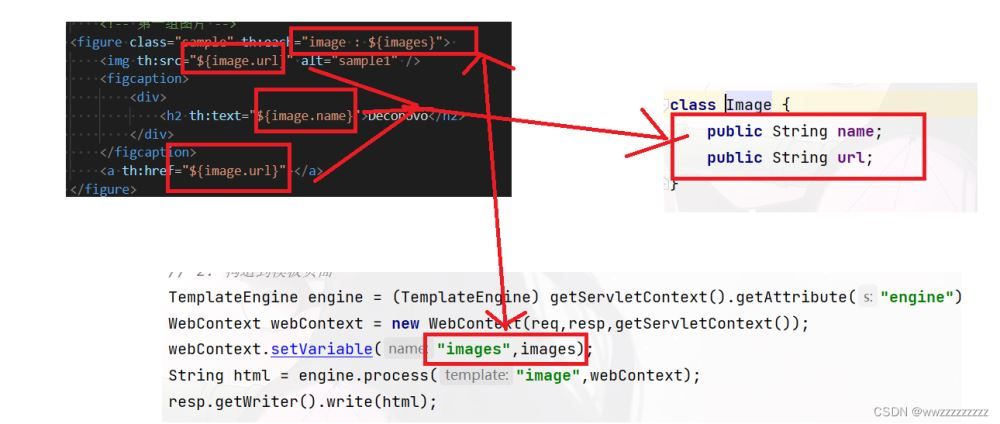
| <figure class="sample" th:each="image : ${images}"> | |
| <img th:src="${image.url}" alt="sample" /> | |
| <figcaption> | |
| <div> | |
| <h th:text="${image.name}">Deconovo</h2> | |
| </div> | |
| </figcaption> | |
| <a th:href="${image.url}"></a> | |
| </figure> | |
| </div> | |
| </body> | |
| </html> |
style.css
| /* 引入文字样式库 */ | |
| @import url(https://fonts.googleapis.com/css?family=Raleway:,700); | |
| *{ | |
| margin: auto; | |
| padding: auto; | |
| box-sizing: border-box; | |
| } | |
| html,body{ | |
| width:%; | |
| height: calc(% - 50px); | |
| background-color: #; | |
| } | |
| .parent{ | |
| display: flex; | |
| justify-content: center; | |
| align-items: center; | |
| flex-flow: wrap; | |
| margin:; | |
| height:%; | |
| } | |
| .nav{ | |
| background-color: rgba(,255,255,0.3); | |
| height:px; | |
| width:%; | |
| display: flex; | |
| justify-content: left; | |
| align-items: center; | |
| } | |
| /* sample 部分的整体样式 */ | |
| .sample { | |
| font-family: 'Raleway', Arial, sans-serif; | |
| position: relative; | |
| overflow: hidden; | |
| margin:px; | |
| min-width:px; | |
| max-width:px; | |
| width:%; | |
| color: #ffffff; | |
| text-align: center; | |
| font-size:px; | |
| background-color: #; | |
| } | |
| .sample *, | |
| .sample *:before, | |
| .sample *:after { | |
| -webkit-box-sizing: border-box; | |
| box-sizing: border-box; | |
| /* 当过了.55s 过渡效果 */ | |
| -webkit-transition: all.55s ease; | |
| transition: all.55s ease; | |
| } | |
| /* 图片部分的样式 */ | |
| .sample img { | |
| max-width:%; | |
| backface-visibility: hidden; | |
| vertical-align: top; | |
| } | |
| /* figcaption 用作文档中插图的图像,带有一个标题 */ | |
| .sample figcaption { | |
| position: absolute; | |
| bottom:px; | |
| right:px; | |
| padding:px 10px 10px; | |
| } | |
| /* 绘制线条 */ | |
| .sample figcaption:before, | |
| .sample figcaption:after { | |
| height:px; | |
| width:px; | |
| position: absolute; | |
| content: ''; | |
| background-color: #ffffff; | |
| } | |
| /* 上面一条线 */ | |
| .sample figcaption:before { | |
| top:; | |
| left:; | |
| -webkit-transform: translateX(%); | |
| transform: translateX(%); | |
| } | |
| /* 下面一条线 */ | |
| .sample figcaption:after { | |
| bottom:; | |
| right:; | |
| -webkit-transform: translateX(-%); | |
| transform: translateX(-%); | |
| } | |
| /* 绘制线条 */ | |
| .sample figcaption div:before, | |
| .sample figcaption div:after { | |
| width:px; | |
| height:px; | |
| position: absolute; | |
| content: ''; | |
| background-color: #ffffff; | |
| } | |
| /* 左面一条线 */ | |
| .sample figcaption div:before { | |
| top:; | |
| left:; | |
| -webkit-transform: translateY(%); | |
| transform: translateY(%); | |
| } | |
| /* 右面一条线 */ | |
| .sample figcaption div:after { | |
| bottom:; | |
| right:; | |
| -webkit-transform: translateY(-%); | |
| transform: translateY(-%); | |
| } | |
| /* 文字部分 */ | |
| .sample h, | |
| .sample h { | |
| margin:; | |
| text-transform: uppercase; | |
| } | |
| .sample h { | |
| font-weight:; | |
| } | |
| .sample h { | |
| display: block; | |
| font-weight:; | |
| background-color: #ffffff; | |
| padding:px 10px; | |
| color: #; | |
| } | |
| .sample a { | |
| position: absolute; | |
| top:; | |
| bottom:; | |
| left:; | |
| right:; | |
| } | |
| /* 当鼠标放到图片时的效果, .hover 仅演示需要,可自行取消 */ | |
| .sample:hover img, | |
| .sample.hover img { | |
| zoom:; | |
| filter: alpha(opacity=); | |
| -webkit-opacity:.5; | |
| opacity:.5; | |
| } | |
| .sample:hover figcaption:before, | |
| .sample.hover figcaption:before, | |
| .sample:hover figcaption:after, | |
| .sample.hover figcaption:after, | |
| .sample:hover figcaption div:before, | |
| .sample.hover figcaption div:before, | |
| .sample:hover figcaption div:after, | |
| .sample.hover figcaption div:after { | |
| -webkit-transform: translate(, 0); | |
| transform: translate(, 0); | |
| } | |
| .sample:hover figcaption:before, | |
| .sample.hover figcaption:before, | |
| .sample:hover figcaption:after, | |
| .sample.hover figcaption:after { | |
| /* 过渡延时.15s */ | |
| -webkit-transition-delay:.15s; | |
| transition-delay:.15s; | |
| } | |
| /* 背景仅演示作用 */ |
3. 这是通过访问文件夹里的图片的
在webapp下创建一个文件夹 image,里面存放图片.
通过 getServletContext().getRealPath("/image") 来获取绝对路径

4. 使用 监视器 来初始化 Thymeleaf
这里的代码不变
| import org.thymeleaf.TemplateEngine; | |
| import org.thymeleaf.templateresolver.ServletContextTemplateResolver; | |
| import javax.servlet.ServletContext; | |
| import javax.servlet.ServletContextEvent; | |
| import javax.servlet.ServletContextListener; | |
| import javax.servlet.annotation.WebListener; | |
| public class ThymeleafConfig implements ServletContextListener { | |
| public void contextInitialized(ServletContextEvent servletContextEvent) { | |
| System.out.println("ServletContext 初始化完毕"); | |
| ServletContext context = servletContextEvent.getServletContext(); | |
| TemplateEngine engine = new TemplateEngine(); | |
| ServletContextTemplateResolver resolver = new ServletContextTemplateResolver(context); | |
| resolver.setPrefix("/WEB-INF/template/"); | |
| resolver.setSuffix(".html"); | |
| resolver.setCharacterEncoding("utf-"); | |
| engine.setTemplateResolver(resolver); | |
| context.setAttribute("engine",engine); | |
| } | |
| public void contextDestroyed(ServletContextEvent servletContextEvent) { | |
| } | |
| } |
5. 编写加载页面的 Servlet代码
创建一个 Image 类
| class Image { | |
| public String name; | |
| public String url; | |
| } |
创建一个类,重写 doGet 方法
| public class OnlineImageServlet extends HttpServlet { | |
| protected void doGet(HttpServletRequest req, HttpServletResponse resp) throws ServletException, IOException { | |
| resp.setContentType("text/html;charset=utf-"); | |
| //. 扫描指定路径 /webapp/image 路径 | |
| List<Image> images = loadImage(); | |
| //. 构造到模板页面 | |
| TemplateEngine engine = (TemplateEngine) getServletContext().getAttribute("engine"); | |
| WebContext webContext = new WebContext(req,resp,getServletContext()); | |
| webContext.setVariable("images",images); | |
| String html = engine.process("image",webContext); | |
| resp.getWriter().write(html); | |
| } | |
| } |
实现 loadImage 方法
注意使用 getRealPath 方法
以及注意使用 file.listFiles()方法
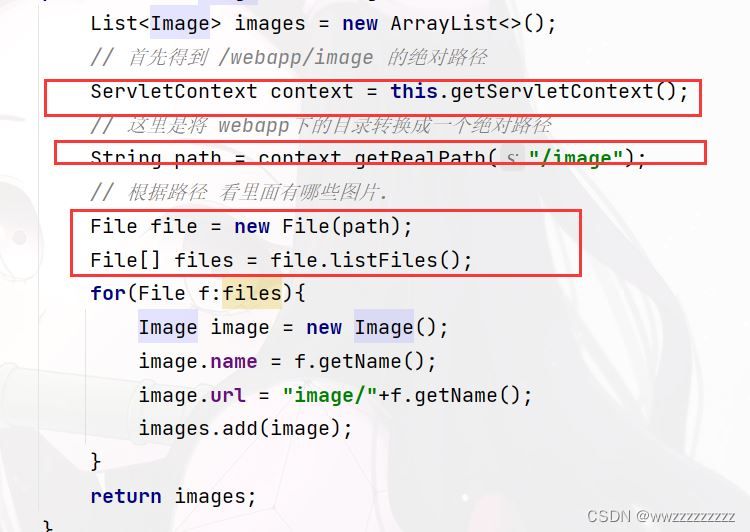
| private List<Image> loadImage() { | |
| List<Image> images = new ArrayList<>(); | |
| // 首先得到 /webapp/image 的绝对路径 | |
| ServletContext context = this.getServletContext(); | |
| // 这里是将 webapp下的目录转换成一个绝对路径 | |
| String path = context.getRealPath("/image"); | |
| // 根据路径 看里面有哪些图片. | |
| File file = new File(path); | |
| File[] files = file.listFiles(); | |
| for(File f:files){ | |
| Image image = new Image(); | |
| image.name = f.getName(); | |
| image.url = "image/"+f.getName(); | |
| images.add(image); | |
| } | |
| return images; | |
| } |
6. 编写提交图片的 Servlet 代码
① 创建一个类,重写 doPost 方法
注意一定要加上注解@MultipartConfig
| import javax.servlet.ServletException; | |
| import javax.servlet.annotation.MultipartConfig; | |
| import javax.servlet.annotation.WebServlet; | |
| import javax.servlet.http.HttpServlet; | |
| import javax.servlet.http.HttpServletRequest; | |
| import javax.servlet.http.HttpServletResponse; | |
| import javax.servlet.http.Part; | |
| import java.io.IOException; | |
| // 这个注解在上传文件的功能中是必要的 | |
| public class UploadServlet extends HttpServlet { | |
| protected void doPost(HttpServletRequest req, HttpServletResponse resp) throws ServletException, IOException { | |
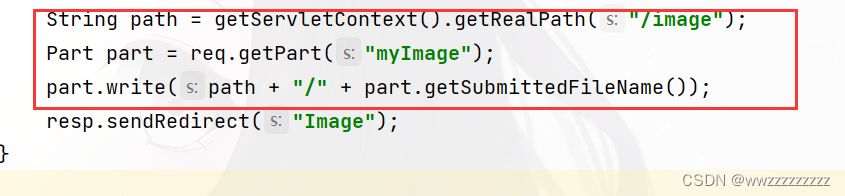
| String path = getServletContext().getRealPath("/image"); | |
| Part part = req.getPart("myImage"); | |
| part.write(path + "/" + part.getSubmittedFileName()); | |
| resp.sendRedirect("Image"); | |
| } | |
| } |
7. 注意事项
主要是得到文件夹,找到路径的步骤复杂点.重点掌握这几种方法的使用
前后端约定好的名称要对应.
传文件需要加上注解,否则会报500的错误.@MultipartConfig
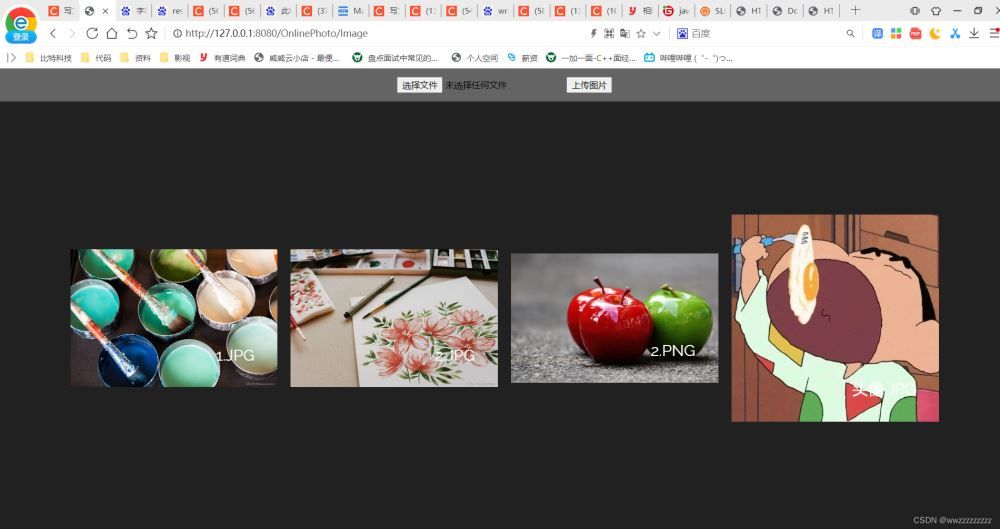
8. 部署之后 运行截图
文件中已经存了两个图片,一运行就可以看到这些图片
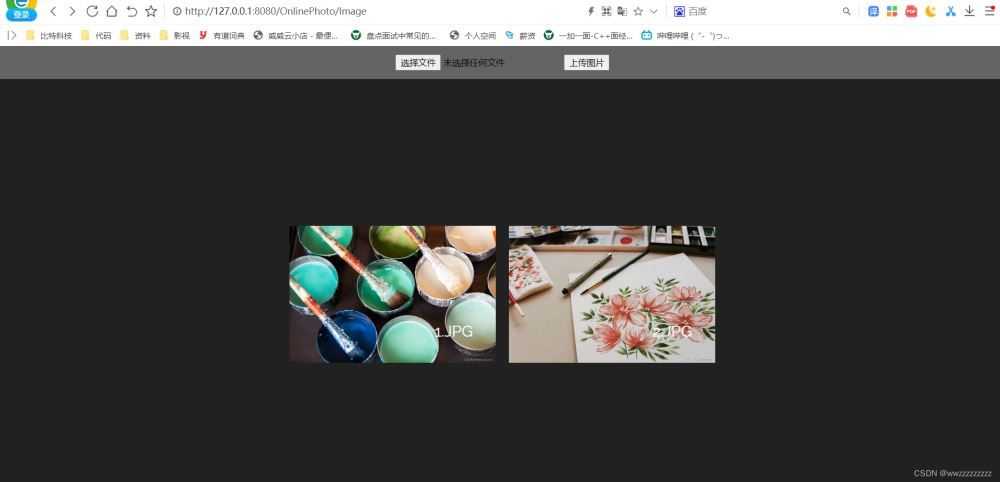
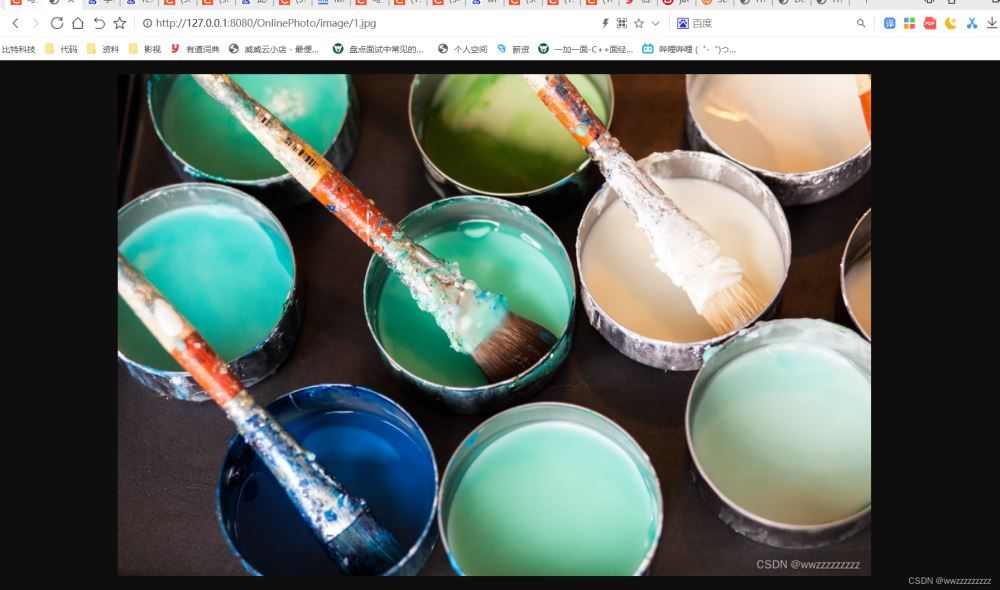
点击图片还能放大
上传图片,上传两个图片